If you like Nutella, but find that it is too sweet and simultaneously neither quite hazelnutty nor chocolatey enough, then you know exactly how I feel. In my quest for a perfectly rich and nutty butter, I have tried various different brands, including Patchi and Neuhaus. None of them really hit the spot, unfortunately. The problem was their texture, their weak chocolate flavour, and the fact that I could taste only a hint of hazelnut flavour in them.
Then, it occurred to me, a few years ago: why not make my own butter? I’ve tried various versions of my own butter since then, but this recipe is now my favourite! This butter’s texture is rich and velvety and the flavour is a perfect balance of dark chocolate and the unmatched, gloriously nutty flavour of real, toasted hazelnuts. A quick note: the more you like the dark chocolate you use in this recipe, the better the butter will taste.
Here it is, poured over a slice of bread, looking so delightfully smooth and glossy!
If you want to try making some yourself, this is the equipment you will need:
A food processor or powerful blender (I use a Blendtec)
An oven
A baking tray
A tea towel
A spatula
A jar
And here are the ingredients you will need:
450g Hazelnuts
35-45 g sugar (based on your taste) (I use castor sugar but if your processor/blender is not too powerful, I recommend using icing sugar) (you could also use maple or agave syrup, to taste)
172 g good quality dark chocolate, to taste (my favourite is Cotê d’or)
A pinch or two of salt.
2 tsp vanilla essence or hazelnut flavouring (optional)(I use this one).
1-2 tsp of hazelnut oil (optional)
Method:
1. Toast the hazelnuts at 350 F in a baking tray for about 15 minutes, until they turn light brown and fragrant, tossing them periodically.
2. After they’ve cooled, place them at the centre of a tea towel/kitchen towel. Wrap the nuts securely in the towel and then roll the wrapped up nuts on any hardish surface. This will help remove their skins. After you’ve rolled the nuts about for a bit, open up the towel, and pick out the skinned nuts. Repeat this step if there are still a lot of nuts with skins on them.
3. Toss the skinned nuts into a food processor or blender and grind them up until they turn into a smooth butter.
4. Melt the dark chocolate in a the microwave or over a bain-marie. If you have a powerful blender you can skip this step.
5. Throw in the melted chocolate, sugar, a pinch or two of salt (to taste), a teaspoon or two of vanilla essence or hazelnut flavouring, and a teaspoon or two of hazelnut oil.
6. Blend everything until it feels smooth enough to you, and there you have it! Your own homemade chocolate hazelnut butter!
My favourite way to eat it is on bread with some homemade peanut butter! Mmmmmm!
When I first ate ceviche in a restaurant in San Francisco, I wasn’t particularly impressed. It tasted ok, but there was nothing about it that really spoke to me or got me excited. Then, we visited a friend of mine in Panama and everything changed! I had ceviche made fresh and on the spot by a street vendor, and I was actually amazed. It was beautiful in its simplicity.
I’ve tried ceviche in different cities since then, doing some research on where it’s supposed to be the best. I am now a committed ceviche lover; it’s my favourite raw fish dish!
Until recently, I’d never tried to make it, but my visit to Miami this spring inspired me! I came back to Toronto and found myself craving really good ceviche. The ceviche at Seven Lives (my favourite cafe in Toronto’s Kensington Market) is pretty good, but given how far away the cafe is from where I live, and given how frequent my cravings for ceviche were, combined with a sudden urge to try making something new, I decided to give throwing together my own ceviche a shot.
I read several articles and blogs, over an afternoon and then biked over to my neighbourhood fish shop, Beach Fish House (which is absolutely wonderful, by the way; they sell sustainably fished seafood and it’s always really fresh! (I also grabbed some lovely Peonies)).
Here is the result of all my reading:
You should try making it too! Here is a dish one can make quickly and easily, and it’s almost guaranteed to taste good as long as you use good quality ingredients! Of course, the selection of ingredients and the proportion of the ingredients is important too. Overall though, it’s a relatively simple dish to put together.
So go for it!
What follows is a recipe for a pretty basic ceviche. Once you are comfortable with the dish, you can play around with it by adding or substituting other fish and/or by adding various fruit and other flavours to it (like mango, or watermelon, or orange juice!).
Two small notes though:
Size and Shape of the Fish: The shape and size of the fish pieces you use in the ceviche, along with the amount of time you leave the fish in the lime juice, will determine the texture of the fish. This is because it is the acidity of the lime/lemon juice that “cooks”, breaks down, or softens the flesh of the fish. I like to cut the fish into cubes to ensure more even cooking (as the lime juice “cooks” the fish from the outside. You can cut the fish into whatever sized cube you like, however, the smaller the cube the faster the fish will “cook” in the lime juice. I find it’s easier to control the process so that I can stop the “cooking” process at the right time, if the cubes are a little larger.
Time: As for the time, for tuna, I like to leave the fish in the lime juice for any where between 12-15 minutes. The acidity of the lime or lemon juice one uses can vary. So around 12 minutes in, I will try out a piece of fish and see if I like it. Equipment
One big bowl
A good quality knife for the raw fish
A cutting board
A citrus juicer (optional) Ingredients:
One red onion
A small bunch of cilantro/coriander (adjust to taste, I use about 1/3 cup)
1-2 jalapeños, maya habenero peppers, or Thai green chillies
1/2 cup lime/lemon juice
1 pound sushi grade tuna (make sure the fish is fresh and handle it safely. Carry it on ice from the store is possivle and place it in the fridge over ice as soon as you get home)
Method
1. Dice the red onion up evenly and place it in the big bowl.
2. Chop the cilantro/coriander and green chillies up and add them to the bowl, as well.
3. Juice the lime/lemon and add it to the bowl, tossing all the ingredients together.
4. Cut the tuna into small cubes about a centimetre sized. (See note above about size and shape of the fish).
5. Toss the fish into the bowl with the rest of the ingredients and mix them together gently.
6. Salt if you like.
7. Set the bowl aside and wait for anywhere between 12-15 minutes.
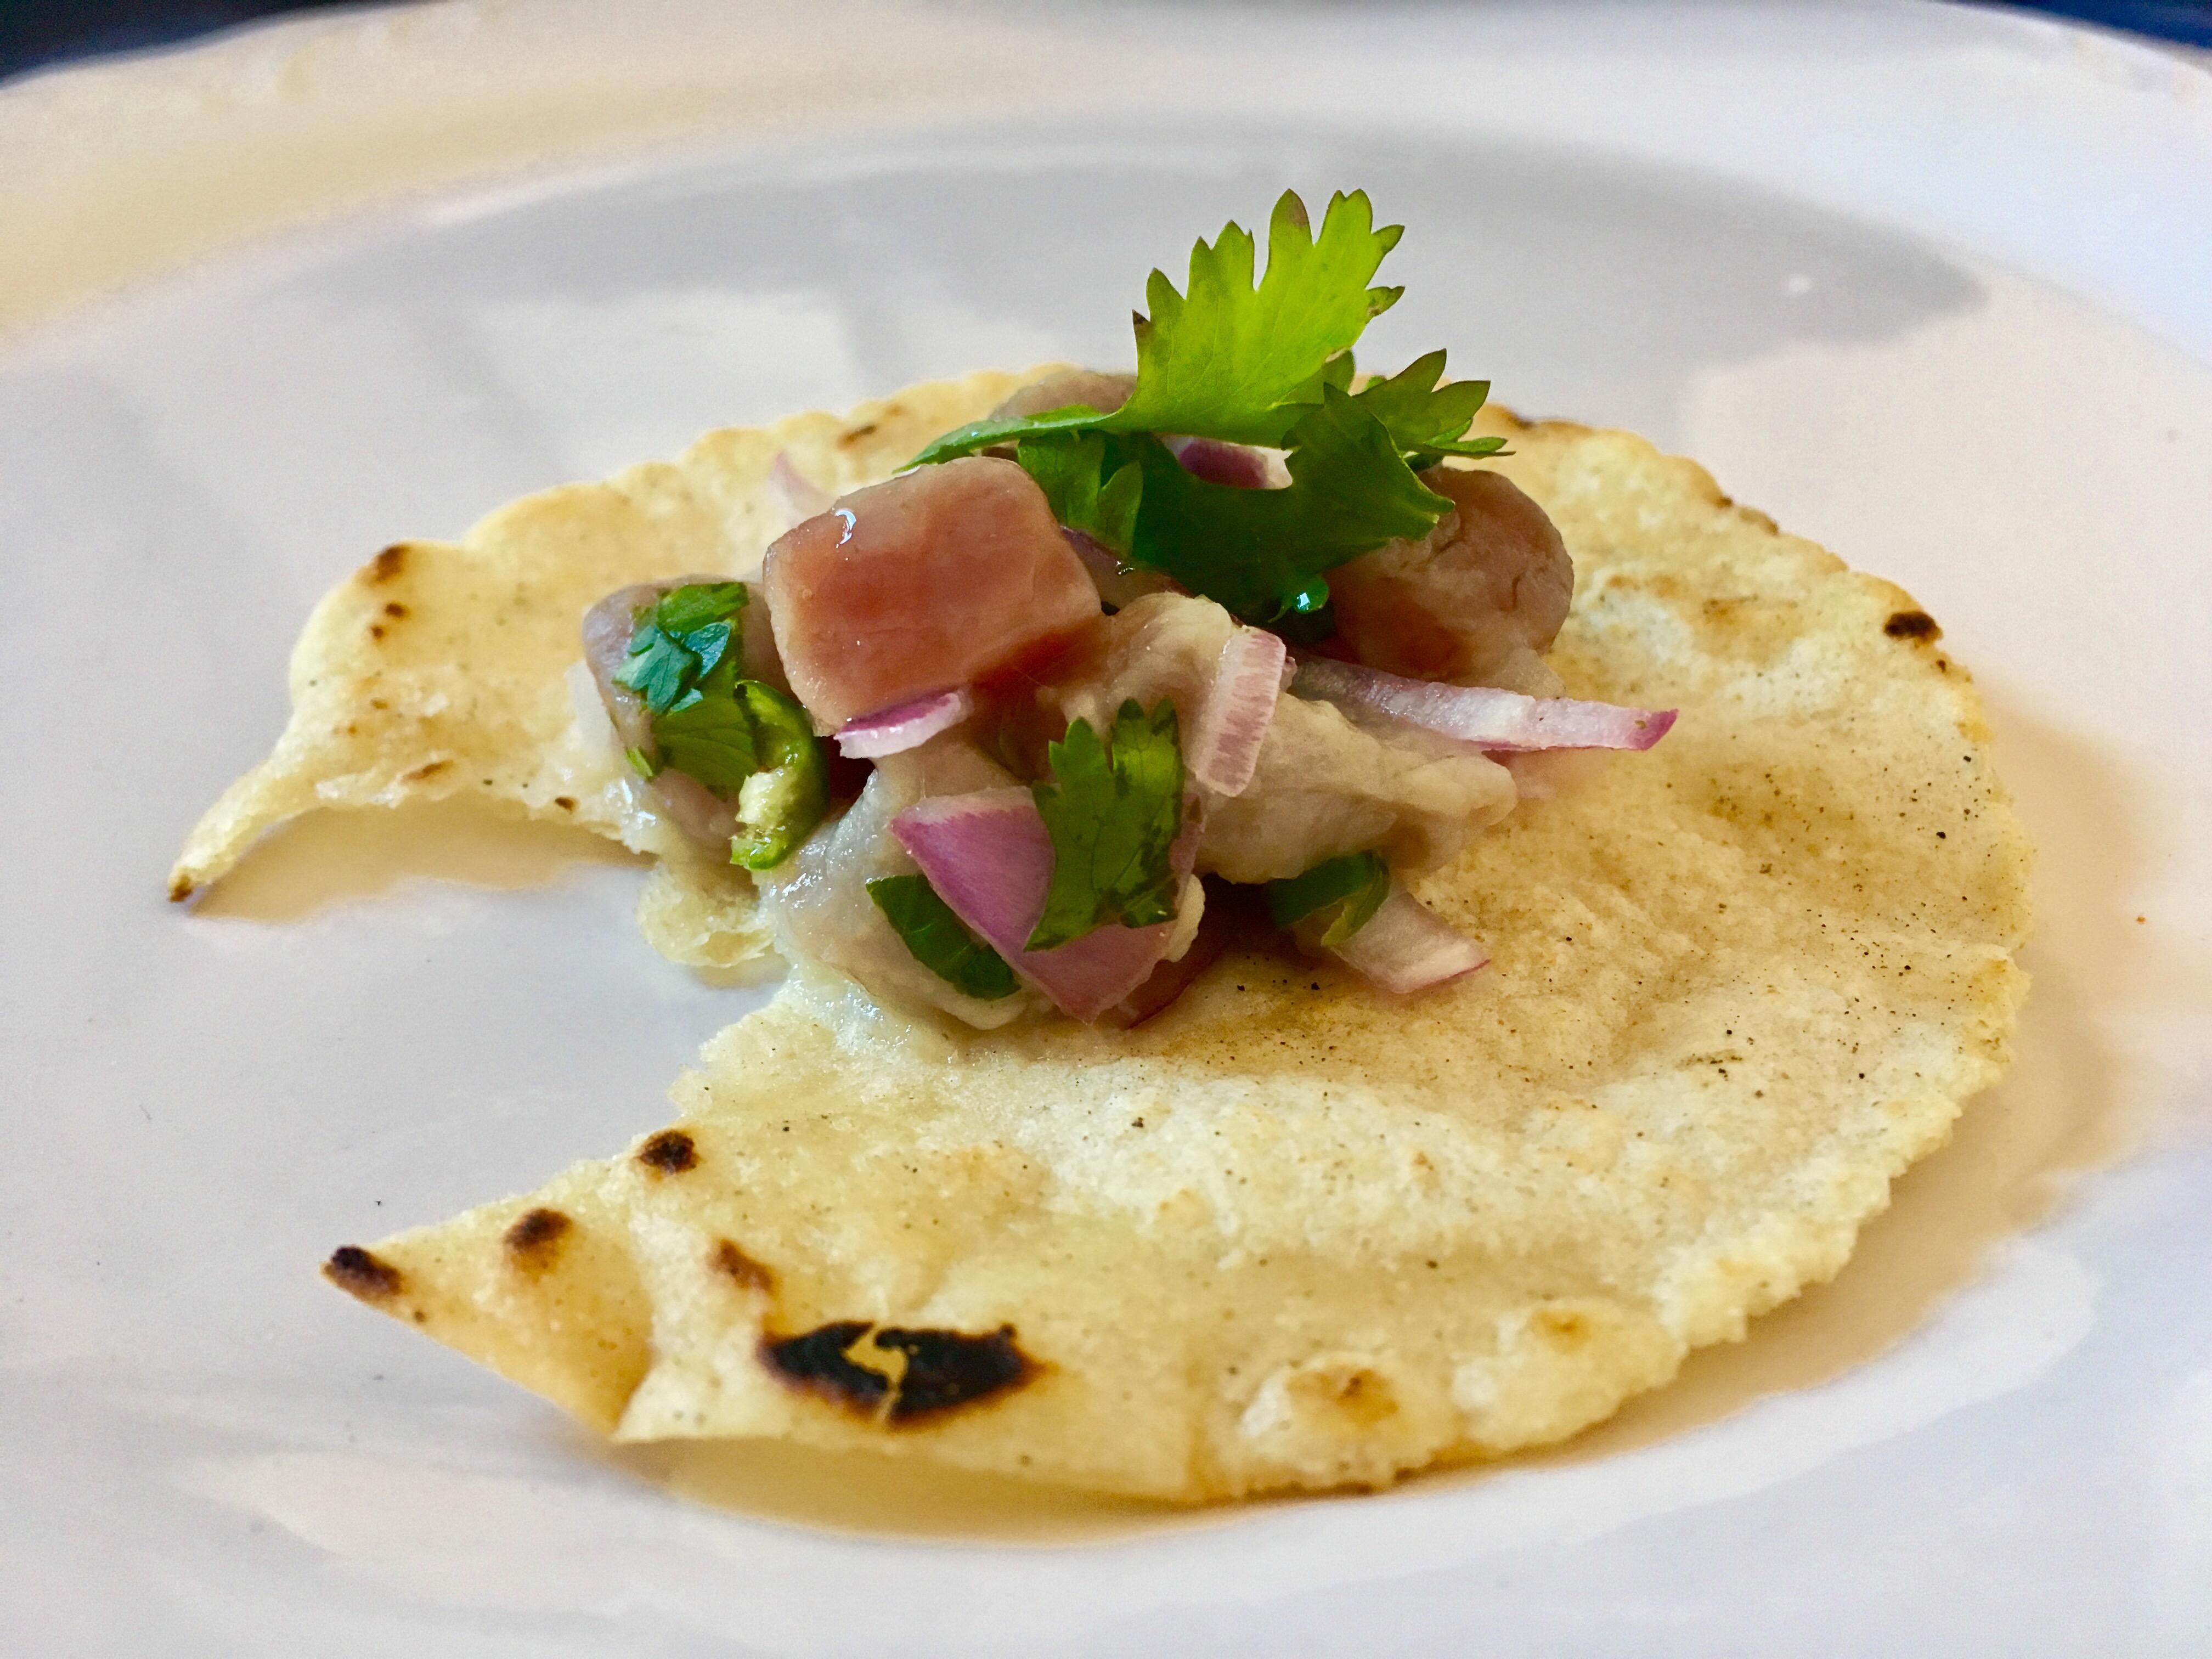
This fish is done!
8. Enjoy your ceviche with some Tortilla chips (preferably homemade !).
I made a little tortilla, roasted it until it was crisp, and then placed the ceviche on it 🙂 (I will write a separate post about how to make tortillas soon! In the meantime, you can go here.
I just wrote a post about my favourite quick snack: paneer bhurji rolls. As a companion post, I thought it would make sense to write about how to make paneer at home. It’s actually very easy and absolutely worth it, given how amazing fresh paneer tastes!
All you need is:
2 litres whole milk
1/4 to 1/2 cup lemon juice (you could also use lime juice)
Salt (optional)
A cheese cloth
A colander
A large saucepan
Two plates
Heavy books
Method:
Pour the milk into the saucepan and bring it to simmer on medium heat (to about 200 F). Keep scraping the bottom of the pan so that the milk at the bottom doesn’t burn.
Take the pan off the heat.
Add the lime juice to the milk, place the lid on the pan and leave it be for about 10 minutes.
Check on the milk. It should have “broken” with the solids separated from the whey. If this has not happened. Add some more lime juice.
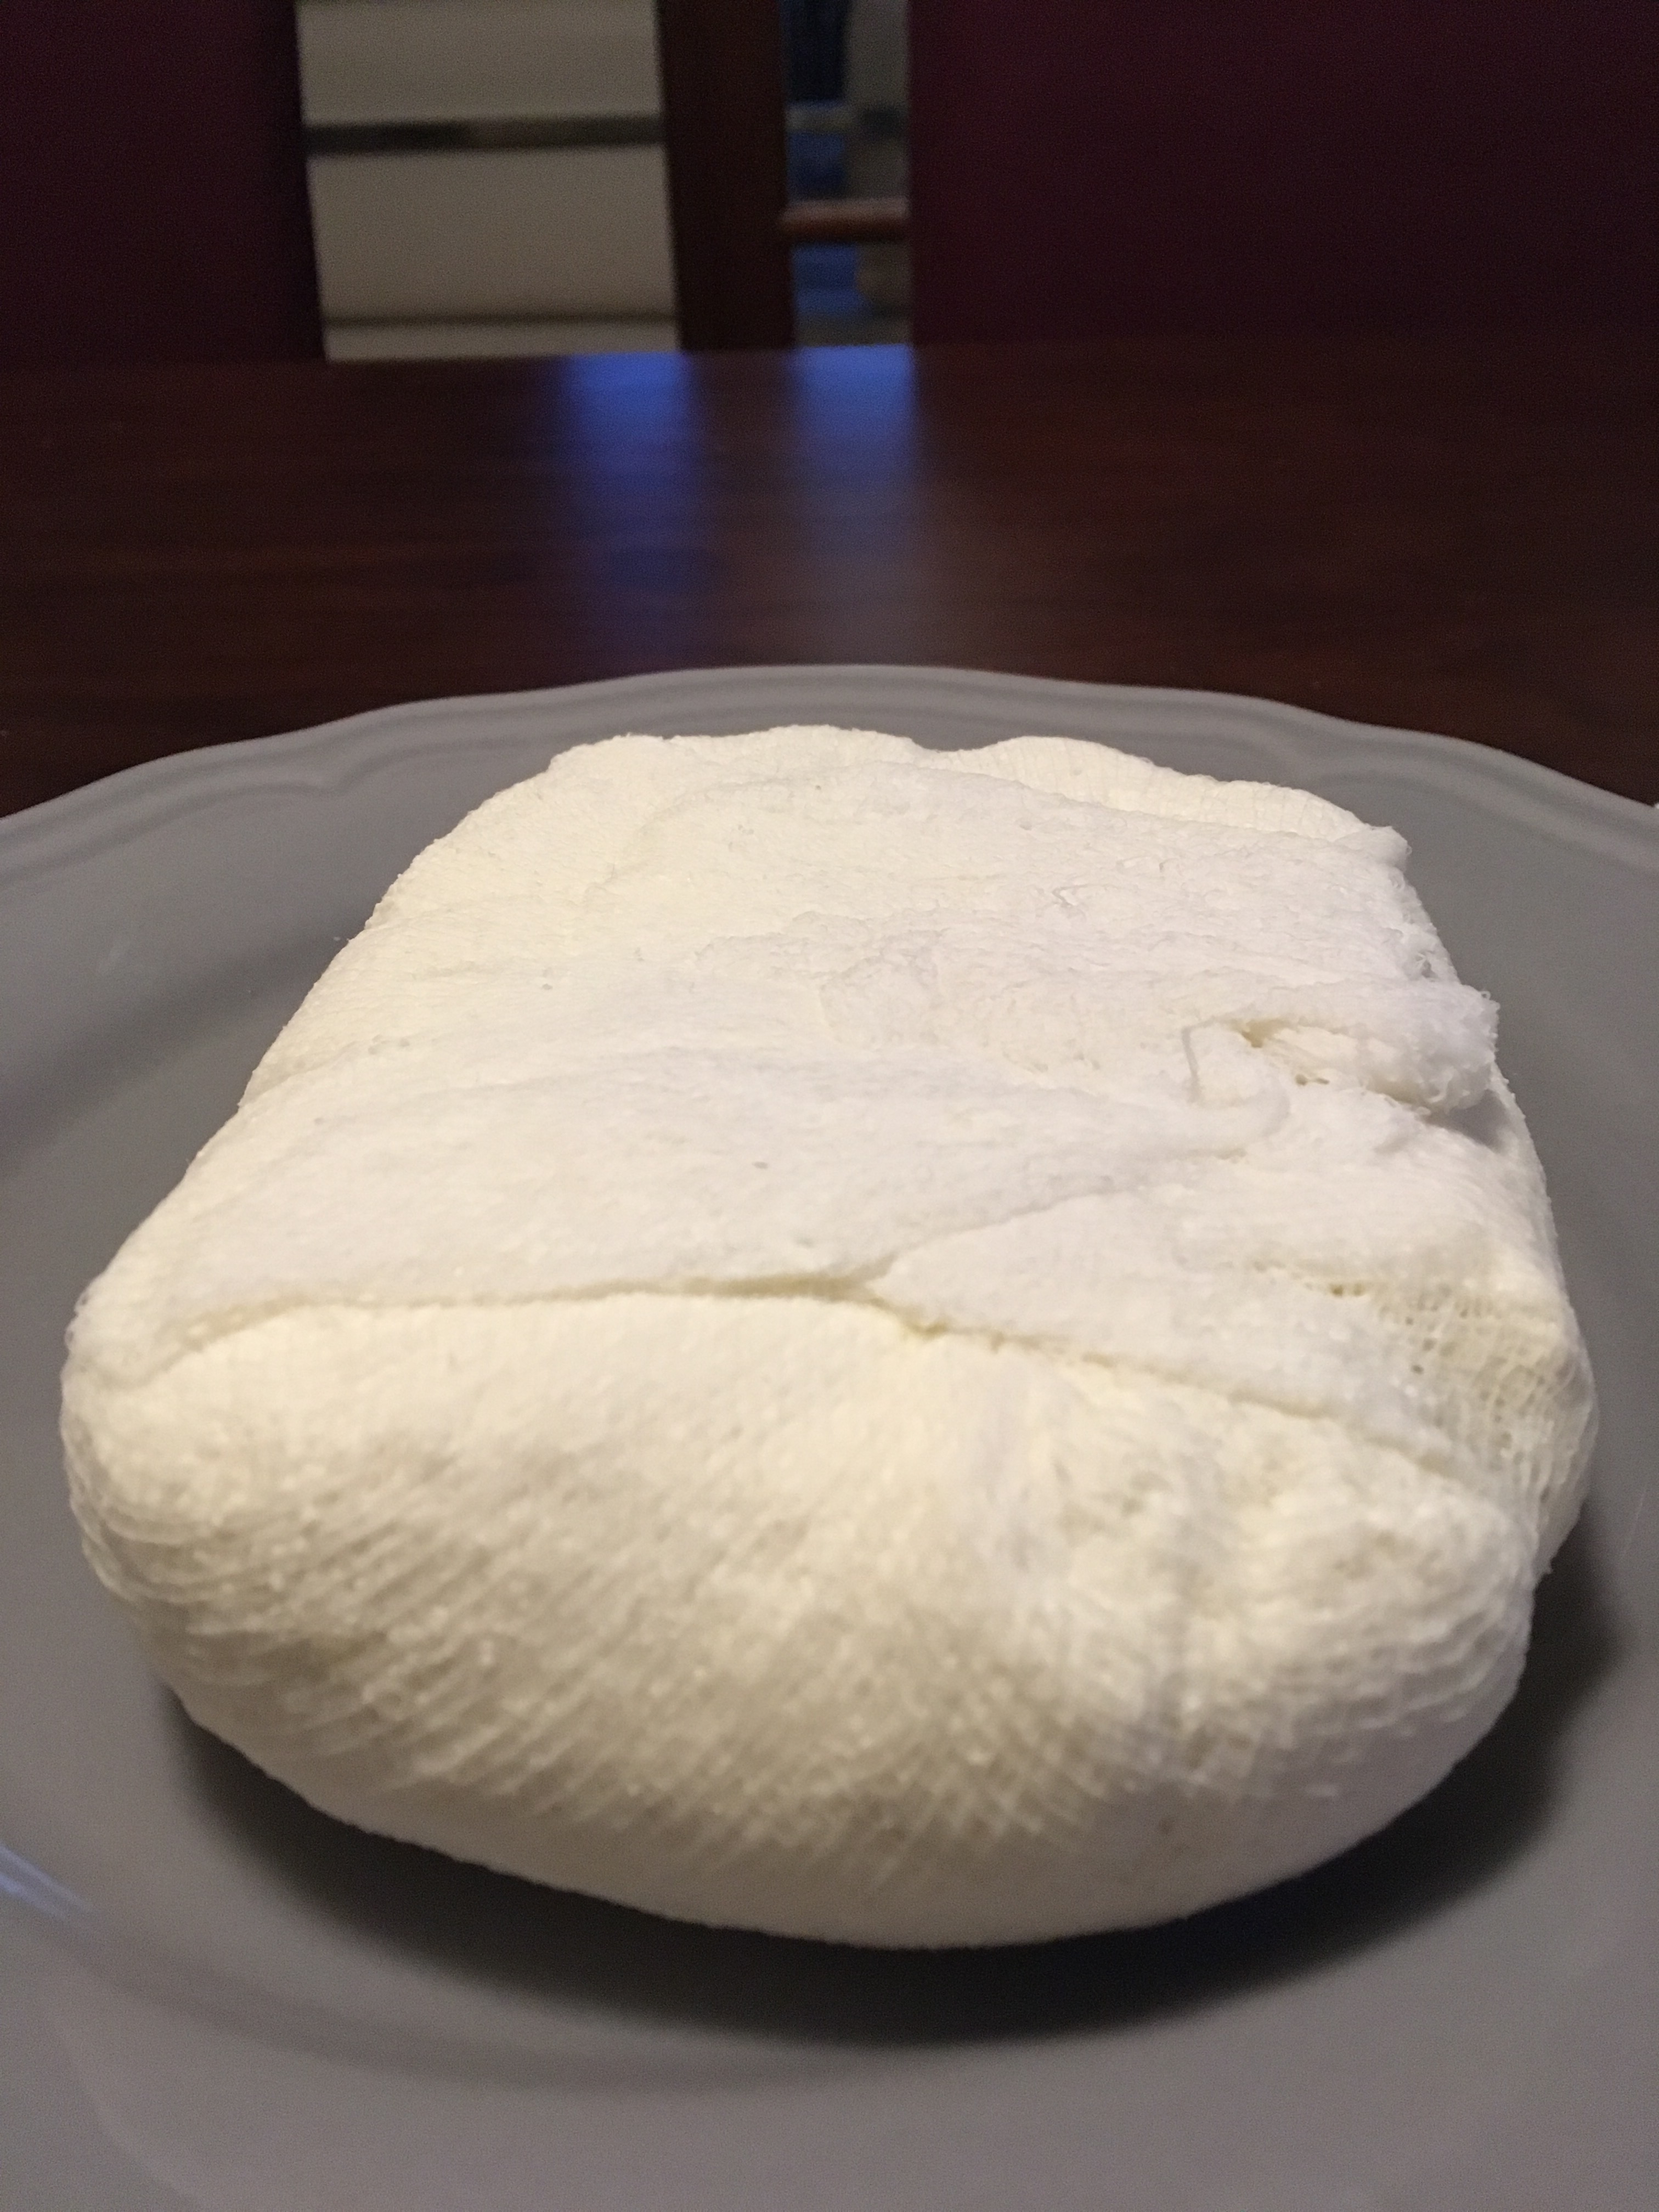
Strain the “broken” milk through a colander lined with a cheese cloth.
Then try and squeeze as much of the whey out as you can. I like to tie the ends of the cheese cloth to the top of the tap over my kitchen sink (very securely) so that gravity does the work for me and the whey just drips down slowly.
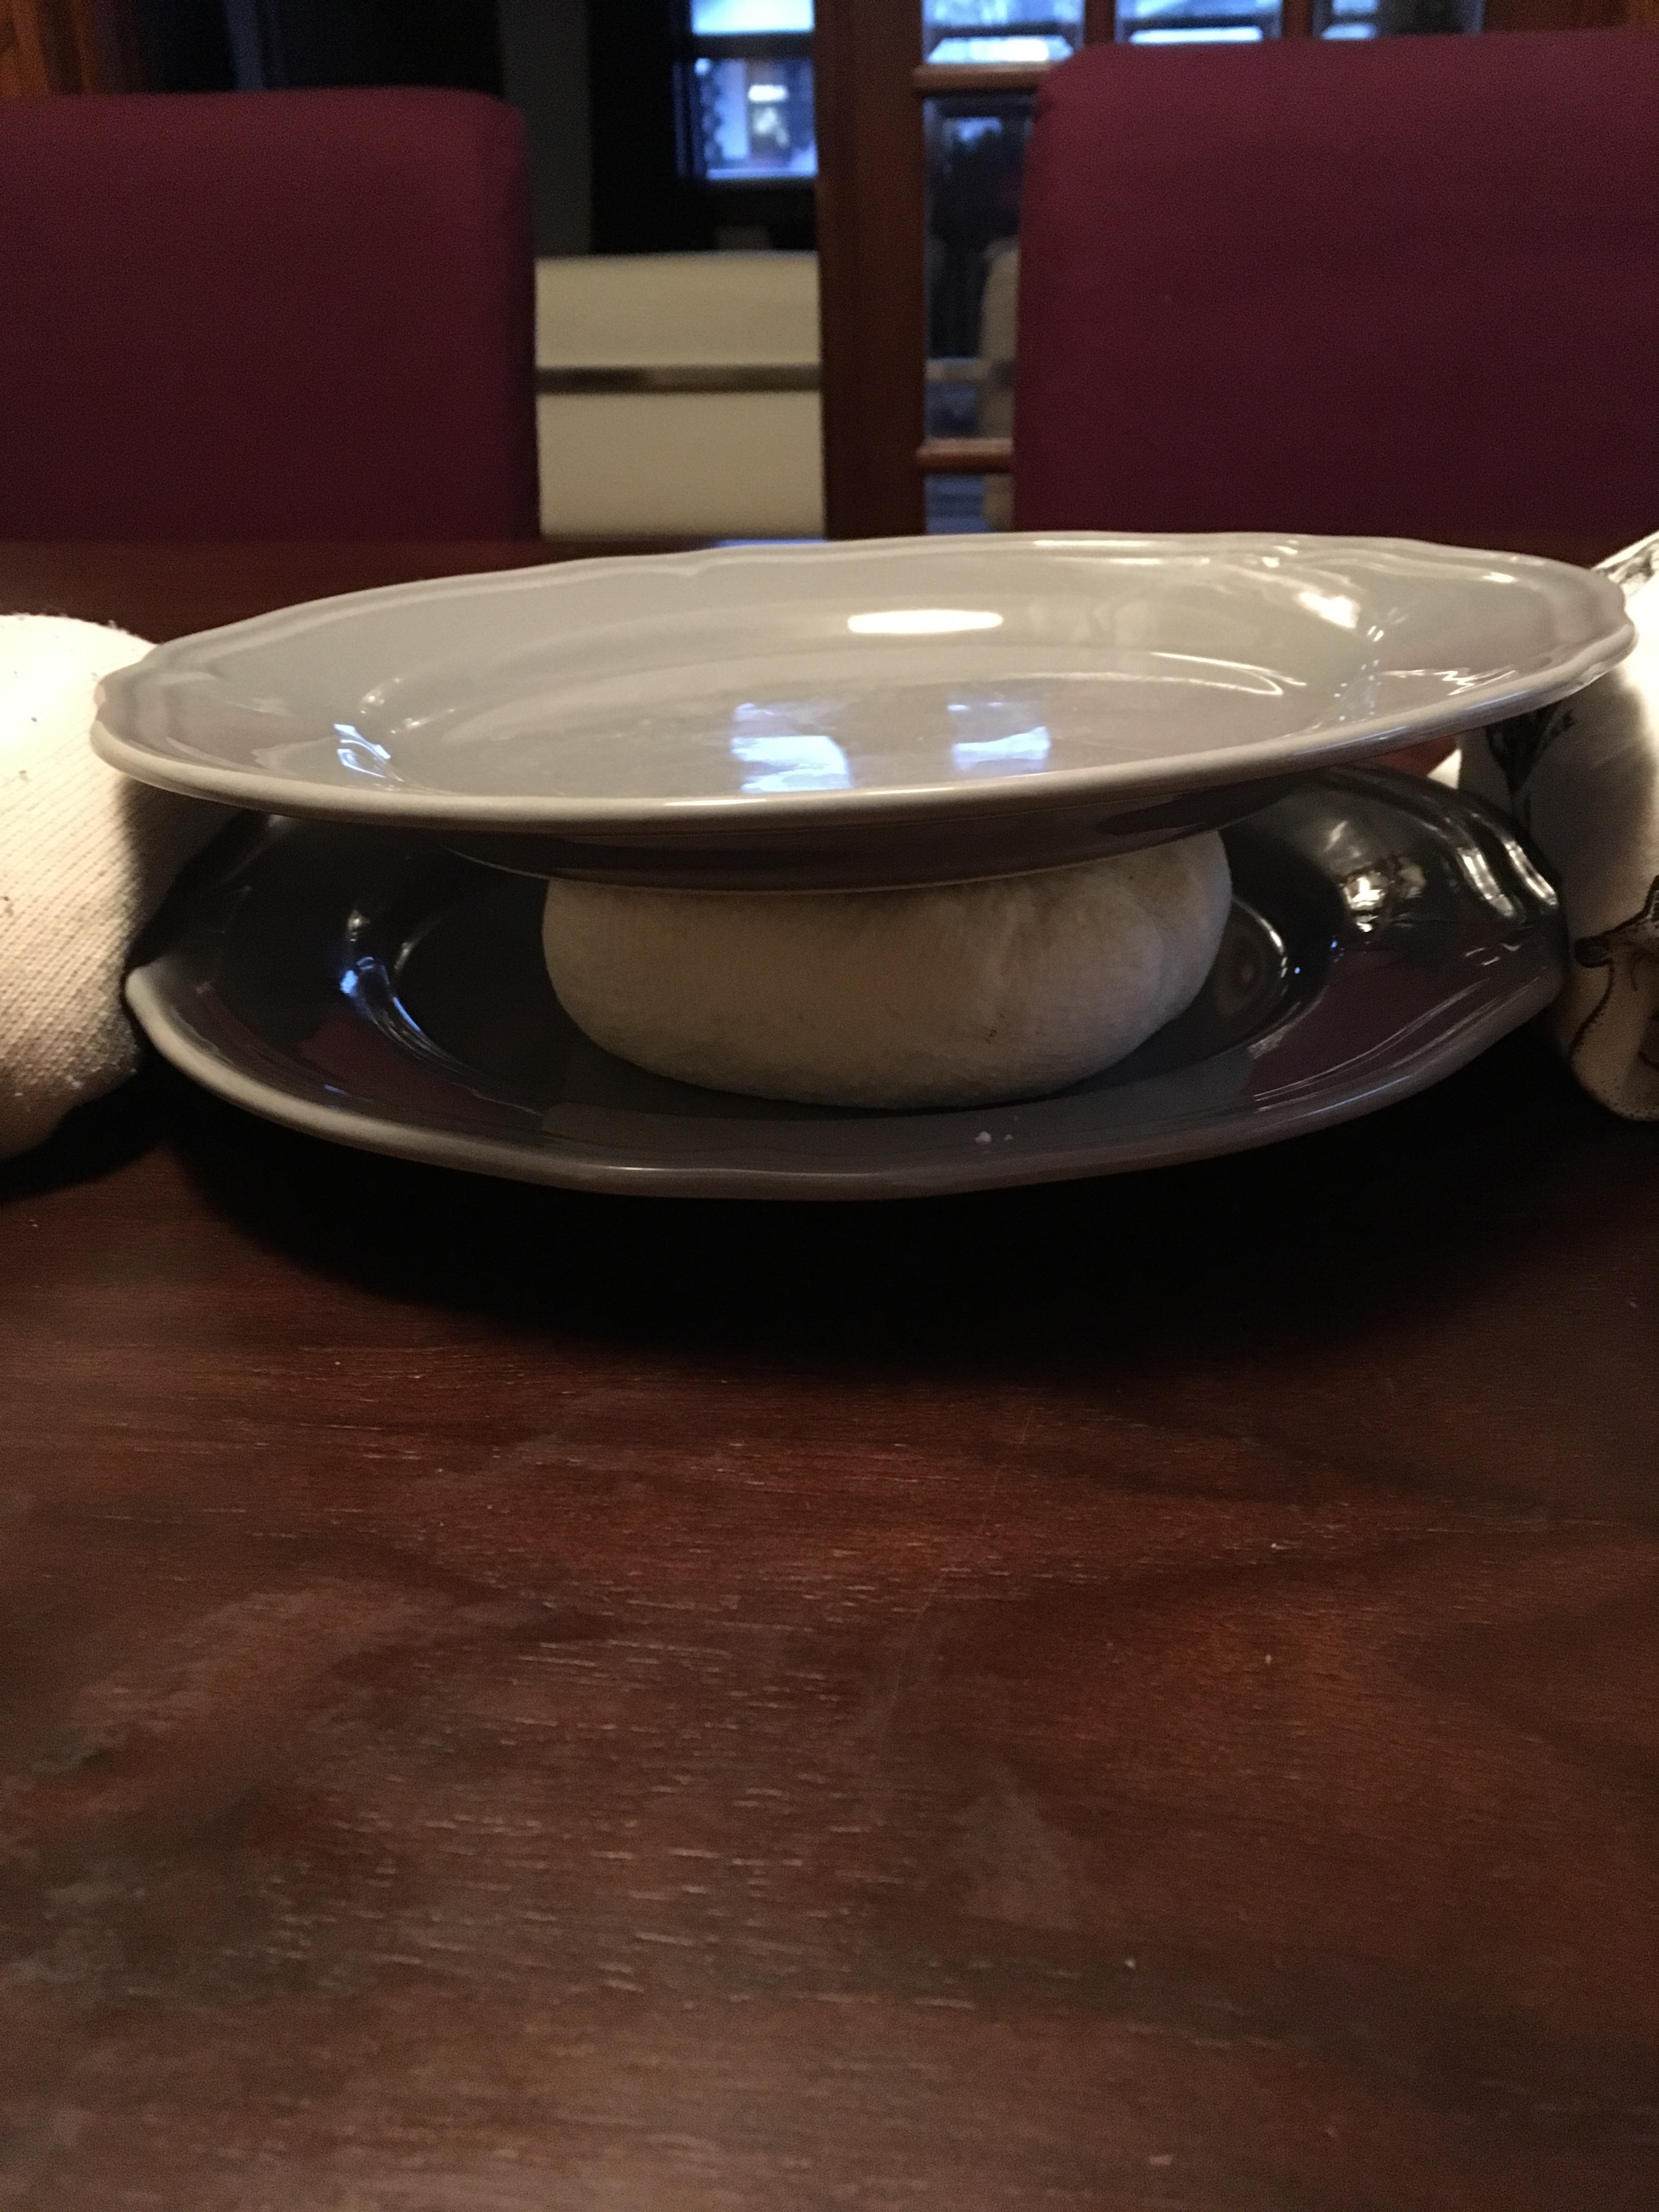
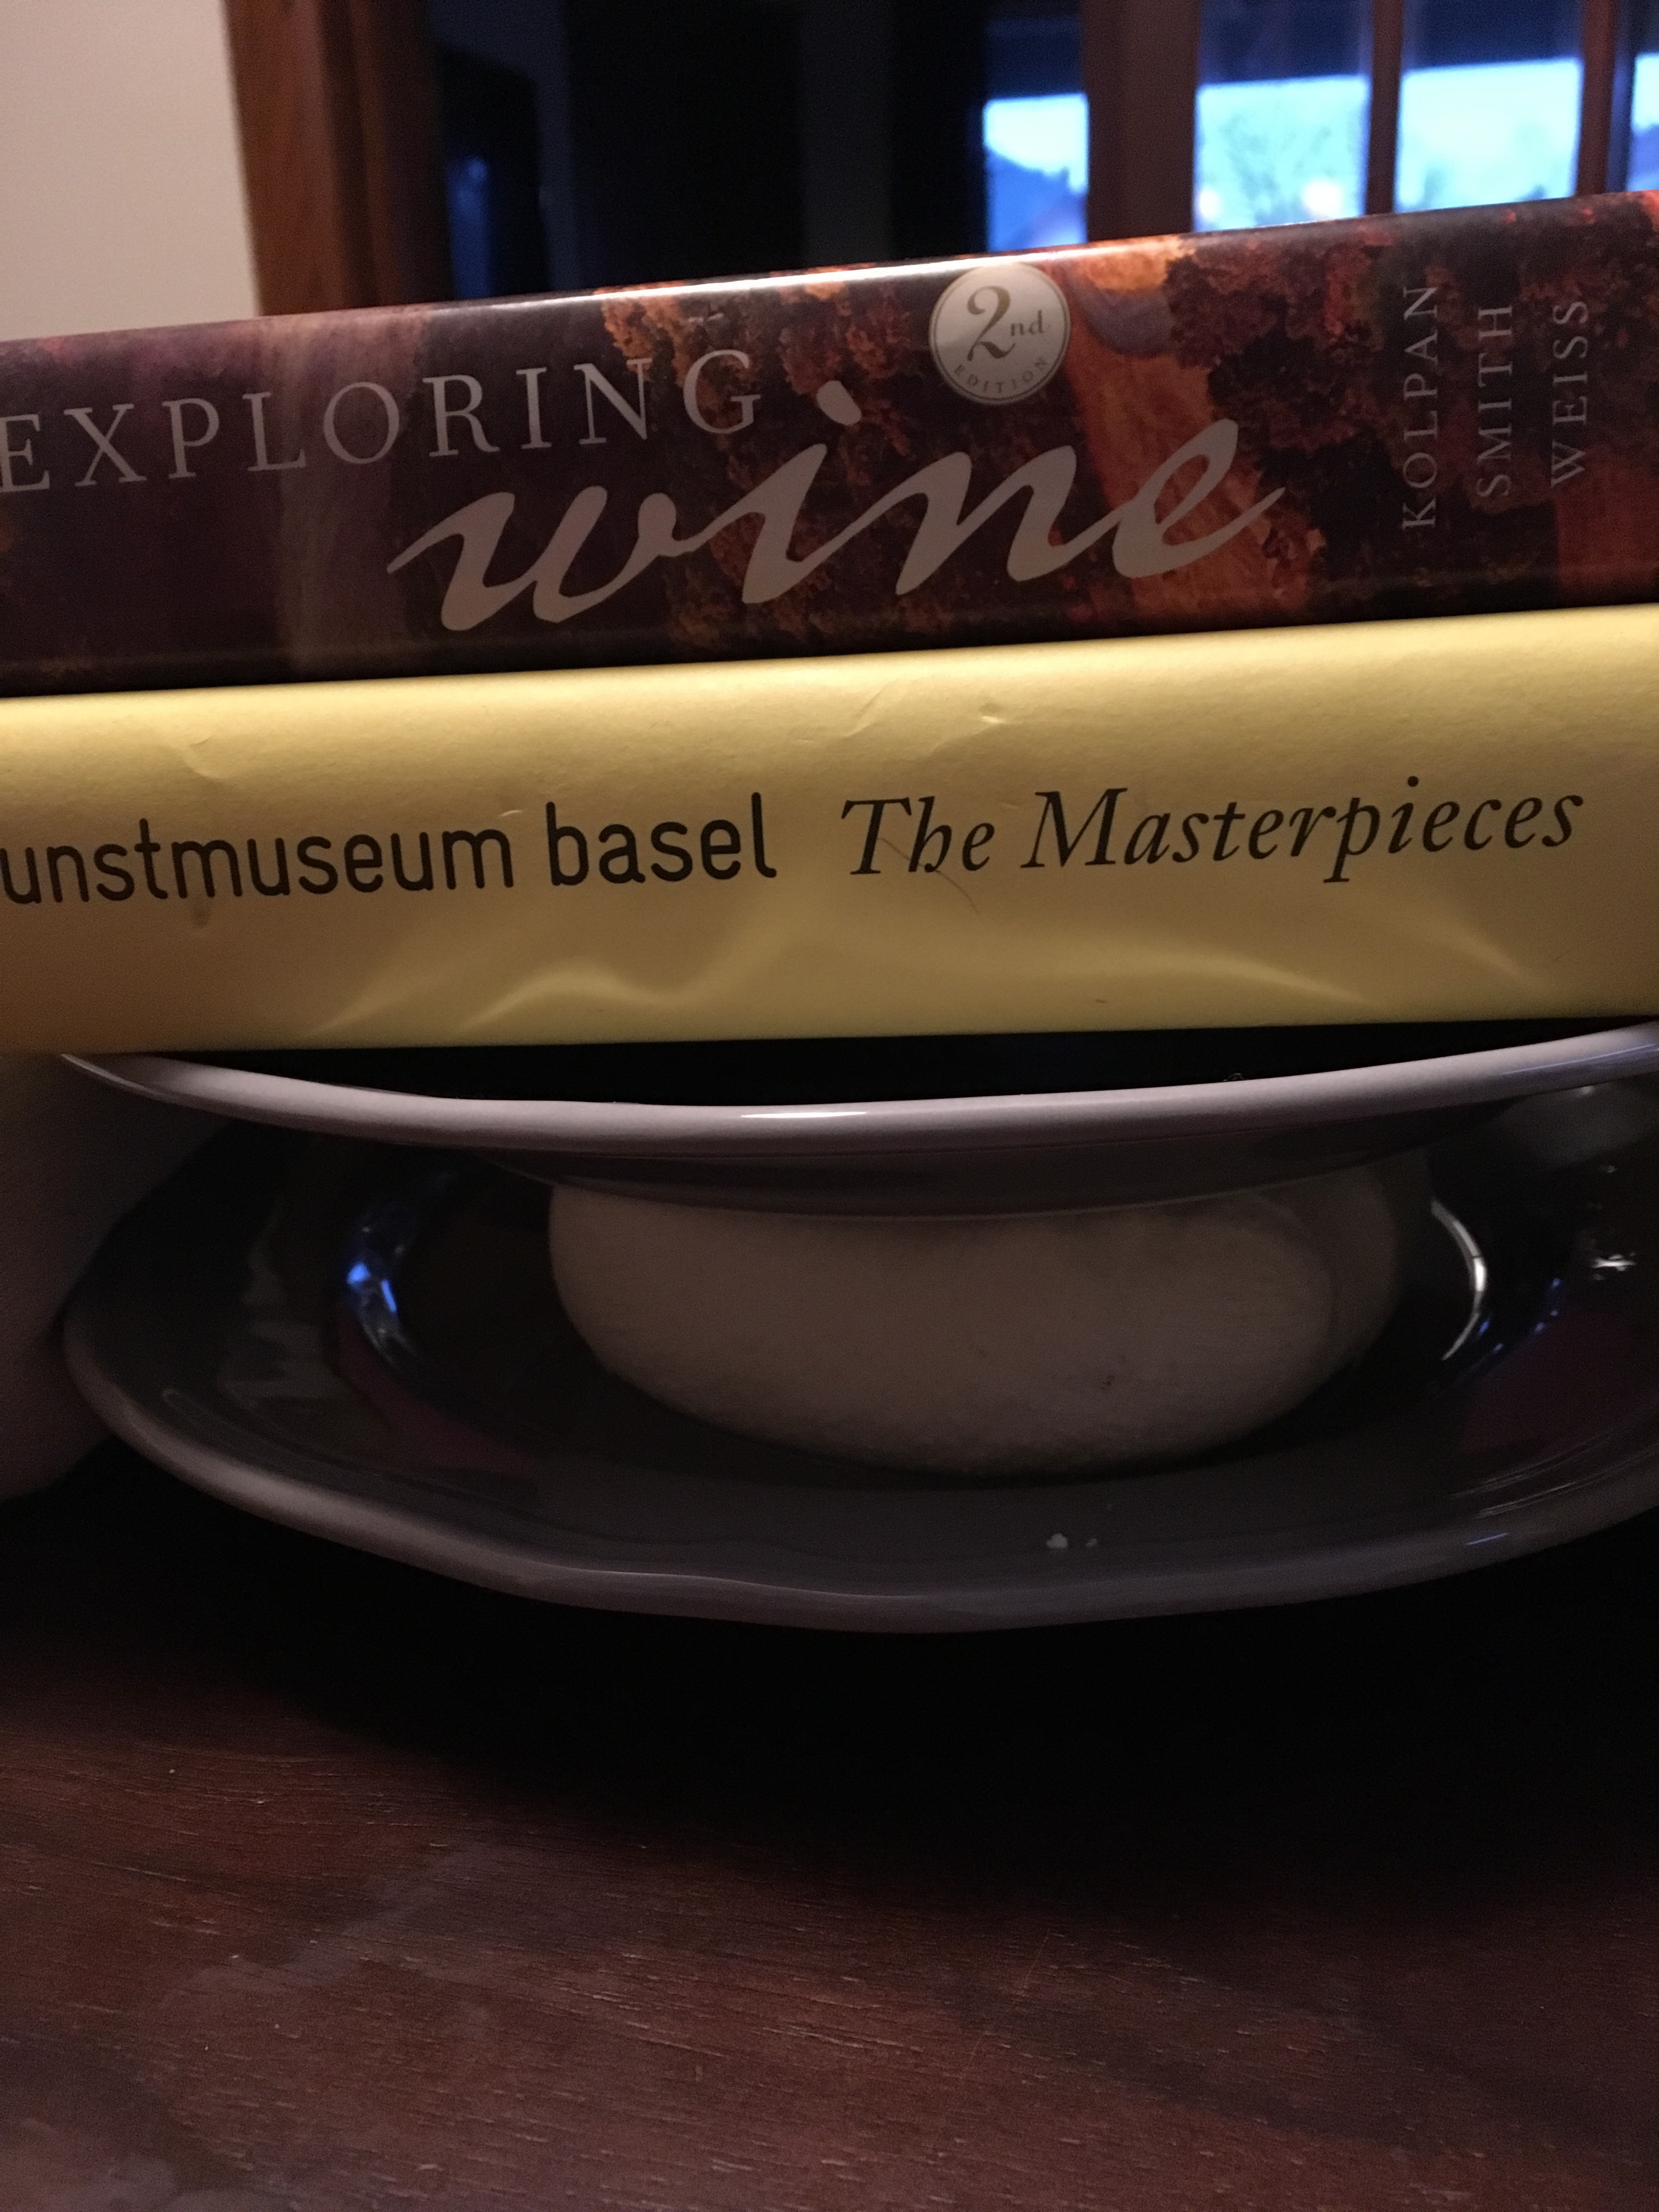
Once most of the whey is out, place the paneer (still wrapped in cheese cloth) on a plate. Place a second plate on top of the paneer. Then place some heavy books on top of the plate. I like to also place some paper towels on the lower plate around the paneer to soak up the extra whey.
In about 30 minutes, the paneer should have hardened into a nice block that you can now use 🙂
The one thing I hate about busy days is that one doesn’t get to sit down and properly enjoy one’s lunch. I hate rushed meals, you see. So on days when I am swamped, I just eat cookies or brownies for lunch and make up for it with two delicious dinners when I get home.
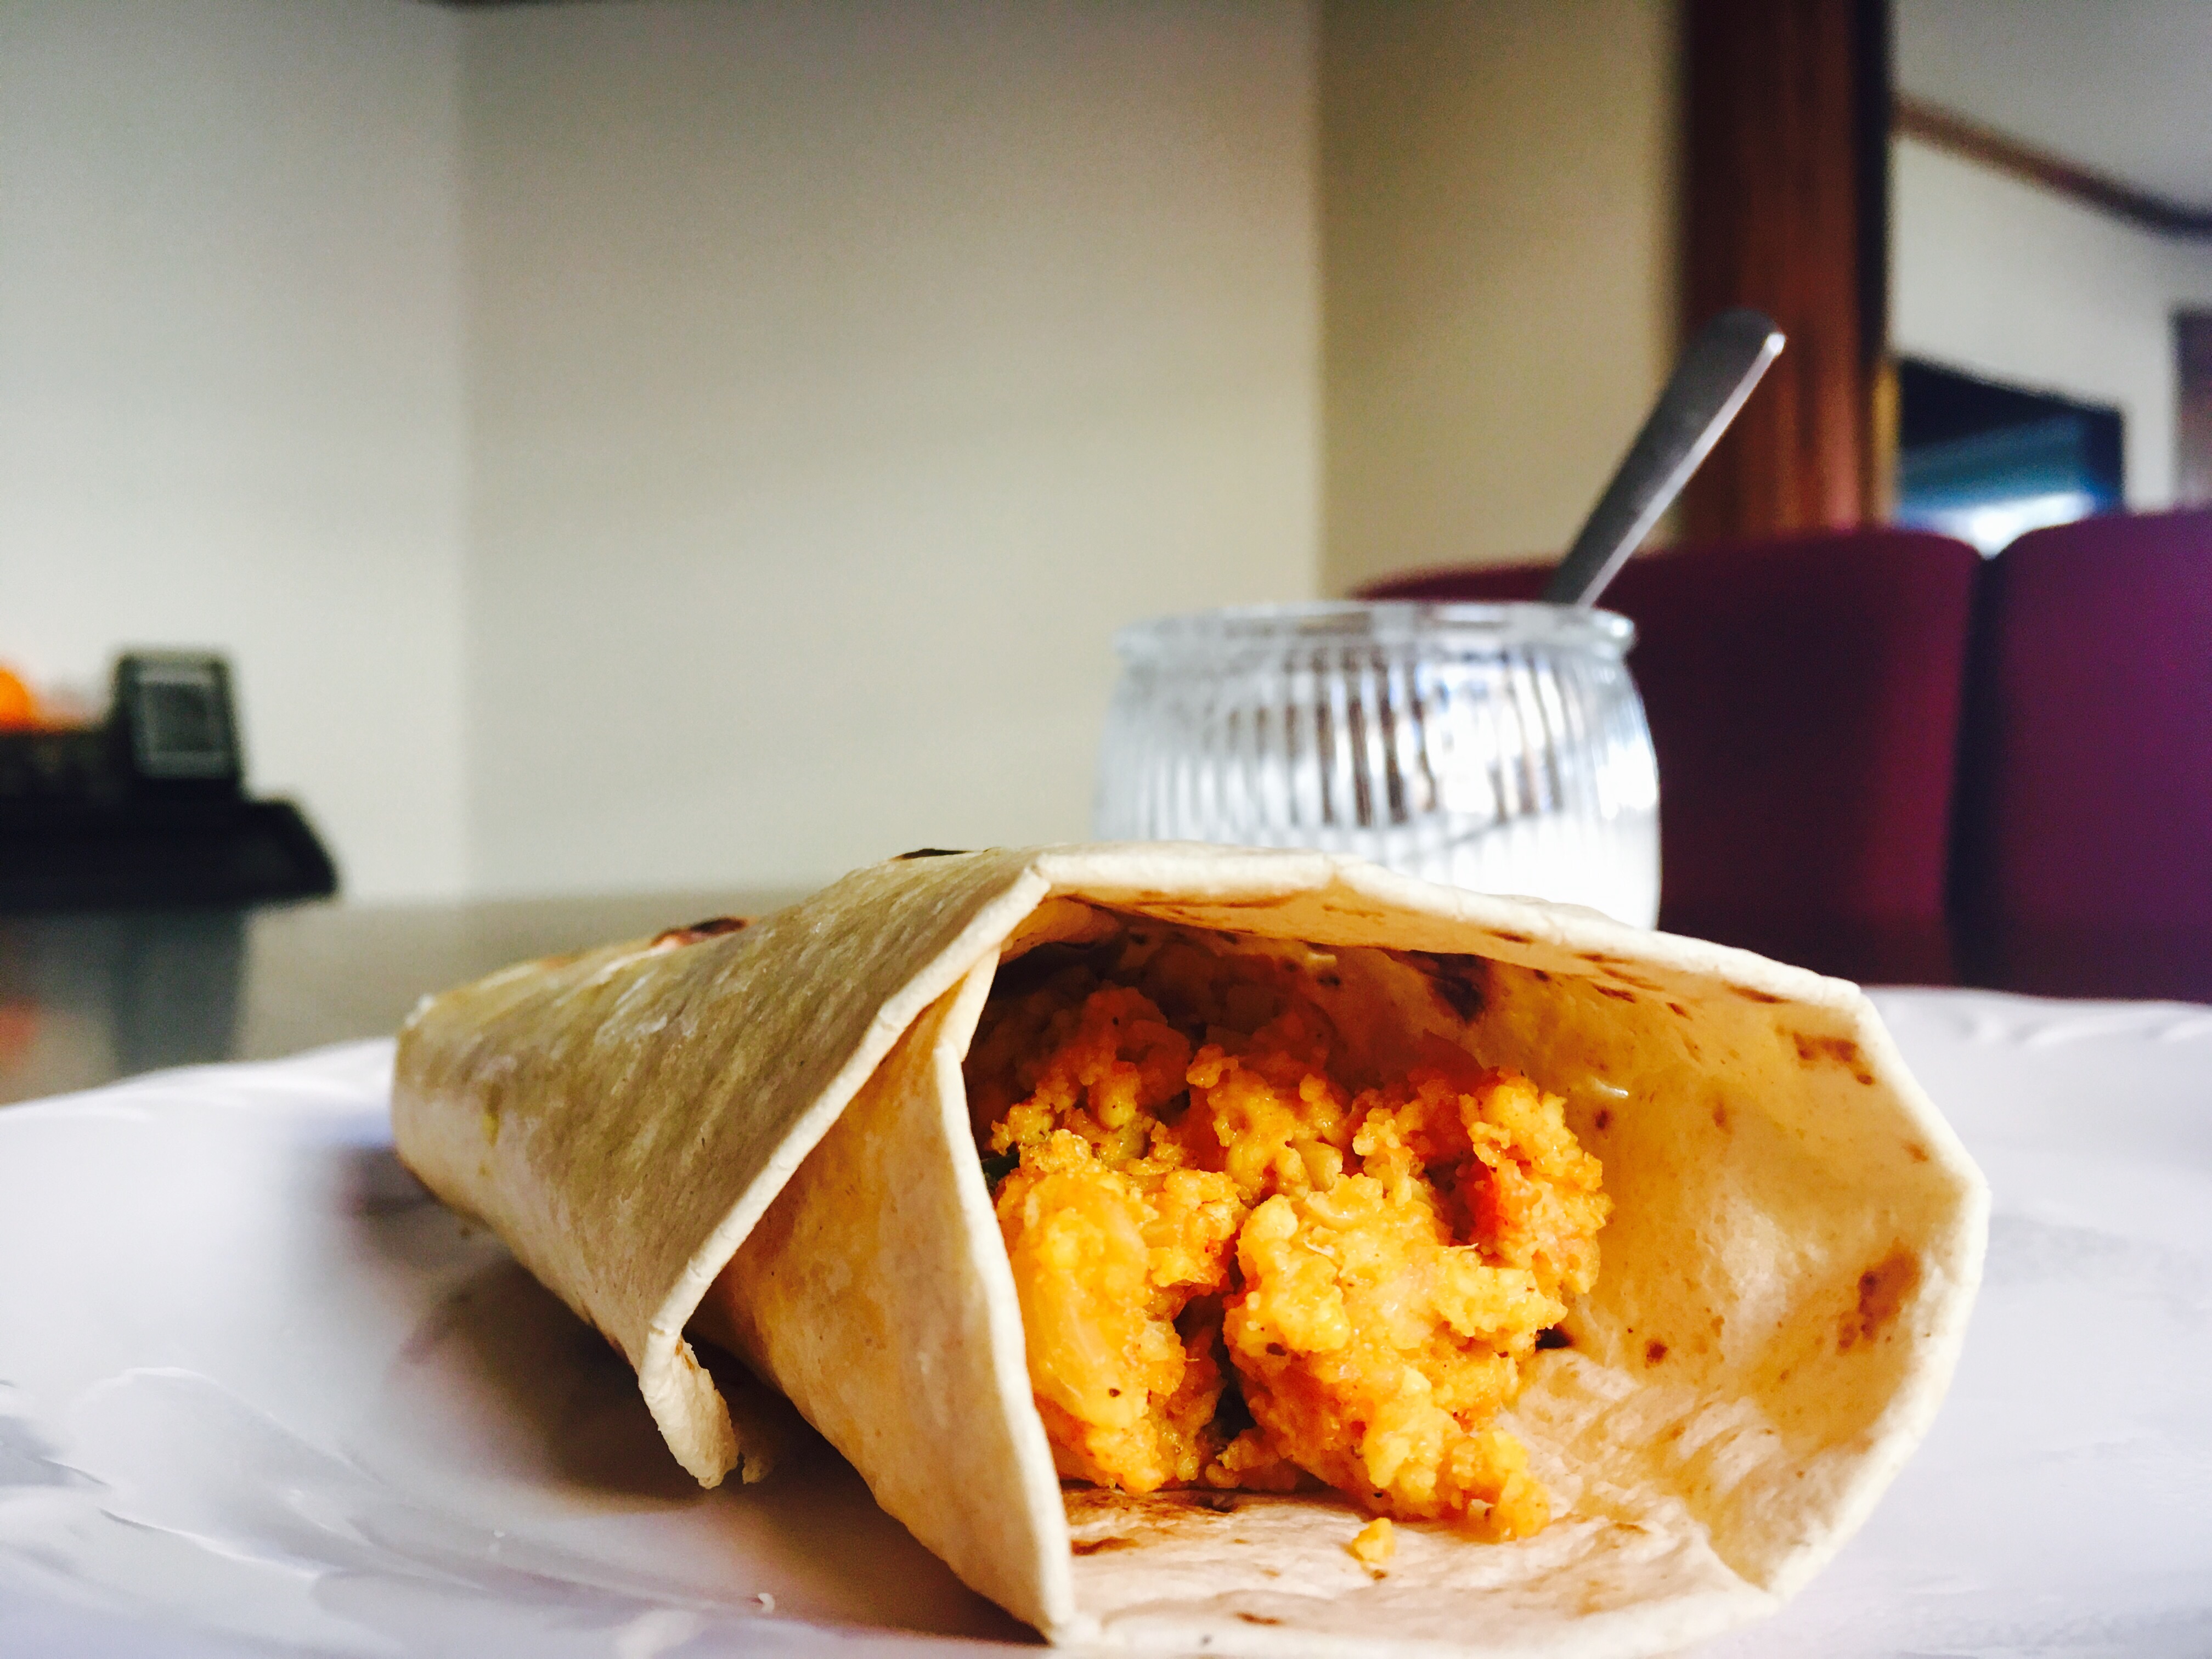
I know, however, that this isn’t the healthiest way to go about things. And sometimes, I miss being able to eat something spicy and not-sweet for lunch (followed by a brownie, of course). That’s where this roll comes in.
It’s inspired by the concept of a Kathi roll and quite easy to assemble. So if you make the bhurji the night before, it becomes an easy snack to put together for lunch on a busy day. And you can eat easily while you work on something without getting your hands all messy 🙂
If you want to try making it, here’s what you will need:
1/2 pound paneer (for instructions on how to make it, go here; you could also buy some at Indian stores, but freshly made homemade paneer really is several orders of magnitude better than the store bought kind)
2-5 tablespoons of vegetable or sunflower oil or ghee (go here for my recipe)
1 medium sized onion (ideally red; diced)
2 cloves of garlic (crushed)(optional)
2 green chillies (ideally, the slender, thai ones) or 1 habanero (chopped);
3 medium-sized vine ripened tomatoes (you can use more tomatoes if you like your bhurji a little more tangy and sweet) (diced)
Salt to taste
1-3 teaspoon red chilli powder
1 teaspoon coriander powder
1 teaspoon cumin powder
1 teaspoon garam masala
1/2 teaspoon turmeric
1 lime or lemon
Rotis (for more on how to make rotis, go here; you could also use tortillas or buy pre-made rotis at an Indian store, but I wouldn’t recommend it).
Method:
Take the Paneer and chop it up into little small pieces. You can also process it in a food processor until it is broken up into fairly small chunks (not larger than 1/2 inch cubes).
Add the oil/ghee to a frying pan. Heat the pan at medium-high heat.
Once the oil seems hot (test it with one small onion piece) throw in the diced onions and sauté them until they are slightly browned.
Throw in the green chilli and sauté it as well. Reduce the heat to medium.
Add the tomatoes and toss them about in the pan.
Add the salt and all the masalas (red chilli, coriander, cumin, garam masala, and turmeric powders). Toss the contents of the pan until the spices are well-distributed.
Place a lid on the frying pan and let the tomato-onion-spice mixture cook for a few minutes, until the oil separates from the mixture (stirring intermittently).
Toss in the paneer chunks and stir well, breaking up the paneer in the pan even more as you stir.
Cook until the paneer looks well cooked but still moist. You can taste it after a few minutes and decide whether or not you want it cooked some more.
Take the pan off the heat. Squeeze lime juice on the paneer bhurji, to taste. It’ll add a bit of tartness to it that I love!
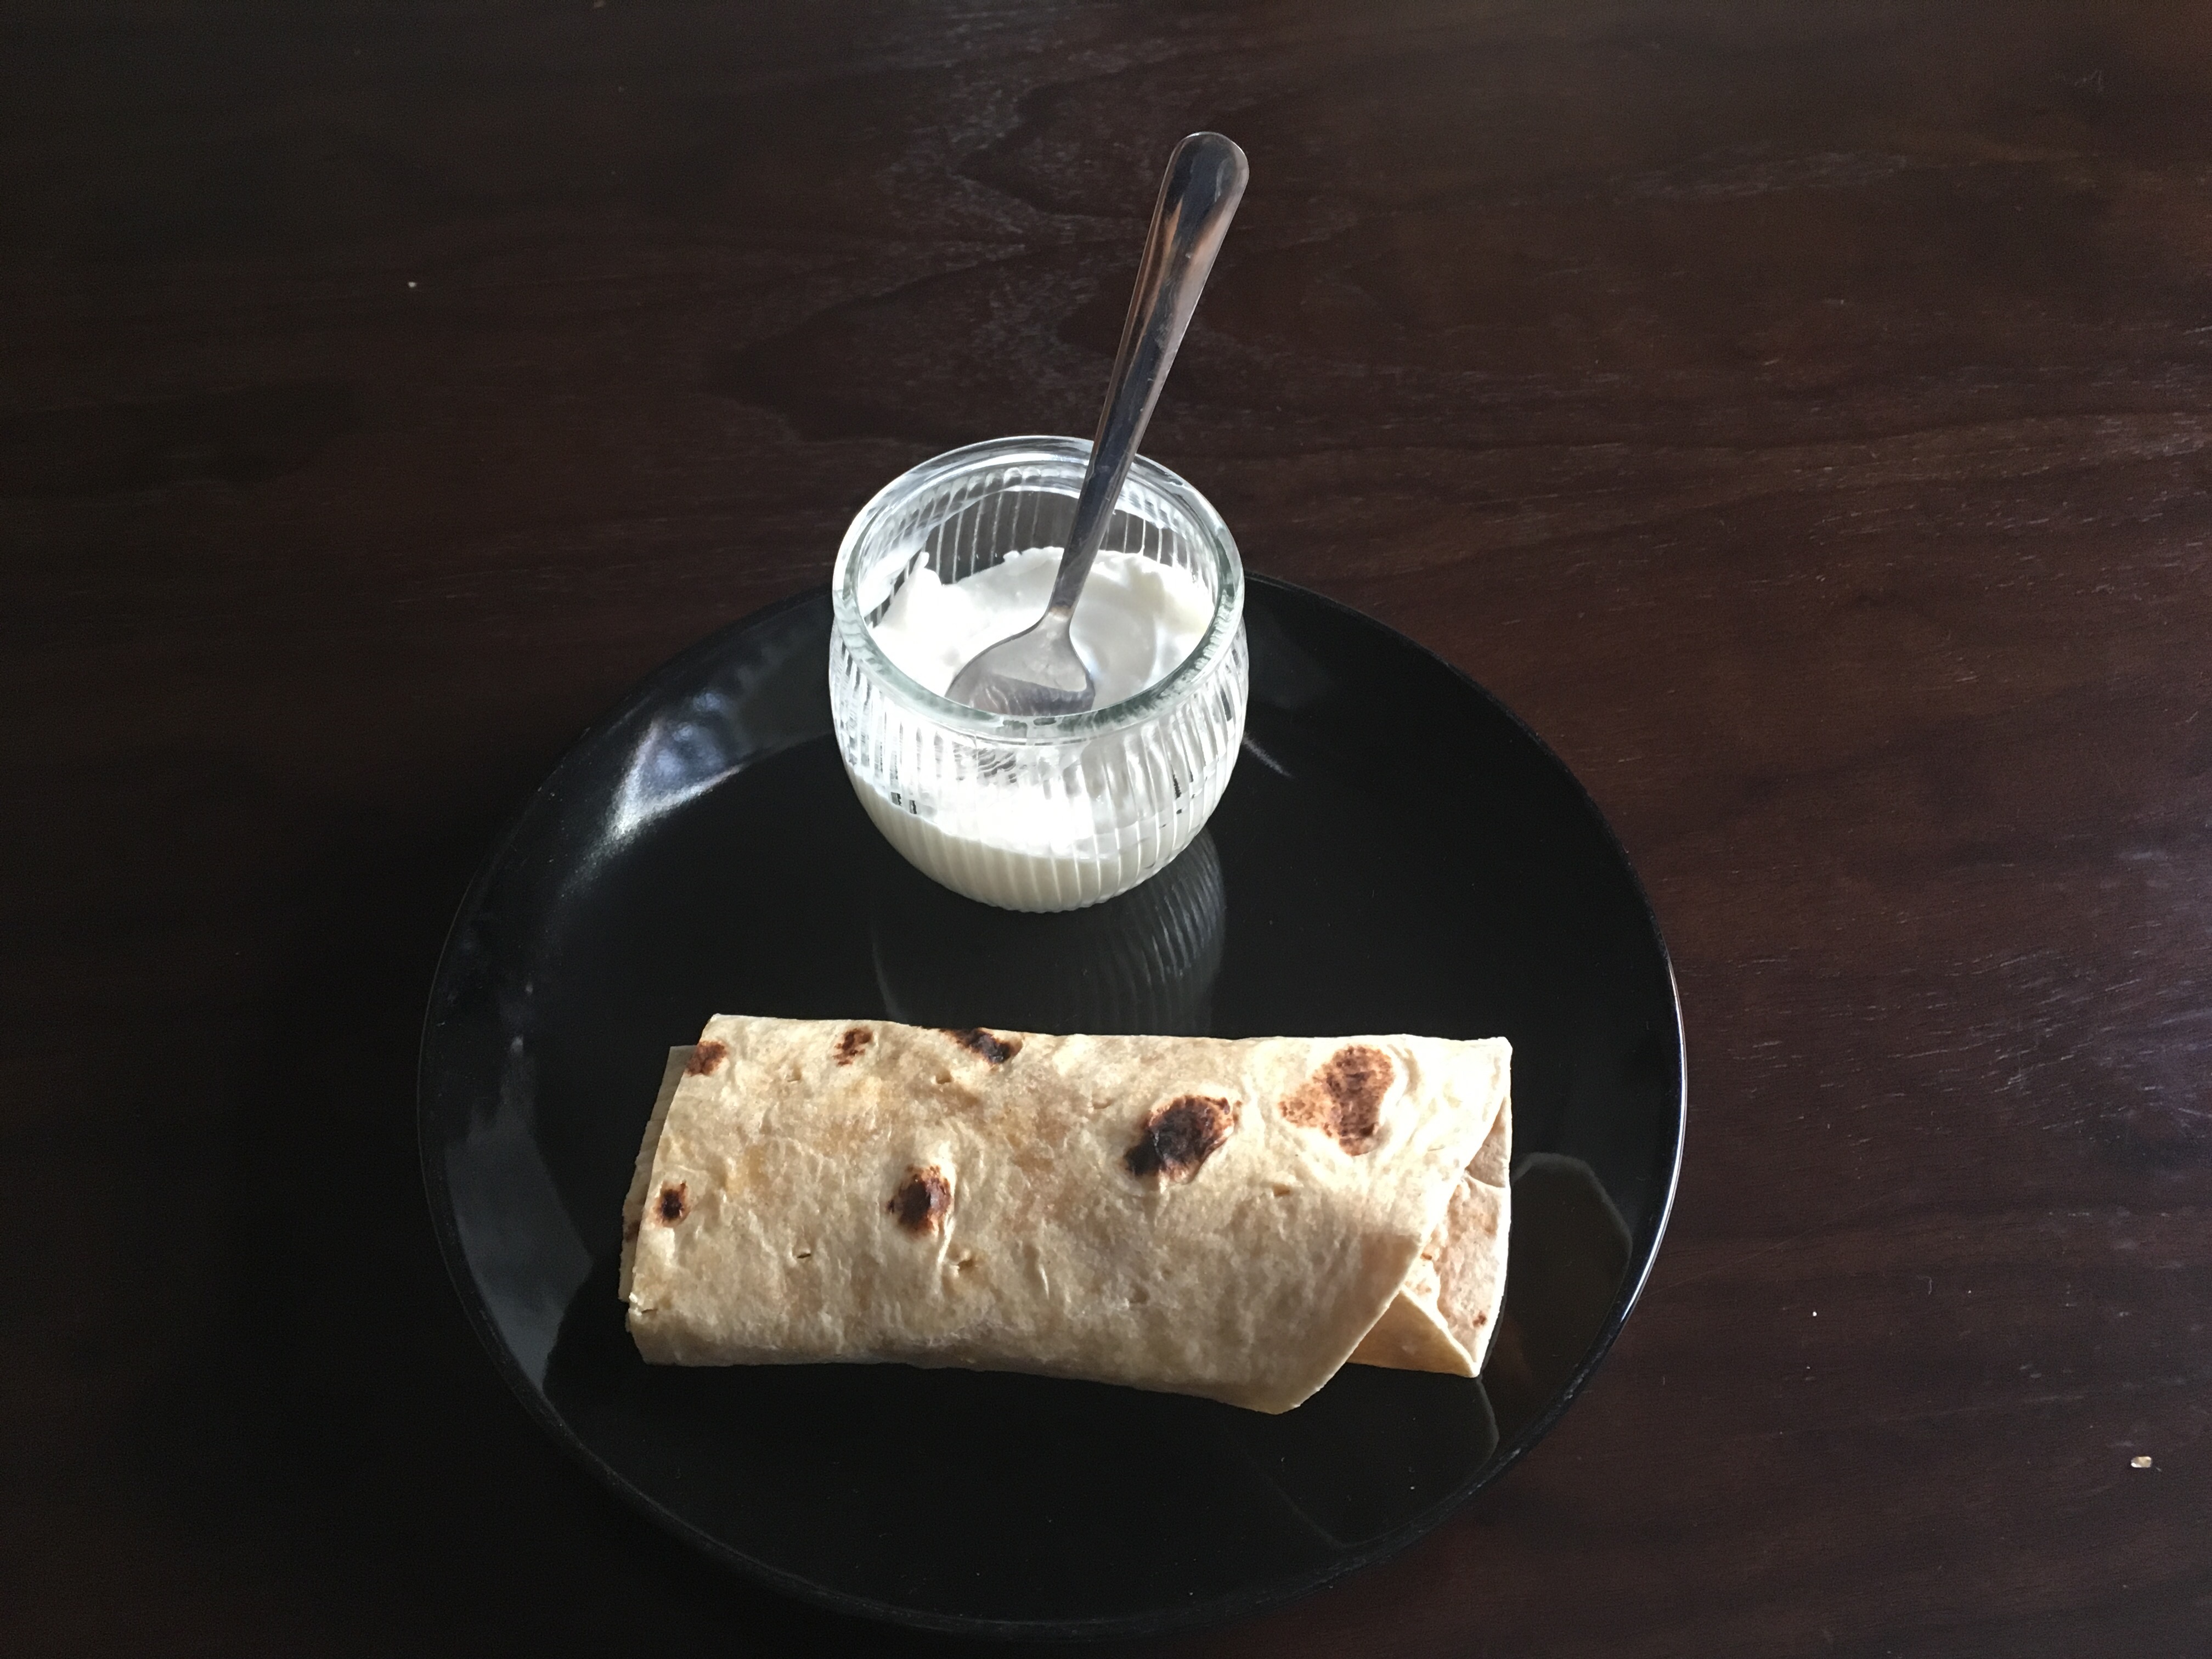
Place a roti or tortilla on a plate. Spoon the bhurji into the centre of the roti.
Roll the roti up, so that it looks like a burrito.
Your snack/portable lunch is ready 🙂 I like eating it with yoghurt (I am a yoghurt fiend!)
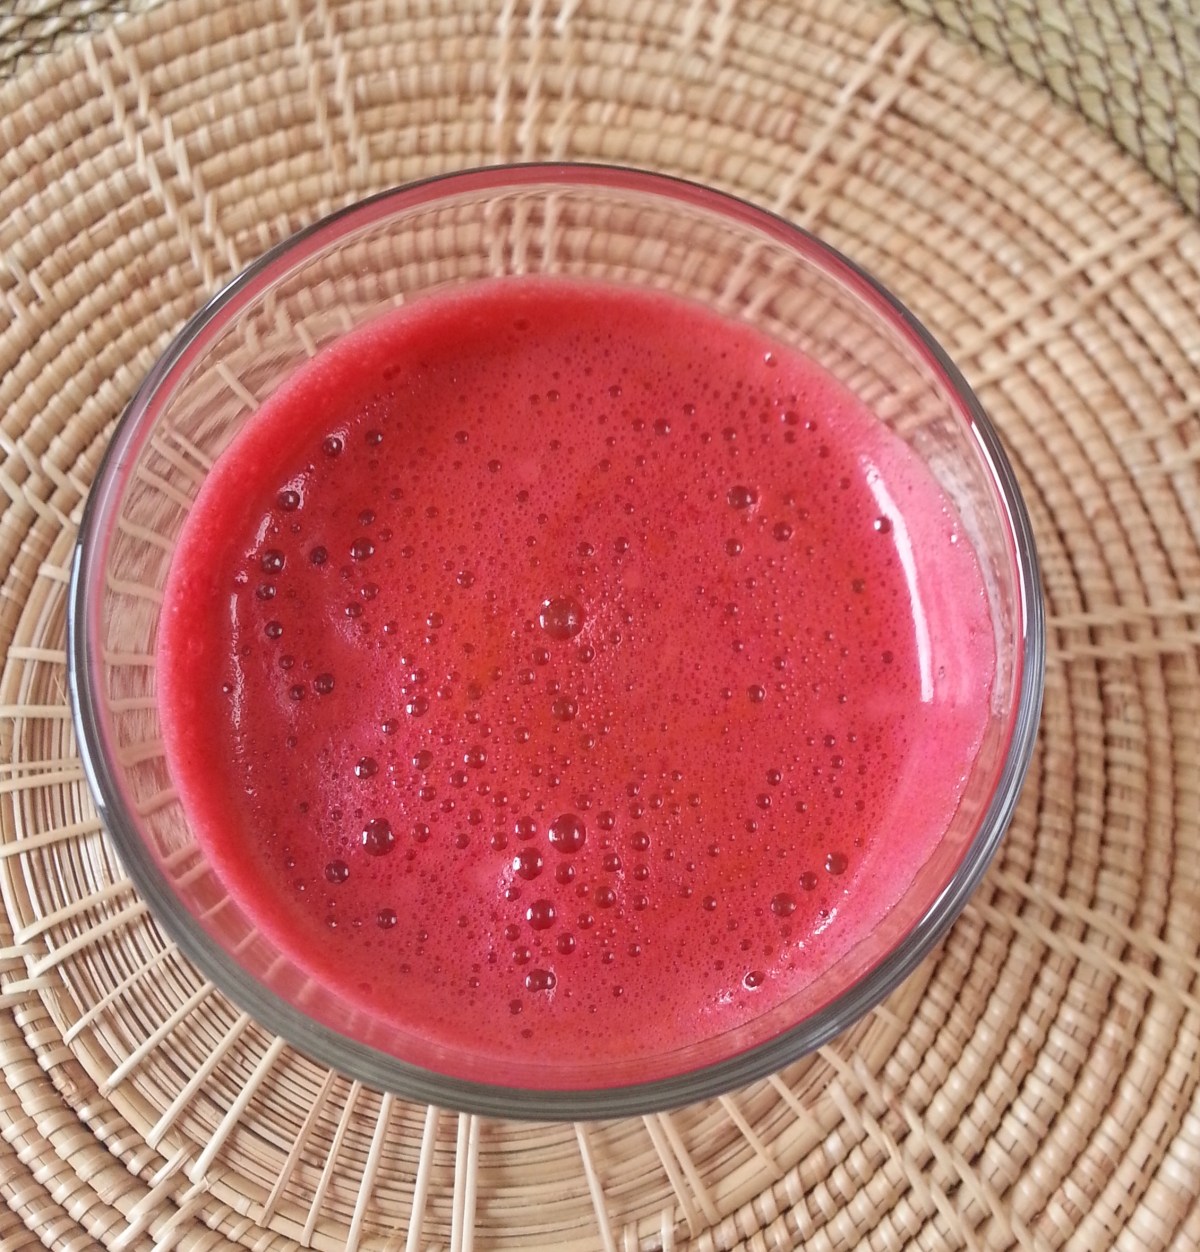
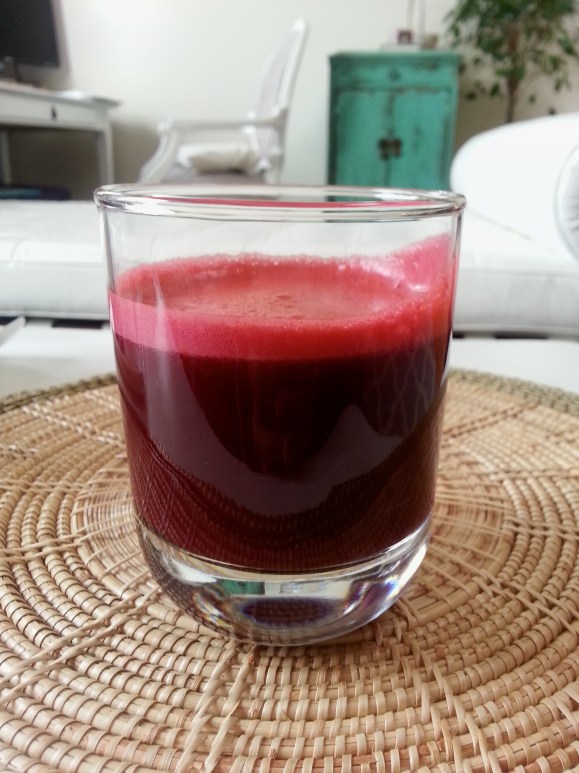
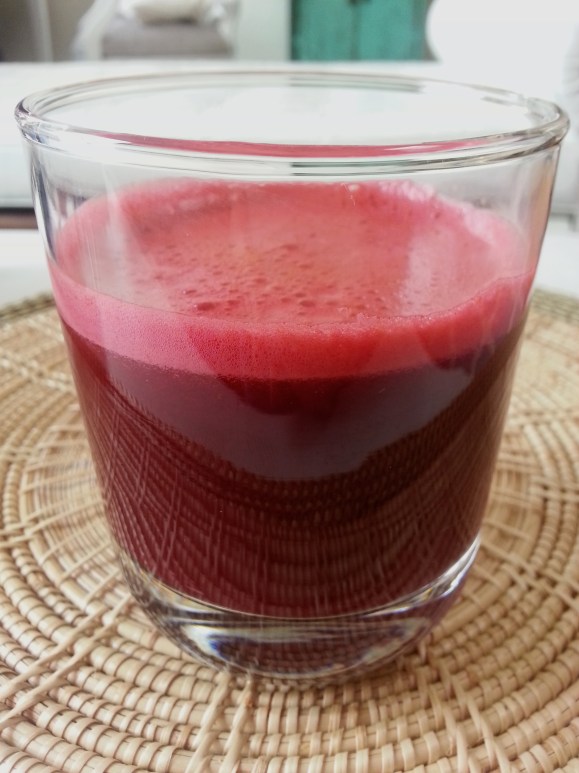
I’ve started drinking fresh juices! If you’ve been reading other posts of mine, you know that I struggle with eating vegetables. I especially hate how crunchy they are. Which is why, if I ever eat them, I eat them very cooked. I have found, however, that I can “drink my vegetables”, even raw vegetables, without too much difficulty. A carrot, beet (beetroot), orange, and ginger concoction I made yesterday for instance, was actually pretty refreshing!
Of course eating whole vegetables is so much better for you. If you’re simply not eating enough vegetables though, for whatever reason, juicing is a good way to supplement your nutrient intake. Also, when it comes to people like me who dislike vegetables, I see juices as the opposite of a gateway drug, they’re a gateway to healthier eating. At least, I am hoping they are.
Anyway, it’s week 2 and I am still keeping at it. Every day, I make myself some juice, varying the vegetables so that I am getting a range of nutrients. If you’re looking to try your hand at juicing and haven’t done it before, this is a great starter juice. I use a juicer, but I have heard of people using a Vitamix and then straining out the pulp if they don’t like it.
Ingredients:
8 Carrots (with the ends cut off)
2 Beets (peeled, with ends cut off) (you can use just one beet if you don’t like the strong “root” flavour of beets and just use 2 extra carrots instead)
1 Orange (peeled) (you could also use an apple)
2 inch Piece of Ginger
Method:
Wash the fruit and vegetables well.
Cut them as needed depending on the size of your juicer feeding tube.
Feed the ingredients into the juicer.
Pour the juice into a glass.
Enjoy your juice 🙂
P.s. You could use the pulp to bake muffins. I plan on trying this out at some point and will update this post, when I do.
Today was a bit chilly compared to the past week and it has been raining all evening. I’ve also been trying to cut down on my sugar consumption. All these factors combined left me craving something warm, delicious, and indulgent. My normal go-to cure for rainy-day blues would be a cup of rich, dark, hot chocolate accompanied by a cookie and some truffles (I’ve written about my idea of a delicious hot chocolate afternoon snack before). Given the fact that I am trying to reduce my sugar-intake for the next week though, hot chocolate was not an option. What then?
I wanted something special, a treat, and something warm…and then, I hit upon it: Fondue! I made several winter trips to Basel (a little town in Switzerland), when I lived in Europe a few years ago. I was even there for the Basler Fasnacht!
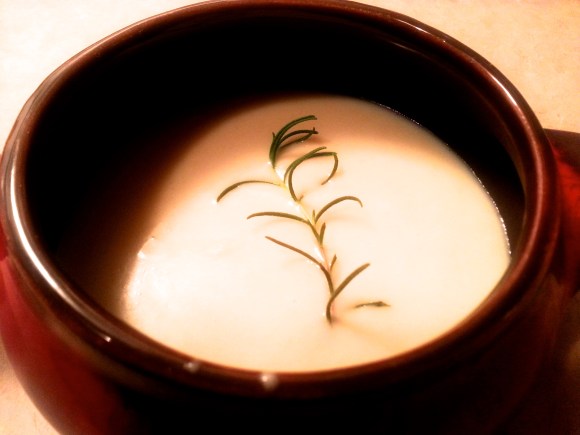
Anyway, I digress, my point is, naturally, one of my favourite things to do in Switzerland was eat Fondue! For lunch, dinner, and dessert! It was delicious! Fondue, I shall make, I decided.
Mmmm. It definitely hit the spot!
This is a fairly simple recipe, with very few ingredients involving even fewer steps. So go for it if you’re at the tail end of a chilly day or in the middle of a cold winter day!
Ingredients:
1/4 pound Gruyere Cheese
1/4 pound Emmentaler Cheese
1/2 Tbsp Corn Starch
A couple of splashes of Kirsch (If you don’t have this, skip it and use a 1/2 Tbsp of lemon juice, instead)
1/2 cup any white wine
1 pod of garlic
A sprig of Rosemary
Ground Pepper (optional)
Toasted slices of bread or blanched vegetables of your choice, to dip into the Fondue
Method:
Grate the cheese. I used a food processor, which makes grating faster and easier.
Cut the garlic clove in half and rub it all over the insides of a small, heavy bottomed pot.
Heat the wine on medium-heat in the garlic-coated pot.
In the meantime, dissolve the cornstarch in the Kirsch. If you don’t have Kirsch, toss the grated cheese with the cornstarch to lightly coat the cheese with the starch.
Once the wine is simmering, add the Kirsch-starch solution, if using.
Next, add the cheese by the handful, waiting for each handful of cheese to melt, before adding the next. Keep stirring in between each round of cheese being added. (At this stage, if you did not use Kirsch, add a half tablespoon of lemon juice.)
Once the cheese is all melted, transfer the cheese to a fondue pot, if you have one. If you don’t have one, and your fondue thickens while you’re eating it, reheat the fondue, on low heat, with a splash of wine.
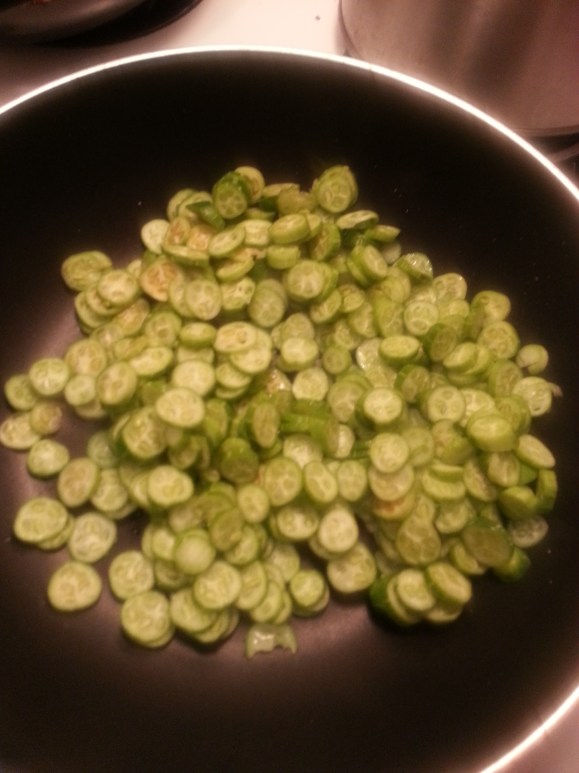
Dondakaya is a common vegetable in Andhra Pradesh (a State in Southern India). While I normally hate eating vegetables, this particular vegetable, prepared in the way my parents make it, I find absolutely delicious! If you’d like to try it, all you have to do is go to an Indian store and ask for “Tindora” which is the Hindi name for it. Once you get your hands on this vegetable, this is a fairly easy recipe to replicate.
Dondakaya or Tindora has a slightly tangy taste, and when sautéed in the manner I describe below, it turns out mostly soft, but slightly crunchy. Overall, it’s a flavourful vegetable with nutritional and health benefits. For one thing, according to WebMd it is “possibly effective” for helping manage diabetes by improving blood sugar control. It is also rich in beta carotene which can be converted by the body to Vitamin A (See Artemis C. Simopolous & C. Gopalan, Plants in Human Health, Basel, Switzerland: Karger, 2003) page 64-65).
If you’d like to give it a try, here is what you will beed:
3 tbsp oil (I use avocado oil, but you can use any oil that doesn’t have a very strong flavour/fragrance)
Method:
1. Slice the Dondakaya either widthways into rings, or lengthways into strips.
2. Add about 1.5 tbsp oil in a pan and heat it at medium-high. Once the oil is hot, add the sliced Dondakaya to the pan.
3. Sauté the Dondakaya for a few minutes, tossing the slices constantly.
4. Cover the pan and let the Dondakaya cook on low heat for about 10-13 minutes until the vegetable is softened.
5. Move the Dondakaya into a separate bowl. Add 1.5 tbsp of oil to the pan again, increase the heat to medium, and add the red chillies and toss until they darken. Then, add the onions and sauté.
6. Once the onions are softened and browned, add the Dondakaya to the pan again, and toss. Season with turmeric, chilli powder and cumin and coriander (if using) and stir the contents of the pan about, for a few minutes, until the spices are more evenly distributed over the Dondakaya pieces.
7. Once the spices are well distributed, take the pan of the heat and serve the DondakayaVepudu!
You can serve it as part of a South Indian meal with Pappu (lentils) and/or Pulusu (a tamarind broth with vegetables) and/or Rasam and/or Sambar, rice, roti, and yogurt.
Sometimes though, when I am busy, I make just the Vepudu and eat it with yogurt 🙂
I made chocolates today and I was going to sit down with a cup of Jasmine tea and write about them. When I looked at my blog home page, however, I realized that my last post was also about chocolate (in fact, a LOT of my posts are about chocolate). Also, Easter was just the other day, so it occurred to me that some of you are probably feeling a little stuffed, maybe even a little ill from all the chocolate eating. In thinking about how guilty and sick you might be feeling, I began to feel somewhat stuffed myself. I’ve been eating loads of homemade, cheese covered pizza and of course, tonnes of chocolate. It was time, I decided, to eat something yummy but healthy.
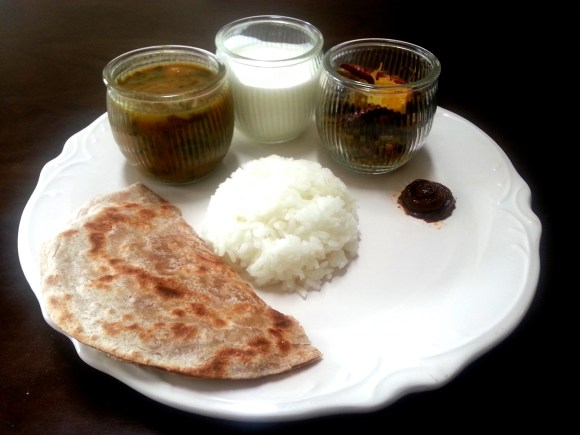
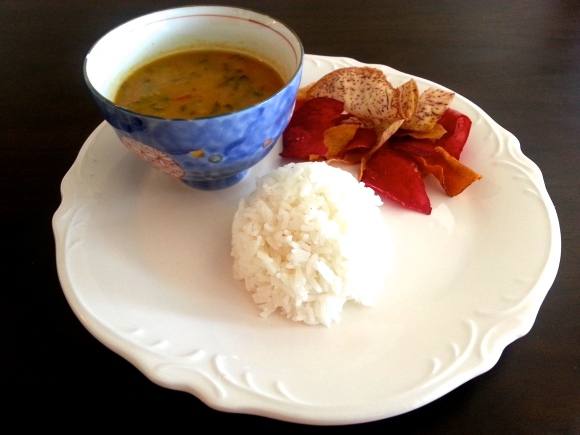
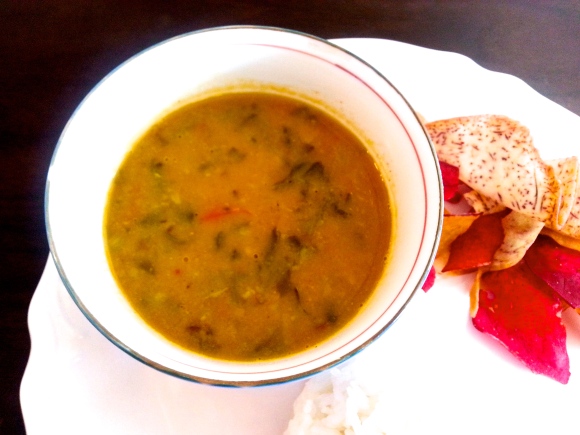
So, I made myself the healthiest lunch that I am capable of enjoying. It included one of my favourite dishes, palak dal (spinach lentils) and was served with rice and baked beets and sweet potatoes.
In general, I hate eating vegetables. The prospect of having to eat a bowl of crunchy and/or leafy vegetables makes me feel ill, miserable and hopeless. Yet, this lunch included tonnes of spinach and I still loved it! The spinach lentils shown above, are as flavourful, as they are good for you (I am no doctor or nutritionist, but I think you will all agree with me when you see the ingredient list). I think spices make vegetables not only edible, but enjoyable 🙂
You can also include rotis and a light vegetable sauté with the meal. I also like to eat some yoghurt along with my meal, but of course, this isn’t compulsory.
A quick note: You can adjust the level of spice easily. In the list of ingredients in the recipe below, I have provided a range of amounts for various spices; you can decide whether you want to stay on the lower side of that range or be brave and add in the highest amount that I recommend.
If you would like to try to make the lentils, the recipe is below; I will write later about the sauté.
Ingredients:
1 cup Pesara Pappu (Moong Dal in Hindi; a type of lentil, native to India; you can also use Toor Dal, or Masoor Dal)
1/2 teaspoon turmeric
2-3 tablespoons of oil (I use either avocado oil or sunflower oil)
1 large onion or 2 medium-sized onions (red or yellow) chopped
1/2 teaspoon grated ginger
3-4 cloves of garlic, skinned (you can also crush them if you don’t like having large pieces of garlic in your dal: I like the chunks :))
3-6 green chilies cut in half lengthwise (You can reduce this amount if you don’t want the dal to be too hot/spicy)
2 medium-sized tomatoes, chopped
1/2 – 1 teaspoon cumin powder
1/2 – 1 teaspoon coriander (cilantro) seed powder
1 – 2 teaspoons red chilli powder
1/2 teaspoon of garam masala (optional)
About a medium-sized bunch of spinach (250 g) (I used organic baby spinach)
1/2 teaspoon brown sugar (you can use white if you don’t have brown sugar) (optional)
Salt to taste
Ingredients for the tadka, baghar, or popu:
1 teaspoon cumin seeds
3-12 dried red chilies
1 or 2 sprigs of fresh curry leaves (optional)
2-4 peeled whole garlic cloves
2-3 tablespoons of ghee (You can get ghee at an Indian store. If you want to make your own, here is my recipe. If you don’t have ghee, you can simply use sunflower oil, vegetable oil, or really any oil with a high smoking point. DO NOT USE BUTTER, it will smoke and burn before the spices are properly fried).
Method:
1. The first thing to do is to prepare the dal (lentils). I use moong dal for this recipe. If you don’t live in India, you should be able to get most lentils at an Indian store. I normally soak lentils for a few hours before I cook them (this helps them cook faster and apparently helps to reduce bloating and gas; I am still looking for studies to back this up, which I will cite here when I find them). If you don’t have the time to do this, you can skip this step. This is how the lentils look soaked:
2. The easiest way to cook dal is to cook it in a pressure cooker. If you don’t have one, just boil the dal in water until its cooked. Add half a teaspoon each of turmeric and salt to the dal before you cook it. Once it’s cooked it should look like this:
3. I like to purée the dal in a food processor/blender/mixie in order to make it into a smooth paste. This makes the texture of the dal smoother and distributes flavour more evenly. This step is completely optional, however. You can skip it without much consequence to the taste of your dal if you do not have either the necessary equipment or the time.
4. In the meantime, heat 2-3 tablespoons of oil in a saucepan. When it’s hot add the chopped onions and sauté them until softened and lightly browned. Now add the ginger, garlic, and green chillies and sauté again until the ginger and garlic is cooked (their raw smell should vanish).
5. Add the tomatoes, followed by cumin powder, coriander powder, red chilli powder, garam masala (if you are using it), and half a teaspoon of salt. Cover and cook all of this for about 10 minutes on low-medium heat.
6. Meanwhile, rinse the spinach well.
7. Place the spinach in a bowl and microwave for a minute, until tender. I like to simply use a herb scissors or a normal pair of scissors and cut up the spinach in the bowl (after it has been microwaved) into slightly smaller bits. If you don’t like this method, you can, of course, chop the spinach on a cutting board with a knife (before or after you microwave it.
8. Add the spinach to the sauce pan, then add the lentils and sugar (if you are using it). Let everything cook for about 5 minutes.
9. The baghar/popu/tadka:
Heat a tablespoon or two of ghee in a little saucepan like this:
Let the ghee get hot. To test if it’s hot enough, throw a single cumin seed into the pan. If it begins to sizzle, add the rest of the cumin and stir the seeds about until they start to pop. When they start to pop, add the curry leaves, garlic cloves and red chilies.
Tadka, popu or baghar
Once the red chillies darken like this:
Add the baghar to the lentils.
Immediately cover the pot.
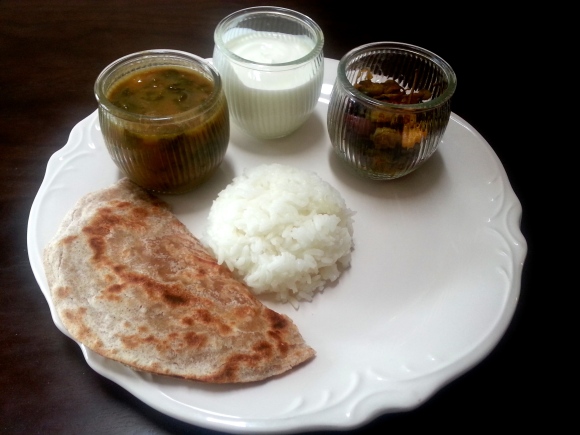
The dal is now ready! Serve it with some hot rice and/or roti, dahi (yogurt), Indian pickle,ghee, and any other accompanying curries or vegetable sauté.
In the photograph below, it is served with rice , roti, dahi (yogurt), some pickle (Gongura pickle, to be precise, which you can get in most Indian stores if you live in North America) and sautéedDondakaya (Indian Ivy Gourd).
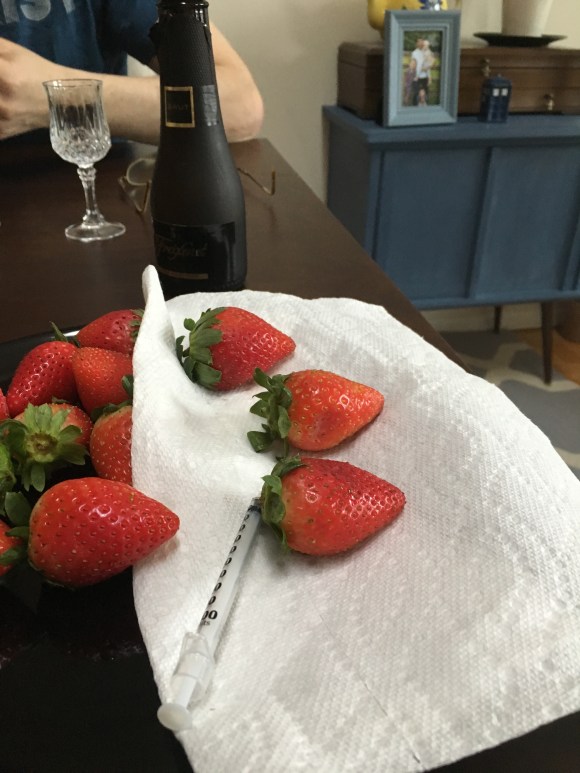
While plain old chocolate-covered strawberries are delicious in themselves (I’ve blogged about those before) some evenings or afternoons call for something with a little more Oomph; champagne gives strawberries exactly that!
Making these champagne-y berries is a little more complicated than simply serving your friends some fruit, but I think they’re fun and worth the effort!
Oh and a quick note: my partner got excited about injecting the berries with other sorts of alcohol, so we tried rum, vodka, and whiskey. We both felt all three options were too strong and they overpowered the strawberries; we would not recommend them!
Ingredients:
12-15 Strawberries
100 g good quality dark chocolate (I used Côte d’Or)
A cup of champagne (you might want to buy a mini-bottle of champagne, unless you want to drink the left-over champagne from a full-size bottle)
Equipment:
A tray
A sheet of parchment paper or wax paper
A syringe
A bain marie (double boiler) and stove, or a bowl and microwave
Method:
1. Wash the strawberries.
2. Fill the syringe with champagne and then inject each strawberry. Just experiment with it a little and see how much champagne you want in each strawberry. You will actually see the fruit fill out and become more plump. You’ll know if you’ve injected too much because the champagne will start squirting out of the fruit. It’s quite a fun process 🙂
3. Once all the berries have been injected, melt some chocolate in a bowl. Ideally, one ought to temper the chocolate (go to this website for a pretty clear explanation of how to do it in case you are not familiar with the process). Tempering will ensure that the chocolate is glossy and shiny. If you don’t have the time and/or the patience, you can skip the tempering.
4. Carefully dip each strawberry into the chocolate, holding the leafy portion of it, and then place it on a tray lined with parchment/wax paper.
5. Once all the berries have been coated, let them set on the tray for about 30 minutes.
I’ve never really been into breakfast; “healthy” breakfast foods have been even less interesting to me. I often just skip breakfast and eat a large lunch instead.
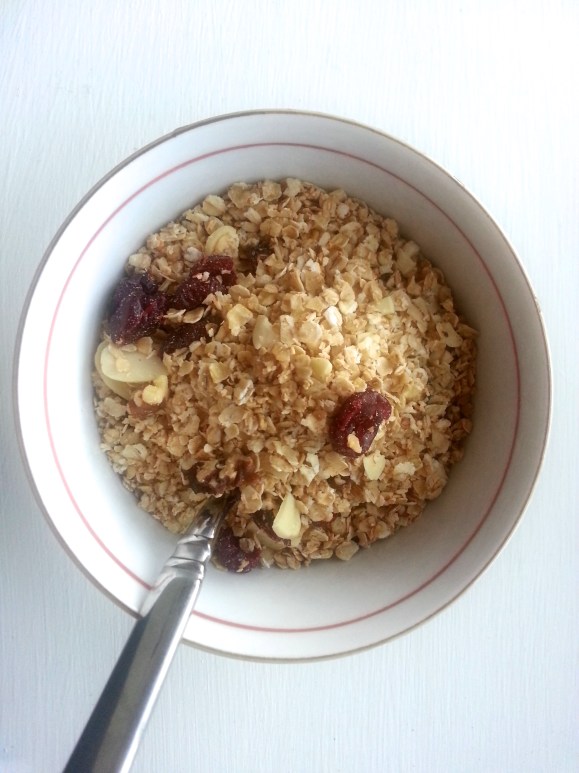
All that changed 2 weeks ago! On Christmas eve, my partner’s Uncle came to visit us and he brought a delicious jar of granola made on his farm along with him. The next morning, before rushing off to spend Christmas day with friends in a neighbouring city, we needed something to eat quickly. The jar of granola was just sitting there on the table, so we opened it up and tried it.
It turns out, I like granola if it’s full of cranberries and coconut 🙂
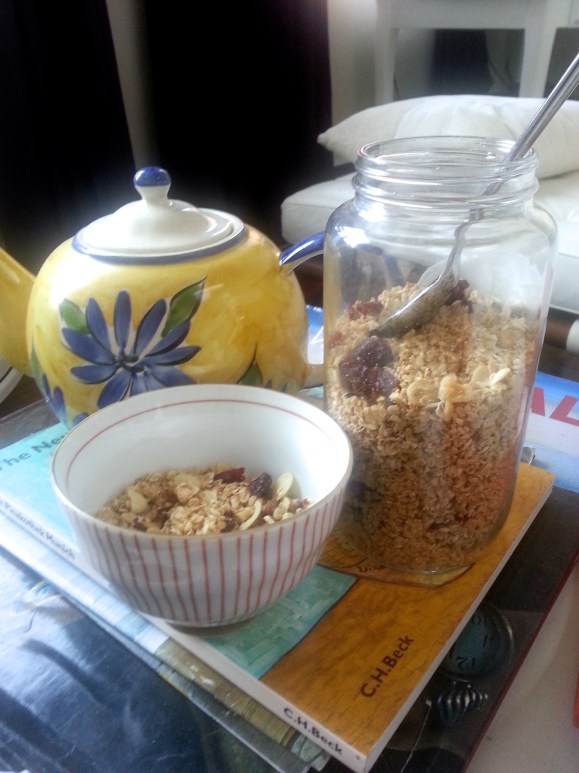
So once that jar-full of granola was gone (which was within the week), I decided to make some more myself. It’s pretty easy; it’s also filled with nutritious ingredients!
If you’d like to try making some too, here’s what you will need (I’ve divided the ingredients into groups to make it easier to describe the steps involved):
Group A:
2 cups of rolled oats
1/3 cup dried, finely grated coconut
1/4 cup chopped walnuts or pecans
1/4 cup sliced almonds
2 pinches of salt
Group B:
1.5 tablespoons virgin coconut oil
20 ml (1 tablespoon + 1 teaspoon) maple syrup (you can add more if you want the granola to be sweeter. I was trying to make a not-so-sweet version. You can also just add more cranberries at the end. I prefer the cranberry option because this means you’ll have extra little bursts of sweetness in your bowl 🙂 )
1/2 tsp vanilla essence
Group C:
Dried cranberries
Method:
Pre-heat oven to 250 fahrenheit.
Measure out and mix together the ingredients in Group A in a large mixing bowl.
Measure out and pour the ingredients in Group B into a microwave safe bowl. Now warm the bowl in the microwave until the coconut oil melts.
Pour the melted ingredients in Group B on the ingredients from Group A, mixing continuously.
Spread the mixture on a rimmed baking sheet and bake for 40-45 minutes, until golden brown, stirring every 15 minutes or so.
6. Once baked, cool the mixture and mix in the cranberries.
7. Store in an airtight container, ideally in the fridge.


")


")