Categories
Baking Chocolate Food General Recipes vegan

Amazing, Almost Ambrosial Vegan Chocolate Chip Cookies

I woke up grumpy, feeling rickety, tired, and ancient. By late afternoon, however, I was quite cheery, even contemplating having a 10 minute solo dance party in my living room. This transformation was in large part thanks to a quick twenty minute yoga session and then, this plate of perfect cookies, alongside a cup of chamomile tea.

What does the perfect cookie taste like, you might ask? What does it feel like when you bite into it? How does it smell? Well, that of course may vary from person to person. To me, a perfect cookie is a chocolate cookie. It is filled with dark chocolate chips and possibly dotted with lightly toasted nuts. It is crisp on the top, bottom, and on its sides, but has a gooey centre. It has the distinct aroma and taste of rich cocoa, a hint of vanilla, and finally, the caramel-like taste of brown sugar. It looks like this:

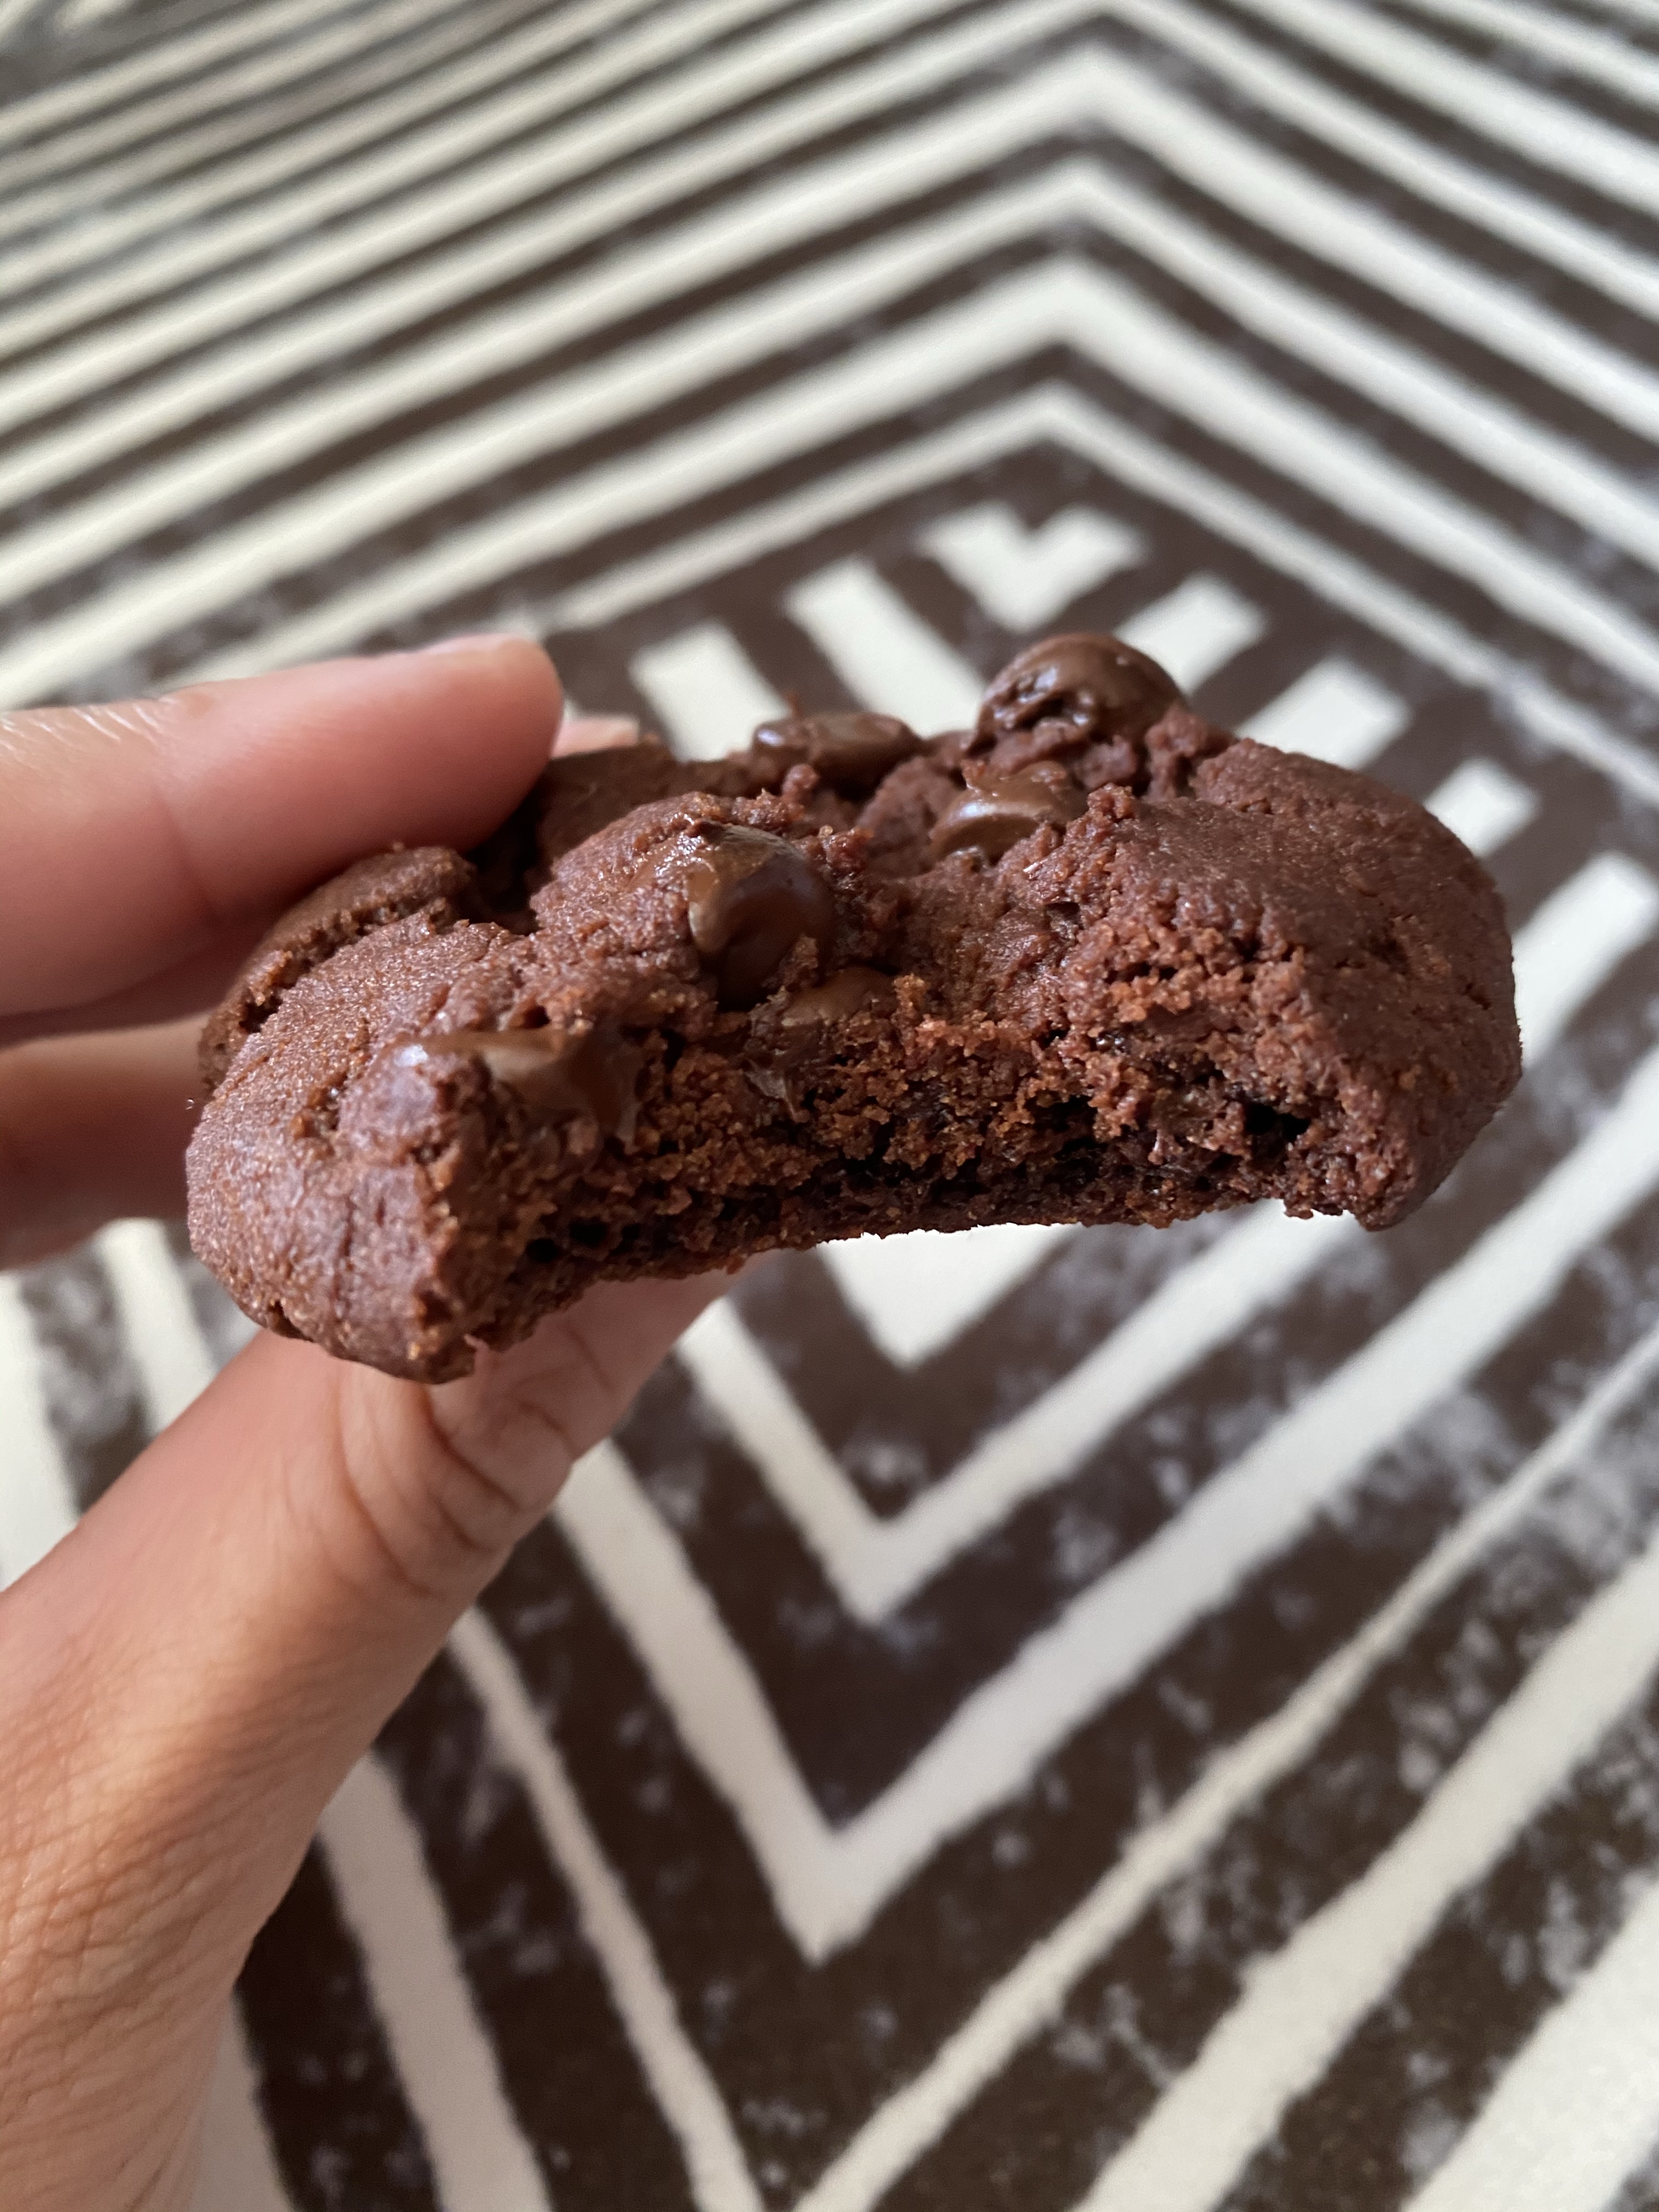
If this sounds and looks like something you might like, then I suggest giving this recipe a shot! Oh and these cookies are completely vegan!

I will say, some people may find these cookies a bit sweet. The trouble is that the recipe requires at least this amount of sugar in order for the cookies to have a crispy exterior and a gooey centre. Moreover, these cookies, while undoubtedly sweet, were not unpleasantly so, to me (just to calibrate my palate/preferences, most North American milk chocolate tastes saccharine to me). Especially, when paired with some unsweetened coffee or tea to offset their sweetness and also, to compliment their crisp and gooey texture.

I sipped on some chamomile tea, made by brewing dried chamomile flowers from our garden, while I ate them.

I think a cup of coffee with these cookies would be great too!

If you want to give making the cookies a shot, here’s what you will need:

Ingredients:

100 g (about 1/2 cup) white sugar

100g (about 1/2 cup) dark brown sugar (if you want to use light brown sugar, use 125g of it and then, reduce the white sugar by 25 g)

112g (about 1/2 cup) vegan butter (I use Earth Balance)

1 teaspoon vanilla extract (I use real vanilla extract, but imitation vanilla extract should work fine in foods treated to relatively high temperatures)

125 g (about 1 cup) all purpose flour

60 g cocoa (about 2/3 cup) (use the best cocoa you have as the better it tastes, the better your cookie will taste)

1 teaspoon baking soda

2 pinches of salt

1-2 tablespoons of almond milk

2 handfuls of vegan semi-sweet chocolate chips (or chop up a bar of your favourite vegan dark chocolate) (you can add less or more, per your preference)

2 handfuls of walnuts, chopped and lightly toasted (toast them in a frying pan until slightly browned and fragrant)

Equipment:

Stand mixer, handheld mixer, or a whisk and strong arms

2 large bowls

1 sieve

A weighing scale or measuring cup

A teaspoon

A baking tray

Some parchment paper

An oven

Method:

  1. Cream the butter and sugar (i.e. beat them together in a stand mixer or in a large bowl with a handheld mixer/eggbeater or whisk) until they form a creamy, thick, pale yellow mixture.
  2. Add in the vanilla extract and continue beating the mixture until the extract is incorporated into it.
  3. Sieve the dry ingredients into a second bowl (flour, cocoa, baking powder, and salt).
  4. Add the dry ingredients to the wet ingredients and mix them altogether with your hands. It will seem like a thick dough. Add in a tablespoon of almond milk and mix it in. If the dough still seems very dry, add in another spoon of the milk.
  5. Toss in the chocolate chips and walnuts and mix them in.
  6. Roll the dough into individual little balls. (I got about 14).
  7. You can bake them all on a baking tray lined with parchment paper (ideally unbleached and compostable) at 350 F for about 12 minutes or so. The cookies are ready when they are slightly firmed up on their sides. They will still seem soft in the centre, but will firm up in about 10 minutes if you just let them cool on the tray.
  8. Alternatively, flash freeze the dough balls in the freezer (i.e. freeze them on a tray or plate) for about 2-3 hours, and once they have frozen, throw them into a freezer ziplock bag and then the freezer. This way, you can pop your head into the freezer and grab some dough whenever you want a fresh cookie! If you choose this route, bake the frozen dough balls directly, without defrosting them, at 350F, but for about 3 minutes longer.
  9. The only problem with the freezing method is that it isn’t very energy-efficient because it involves heating up the oven multiple times. What we’ve been trying to do in our home is to bake various different things in the oven at the same time. For instance, one can also toast bread at 350F. Alternatively, we heat up the oven to 350F, bake the cookies, and then increase the oven temperature to a higher temperature to bake other things, like bread, for example.
  10. Whatever method you choose, I recommend enjoying your warm cookies with a glass of milk, coffee, or tea!
Advertisement
Categories
Baking Chocolate Food General Recipes

Easy Chocolate Cupcakes (with Dark Chocolate Centers and Cream Cheese Frosting)

Dearest readers, I must begin by apologizing for my long absence. I’ve had a very busy summer indeed. But, I am back now, and I thought a great way to apologize would be to bake you all some delicious cupcakes.

Yes, yes, I know that some people are saying that cupcakes are ‘dead’ now and all that, but really, that’s all stuff and nonsense. Like chocolate, cupcakes are forever, or at least, chocolate cupcakes are forever. I can’t speak for lemon flavoured ones, or even about Kiwi ones, or really about any fruit flavoured ones, but chocolate ones, mmmmm…. even contemplating a world without chocolate cupcakes is enough to drive me to utter and complete despair.

I mean, just look at this cupcake:

Easy Recipe for chocolate cupcakes

Can you imagine this ever not being delicious?

So you see, I am convinced that cupcakes are here to stay, whatever the naysayers may say (I agree with most things on Jezebel, but on the issue of cupcakes, Jezebel and I disagree, vehemently, see: http://jezebel.com/fuck-cupcakes-475125988.)

So, given their classic status (at least in my home and heart), here is a delicious and easy recipe for chocolate cupcakes, with some optional frills you can add to make them even more yummy!

Ingredients:

(I’ve divided the ingredients into three groups, so it’s easy to refer to them collectively in the recipe.)

Group A:

1.5 cups unbleached all-purpose flour

1.5 teaspoons baking powder

0.5 teaspoon baking soda

3-4 pinches of salt

Group B:

1 cup sugar

0.75 cups cocoa

0.75 cups sunflower or vegetable oil

1 teaspoon vanilla essence

2 eggs

1 cup 1% milk

Group C (for frosting and chocolate fillings):

Icing sugar (to taste, usually not more than a cup)

8 ounces cream cheese

About 140 g dark chocolate (this amount will vary depending on the darkness of the chocolate you choose and your taste as well).

About 40 g milk chocolate

1 teaspoon vanilla essence

Method:

1. Pre-heat the oven to 350 degrees Fahrenheit (180 degrees celsius).

2. Whisk all the ingredients in ‘Group A’ together in a bowl.

3. Whisk the sugar and cocoa together in another bowl. Add all the other ingredients in ‘Group B’, except the milk, and beat with an electric mixer on medium to high-speed, until the mixture is smooth.

4. Now beat the ‘Group A’ ingredients into the mixture from step 3, a few spoonfuls at a time, alternating with the milk. Beat until smooth. This is your cupcake batter. You can mix a handful or two of chocolate chips, if you like, at this stage.

5. Ladle or pour the batter into cupcake cups placed in a cupcake or muffin baking tray.

6. Place the tray in the oven and bake for about 20 minutes, until a toothpick inserted in the centre of the cupcakes comes out clean. Do not over bake as the cakes will then end up dry.

7. Once the cakes have cooled, take them out of the mold/tray. You can eat them as they are, or you can give them dark chocolate centers and frost them.

8. To give them chocolate centers, melt 6 squares (about 60 g) of your favourite dark chocolate (make sure it’s not too dark, as you want the centre to be soft at room temperature, rather than hard and gritty) with 4 squares (about 40 g) of milk chocolate in a bowl in the microwave on a very low heat setting, or in a double boiler. While the chocolate is melting, use a cupcake corer, or a knife to carefully bore a hole into the cupcakes from the top, to about midway into the cupcake (make sure not to go all the way to the bottom), and take out some of the cake to create space for the chocolate. Once the chocolate is melted, spoon some chocolate into each cupcake. Let the chocolate cool. (Note: don’t wash the bowl you use in this step to melt the chocolate in, just yet.)

9. In the meantime, place an 8 ounce brick of cream cheese in a bowl, and beat it with an electric mixer, until it’s smooth and creamy. Add a teaspoon of vanilla essence, and a few tablespoons of icing sugar, then beat the mixture, and taste it. Keep adding sugar by the spoonful until it tastes just right. Now melt about 8 squares of dark chocolate (80 g) (my measurements for the chocolate are approximate because each person will want different amounts of chocolate in the frosting; so go by what tastes right) in the same bowl used in step 8. Pour this chocolate into the cream cheese-sugar mixture. Make sure that the chocolate is only warm, not hot. Now beat it all together until smooth. Your frosting is ready.

10. Spoon the frosting into an icing bag (if you don’t have one, you can spoon the icing into a sandwich bag or other type of plastic bag and cut a whole at one corner of it). Holding up each cupcake, swirl frosting on it.

11. Top off the cupcake with dark chocolate shavings, if you feel like.

12. You can also make cupcakes with mint buttercream frosting, as shown in the photo below. Just beat a cup of unsalted butter with a few drops of mint essence, a few drops of green food colouring, and icing sugar to taste. Then follow the same steps for frosting the cupcakes as described in 10 and 11.

13. Eat the cakes yourself, or throw a cupcake party for your friends 🙂

Cupcakes with chocolate cream cheese icing

Chocolate cupcakes with mint buttercream frosting

Categories
Baking Chocolate Food General Recipes

In Praise of Spontaneity and Vanilla and Espresso Buttercream Frosting

One of the things that often irks me about living in North America is how much people seem to plan and organize their social lives. Speaking broadly of course, based on anecdotal evidence from my life, I find that people in India are far more spontaneous. I think there is something nice about being able to phone a friend and make an impromptu plan for the same day once in a while. But, here, more often than not, people plan dinner parties and drinks weeks in advance.

Unfortunately, having to pencil appointments with my friends into my calendar really doesn’t work for my personality. I often find myself feeling tired, or un-social, and want nothing more than to sit on the couch with a book, but end up having to go out because I accepted an invitation weeks ago. People may have gone to considerable trouble to cook for me, or a the very least they’ve set aside time to see me, so I feel compelled to go. At other times, I have a spontaneous urge to go out and see people, but end up staying in, because I haven’t made any plans with anyone.

I realize that part of life is having to do things one doesn’t feel like doing, but when it comes to how we interact with one another, I don’t think it has to be this way, and it isn’t this way in India. Of course, the ‘impromptu system’ I am advocating has its own drawbacks. In spite of its flaws however, I prefer this system to what I see as an overly organized North American model.

Luckily, that’s all it is, a model; which means not everyone follows it and I’ve managed to find a few people here who like spontaneity once in a while too 🙂 All of this has meant that last evening, I was able to indulge in one of the small, simple joys of life, namely throwing an impromptu soiree. The plan was made frantically, over multiple text messages, sometime last afternoon. After which, I could be seen running about trying to throw some snacks together. Since spontaneity was the theme, I even decided to bake a cake! It turned out pretty well, but what I really liked about it was the icing, so I thought I would share the recipe here with you 🙂

Ingredients:

1 Chocolate Cake

4 Eggs

1 Cup Sugar

2 Pinches of Salt

3 Sticks of Butter

1 tsp Vanilla Essence

1 tbsp Instant Espresso

Method:

Place the sugar, salt and eggs in a double boiler (just place them in a heat proof bowl and then place the bowl over another bowl of simmer water, make sure not to let the bottom of the first bowl touch the water). Gently and continuously, whisk the mixture while it heats up. Using a thermometer check the temperature of the mixture periodically. When the temperature reaches 160 F, take the mixture of the heat. Now beat the mixture at high-speed until it becomes fluffy and airy and reaches room temperature. Then add the butter in, half a stick at a time, beating continuously at medium speed. Once the butter is whipped in, separate the mixture into two equal parts in two bowls.

In the first bowl beat in the espresso at high-speed until you have a really light fluffy frosting.

Next, cut the cake in half. (Ideally, when you bake the cake, bake it in two separate bowls so that you have two layers without having to slice the cake in half later). Using a spatula spread a thick layer of espresso frosting over the top of the bottom layer. You don’t have to worry about doing this neatly. Make sure to leave aside about 3-4 tablespoons of frosting to decorate the top of the cake with. Then place the top layer of the cake on top of the frosting.

In the second bowl, beat in the vanilla essence, until you have a smooth, fluffy texture.

Using a separate spatula, spread this over the top and sides of the cake. Once you have a somewhat smooth (it does not have to be flawless) surface, use a basting brush to draw fine decorative lines along the sides and top of the cake. Finally, fill some of the left over frosting into a frosting bag and squeeze little bits of it on the top the cake in whatever pattern you like.

And there you have it, a white vanilla butter-cream frosted cake with a creamy espresso layer in the middle. Mmmm.

Mine turned out a little lopsided 😦 clearly I have to work some more on my decorative skills. However, it tasted pretty darned good and got rave reviews at my party 🙂

Categories
Baking Chocolate Food General Recipes

The Hazelnuttiest Cake in the World

My very first post on this blog was about a Nutella cake. While baking that cake, I used a recipe from Nigella Lawson’s book, ‘How to Be a Domestic Goddess’, as a guide. I really liked that cake, as is evident from my post about it, but there was one thing about it that bothered me. I didn’t like the fact that the cake called for Nutella, which is after all a processed food from the supermarket. I’d rather make a cake from scratch, or as close to from scratch as is possible for someone who lives in a little apartment in a big city. That way, I have a little more control over what goes into it. Last week, I tried making a more ‘wholesome’ and ‘homemade’ option as it were, based off a recipe from ‘Baking Illustrated’.

How did it turn out you ask? Well see for yourself:

Recipe for Dark Chocolate Hazelnut Cake

Truly, I liked the taste of this cake even better than my earlier attempt; the big bonus of this new recipe is that the cake turns out even more hazelnutty, which is GOOD, because hazelnuts are heavenly 🙂

If you want to make this cake too, here’s what you will need:

Equipment:

A 23 cm or 9 inch spring-form pan, two large bowls, two smaller bowls, a hand-held or stand-alone mixer or a whisk, a food-processor or mortar and pestle, and a tea towel.

Ingredients:

For the Cake:

6 free range eggs (I insist on free-range after seeing some horrific videos of how chicks and hens are treated in “egg factories”.

A pinch of salt

1 stick of unsalted butter 

200 g hazelnuts

1 cup granulated sugar

2 tablespoons all-purpose flour

175 g dark chocolate (at least 70% cocoa solids)

For the Icing:

150 ml heavy cream or whipping cream

150 g good quality dark chocolate (at least 70% cocoa solids), chopped

2-3 Tablespoons fo Frangelico

A pinch of Salt

2 handfuls of hazelnuts 

A half cup or so of dark chocolate flakes (you can make these by using a paring knife or a vegetable peeler on some dark chocolate).

Preparing the Ingredients:

To begin with, I made sure to lay all the ingredients out on my dining table. When you’re baking, unless the recipe otherwise specifies, it is best to use all ingredients at room temperature. Next, I turned on the oven and preheated it to 350 degrees Fahrenheit.

Preparing the hazelnuts: I toasted the nuts (both those you need for the cake and those you need for decorating the top of the cake) in the oven at 350 Fahrenheit for about 10 minutes, tossing them once or twice in-between. Once they were lightly browned and I could smell the delicious hazelnutty aroma, I took them out of the oven and let them cool for a bit. Then, I placed them in a tea-towel and rubbed the nuts against each other until their skins peeled off.

Next, I put 200 g of the toasted and skinned nuts in a food processor, along with 2 tablespoons of flour and 1/4 cup of sugar and processed them till fine (you could also use a coffee grinder or mortar and pestle).

Preparing the chocolate: I melted the chocolate in a microwave, taking care to use a low heat setting, so as not to burn the chocolate.

Preparing the eggs: I separated the egg yolks from the whites, placing 5 egg whites in a large bowl and 6 egg yolks in a smaller bowl. (You can throw away the extra egg white or use it in a face or hair mask.)

Some people think separating the egg white and yolk and beating them separately is a waste of time, but it isn’t if your recipe does not call for baking powder/soda. This is because all the air in your cake will have to come from the egg whites, since there is no chemical raising agent added to the cake.

I was now ready to begin! What follows are step-by-step instructions to re-create the rich nutty cake I made today! Enjoy!

Method:

1. Place the butter in a large bowl and beat until fluffy. Next, add the remaining three-quarters of sugar, one-quarter at a time, until creamy and almost white. Now add the egg yolks two tablespoons at a time, beating well throughout. Next, add the melted chocolate (which would have cooled a bit by now) and beat the mixture until the chocolate is blended in. Then, gently stir in the hazelnut meal that you have already prepared in the food processor.

2. Now we beat the egg whites; this is the slightly tricky part of the recipe. Add a pinch of salt to the whites and then beat them until they are ‘stiff but not dry”. What this means is that you want to be able to make the foamy whites rise to a peak with your finger.

How to properly beat egg whites
Stiff egg-whites
Another way to test this is to take a clean dry egg and try to float it on top of the egg-white foam. If it sinks you’re not done. If it floats completely you’ve overdone it. If it sinks just a quarter of an inch, well you’re egg-whites are perfect then! Make sure the bowl and the whisk you use are perfectly clean, i.e. they are free from oil and water.

3. Once the egg whites are ready, add a dollop of the egg-white-foam to the mixture from step 1 and mix it in. Next, very gently and with a light hand, fold in the rest of the foam. This is important; don’t be rough at this stage; because we want to preserve the airy-ness and lightness of the foam. Here is a video that shows you how to do it:

4. When you’re done folding the foam in, pour the batter in a greased and floured 9 inch or 23 cm springform pan.

Delicious Hazelnut Cake

5. Slide the pan into the oven and set the timer for 50 minutes. I would go and check on the cake toward the tail-end of this period, say around 45 minutes in. The cake is done when you can insert a tooth-pick gently into the cake, about halfway between the centre and the edge of the cake, and it comes out clean when you pull it out.

6. When it’s done, take the cake out and cool it on a cooling rack. Once it has cooled remove the sides of the pan.

(At this stage of the process, I already noticed one thing that was better about this cake when compared to my earlier Gianduja cake. The surface of this cake was smoother; there were no cracks on this cake at all. Also, it was more evenly baked. (The small nick visible in the picture was made by me with a knife, it wasn’t a crack on the surface.)

Hazelnut cake

7. Now the cake is ready and it’s time to make the icing! Heat 150 ml of cream and 150 g of chopped chocolate in a saucepan over low heat. Once it’s melted, add a pinch of salt and the Frangelico. Mix and let the ganache sit on the counter and cool for a bit. In the meantime, take the 2 handfuls of hazelnuts you toasted earlier, and crush them in a mortar or pestle or processor. I like to crush them into small chunks, you can choose to crush them more finely, or coarsely, whatever works for you.

8. Once cooled a bit, pour the ganache over the cake and spread it evenly over it, using an icing spatula or a large, broad knife.

Icing a Hazelnut cake with Dark Chocolate Ganache
I couldn’t glaze the cake until the day after I baked it because I had errands to run. Mysteriously, more than a quarter of the cake just disappeared overnight, so I ended up glazing the left-over part of the cake 😛
Next, garnish the cake with crushed hazelnuts and dark chocolate flakes and serve with a shot of Frangelico 🙂

Rich, hazelnut cake served with Frangelico
This rich hazelnut cake tastes best when served with Frangelico
Also, a little tip, if you’re going to store the cake for a while, make sure to heat it up quickly in the microwave when you take it out of the fridge. Just heat for 20-30 seconds on a low setting; both the cake and the icing taste waaay nicer that way.

Mmm this cake was utterly delicious, it’s totally worth the effort of baking it, I promise!

Chocolatey Hazelnut Cake
Eating my Delicious Hazelnut Cake 🙂

Categories
Baking Chocolate Food Recipes

Universal Dark Chocolate Icing Recipe

After making the Gianduja cake earlier today (see earlier post) I sat down to figure out what sort of icing would work with the cake. As I said in my earlier post, I used a recipe from Nigella lawson’s book, “How to be a Domestic Goddess” for the cake. However, I didn’t really like the sound of the dark chocolate ganache she recommended for the cake. It didn’t sound bad or anything, I mean how can “dark chocolate ganache” be bad, but it didn’t sound perfect to me (I have particular preferences. For instance, I always prefer buttercream frosting to cream-based frosting). Also, I didn’t have enough cream at home. So I decided to wing it, as it were. And this is what I came up with.

What you need:

Equipment:

Mortar and pestle (if you want to add toasted ground hazelnuts on top of the icing) 

Spatula or knife to spread icing

A double boiler or a small bowl and a microwave

A food processor or stand-alone mixer OR 1 large bowl and a hand-held mixer or whisk.

Ingredients:

100 g bar of good quality dark chocolate (at least 70% cocoa solids)

A few tablespoons of the heaviest cream you can find (in Canada you’ll have to settle for whipping cream which is about 38% I believe)

1/2 tsp vanilla essense

About a cup of icing sugar

1 1/3 stick of unsalted butter

Two handfuls of hazelnuts

There is a reason these measurements are so imprecise. I just sort of experimented. They say that cooking is an art-form because you can adjust ingredients and spices to taste, whereas baking is science. This is generally true I think, but frosting is a little more on the art side of the scale than baking a cake is. What I mean is you can have an adjustable frosting recipe. I find most frosting to be too sweet and creamy- I would prefer it to be more buttery and chocolately. I also like to put a lot of frosting on my cake 🙂 This is why I have listed approximate measures here.

Preparing the chocolate: Melt the chocolate in a double boiler or microwave.

Preparing the hazelnuts: Toast the hazelnuts in the oven at 375 farenheit (that’s 180 celsius) for about 10 minutes, tossing the nuts once during this time. Let them cool and then place them in a tea-towel and rub them against each other until they lose their skins. Then place them in a mortar and pestle and coarsely grind them. I suggested a mortar and pestle rather than a dry-grinder because this way you can make sure you break up all the nuts without reducing most of the nuts to a powder.

Method:

I began by putting about 3/4 cup of icing sugar into my food processor. I then processed it to get rid of any lumps. Next, I added the butter to this and processed it again, until it was a smooth, creamy mix. If you don’t have a processor just put the sugar and butter in a large bowl and use an egg-beater ( or whisk).

I tasted it at this point and felt it wasn’t sweet enough, so I added a little sugar and then a little more and a little more- until it was just right. I think each person’s desired level of sweetness differs, so this is a great way to make the icing just right for you! At this point, I added the vanilla essence and two tablespoons of heavy cream and gave the whole mixture a nice whirl in the processor. I made sure that the mixture was creamy and light at this point.

The next step was to add the chocolate. I spooned about 3/4 of the chocolate into the processor and processed it.

Upon tasting the icing it I found it needed more chocolate, so I added some more melted chocolate. I also added one more tablespoon of cream to the mix and gave the whole thing a few more whirls until everything was nicely mixed up and I had a smooth, creamy chocolatey frosting.

In the mean time, the Gianduja cake had been cooling on the dining table. I poured the icing at the centre of the cake and then spread it over the cake.

You can get angled spatulas that are great for spreading icing – since I didn’t have one, I used this:

Periodically, I rinsed off the extra icing on the knife in warm water and shook off the extra water. This made it easier to spread the icing.

I finally managed to spread the icing somewhat evenly over the cake. It didn’t matter that much if it wasn’t perfectly even because I was going to top it off with nuts. Finally, I sprinkled the toasted, crushed hazelnuts all over the cake.

And the end result was this:

Which my friends will be enjoying tomorrow when I have them over for tea! I already sneaked a piece though, and it was absolutely YUMMY! I recommend this recipe to anyone who likes chocolate and nuts and doesn’t like their desserts overly sweet.

I cannot stress this enough though, this icing tastes best when it’s warm. So reheat a cake slice in the microwave before you serve it.

Categories
Baking Chocolate Food Recipes

Flourless Gianduja Cake (a.k.a. the best Nutella cake in the Universe)

Ever since I returned from India last week I have been feeling sickish intermittently. I woke up this morning feeling more drained than usual, so in an effort to cheer myself up I decided to bake.

I walked over to the neighborhood Public Library, which, by the way, happens to be 2 minutes away from my apartment, and checked out Nigella Lawson’s “How to be a Domestic Goddess”. I browsed through the book and when I came upon her recipe for “Torta Alla Gianduja”, well I was quite excited to say the least. You see, I have loved Nutella for most of my adult life with an unhealthy, even disturbing fervour and devotion. (I would have loved it as a child, but I grew up in India at a time when “foreign products” were difficult to come by. My parents brought me chocolate from all over the world because they traveled quite a bit, but for some reason they never did buy me nutella. Even peanut butter I only chanced upon when my American cousins brought a jar with them on their visit to India. (Needless to say I was smitten, but that ramble is for another blog-post.))

Back to the recipe, the Nutella cake seemed fairly simple to make- so I decided to give it a try. I modified the recipe a bit, and the icing I used (the recipe for which can be found in my next post) was quite different from the one Nigella recommended. You can find her original recipe here:

What follows is a blow-by-blow account of how the experiment went, complete with amateur pictures taken with my iPhone.

What you will need:

Equipment:

A 23 cm spring-form pan, two large bowls, two smaller bowls, a hand-held or stand-alone mixer or a whisk, a food-processor or mortar and pestle, and a tea towel.

Ingredients:

6 free range eggs (I insist on free-range after seeing some horrific videos of how chicks and hens are treated in “egg factories”.

A pinch of salt

1 stick of salted butter (the recipe calls for unsalted butter, but I like a little bit more salt in my chocolate recipes than most, I find it balances the flavour well. In addition, salted butter is cheaper at the super-market by mine (for some mysterious reason). Therefore, I decided to use salted butter.)

1 375g jar of Nutella

1 Tbsp Jamaican Rum (the recipe calls for Frangelico, but my neighborhood LCBO (for my non-Ontario friends, this is the only store that sells alcohol in Ontario, apart from the beer store and a few random wine stores that sell only Canadian wine) (it’s weird I know!) didn’t have any.)

100 g Hazelnuts

100g Lindt dark chocolate ( with at least 70 % cocoa solids)

To begin with, I made sure to lay all the ingredients out on my dining table. When you’re baking, unless the recipe otherwise specifies, it is best to use all ingredients at room temperature. Next, I turned on the oven and preheated it to 375 degrees farenheit (that’s 180 celsius).

Preparing the hazelnuts: I toasted the nuts in the oven at 375 farenheit for about 10 minutes, tossing them once or twice in-between. Next, I let them cool a bit and then placed them in a tea-towel. Then I rubbed the nuts against the towel until their skins peeled off. Then, I put the nuts in a food processor (you could also use a coffee grinder or mortar and pestle) and processed them till fine.

Preparing the chocolate: I melted the chocolate over a double boiler (you can use a microwave, but be careful not to burn the chocolate then).

I was now ready to begin! What follows are step-by-step instructions to re-create the delish cake I made today! Enjoy!

The first step of the baking process involved separating the whites and yolks of 6 eggs. (Make sure to put the whites in a large bowl). Some people think separating the egg white and yolk and beating them separately is a waste of time. But it isn’t if your recipe does not call for baking powder/soda. Your cake will not rise properly if you don’t beat the whites properly in that cake.

After separating the whites and yolks, add the pinch of salt to the whites and then beat them until they are ‘stiff but not dry”. What this means is that you want to be able to make the foamy whites rise to a peak with your finger. Another way to test this is to take a clean dry egg and try to float it on top of the egg-white foam. If it sinks you’re not done. If it floats completely you’ve overdone it. If it sinks just a quarter of an inch- well you’re egg-whites are perfect then! Make sure the bowl and the whisk you use are perfectly clean- i.e. they are free from oil and water.

Stiff egg-white
Next, beat the Nutella and butter together, until they are well-mixed and creamy. Then add the rum. Beat. Next add egg yolks. Beat. Finally beat in the ground hazelnuts.

Nutella batter!
Then, fold in the dark chocolate. Next, add a dollop of the egg-white-foam and beat it in. Finally, slowly and gently fold in the rest of the foam. This is important- don’t be rough at this stage- because we want to preserve the airy-ness and lightness of the foam. Here is a video that shows you how to do it:

When you’re done folding the foam in, pour the batter in a greased and floured 23 inch springform pan.

Batter in the pan
Slide the pan into the oven and set the timer for 40 minutes. I would go and check on it towards the tail-end of this period. The cake is done when it starts separating from the sides of the tin. You can do the tooth-pick test to confirm (insert a toothpick gently in and see if it is clean when you pull it out).

When it’s done, take it out and cool it on a cooling rack. I don’t have one so I made a makeshift one:

My cake cooling!
And when it’s cooled remove the sides of the pan:

As you can see, I couldn
Now the cake is ready! I am off to go make some chocolate ganache to ice it with now. Yay! You can find the recipe for the icing in the next post. Also, a little tip- if you’re going to store the cake for a while, make sure to heat it up quickly in the microwave when you take it out of the fridge. Just heat for 20-30 seconds on low- both the cake and the icing taste waaay nicer that way.

Oh and by the way, since the cake is flour-less it’s gluten-free!