Categories
Cooking Food General Indian Cooking Recipes

Heavenly, Healthy Hyderabadi Palak Dal (Spinach Lentils)

I made some absolutely delicious truffles today, and I was all set to write a post about it. Then I looked at my blog home page and realized that my last post was also about truffles. (In fact, a LOT of my posts are about truffles.) Also, Easter was just the other day, so it occurred to me that some of you are probably feeling a little stuffed, maybe even a little ill from all the chocolate eating. In thinking about how guilty and sick you might be feeling, I began to feel somewhat stuffed myself. I’ve been eating loads of homemade, delicious but cheese covered pizza and of course, tonnes of chocolate. It was time, I decided, to eat something yummy but healthy. And so, I made myself the healthiest dinner that I am capable of eating. I have difficulty eating leafy vegetables you see, they literally make me feel unhappy and hopeless. But this particular magical recipe for spinach lentils that I am about to share with you is as spicy and flavourful, as it is good for you. I am no doctor or nutritionist, but I think you’ll all agree with me when you see the ingredient list.

Hyderabadi Palak Dal (Spinach Lentils) with RiceOh and as you can see from the title, this is a Hyderabadi recipe. Hyderabad is the capital of a southern State in India: Andhra Pradesh. It was the seat of the Nizams, who ruled Hyderabad for about 2 centuries. The word Nizam or Nizam-ul-mulk means ‘administrator of the realm’ or ‘governor of the nation’ in Urdu. This is because the first Nizam was originally appointed by the Mughal emperor to oversee and govern Southern India on his behalf. As the Mughal empire began to crumble (for a brief overview of Mughal history go here), Asaf Jha who was a Mughal noble and a Nizam, declared independence from the Mughals and founded his own dynasty, the Asaf Jha dynasty, also known as the Nizams.

The history of the Nizams is of course more complex than this little paragraph intimates. It is full of battles, intrigue and all the other stuff that good history is made of. But this post is about food, also I am not a historian. I just wanted to give you this brief little background so you can understand Hyderabadi cuisine better. I would recommend reading more about the Nizams though, about their food, jewellery and architecture in particular.

Because the Nizams were essentially nobles from the Mughal court, their food was strongly influenced by Mughlai cuisine. But South Indian food, more precisely Andhra food, i.e. the food the locals ate (and continue to eat today) before the Nizams came to Hyderabad, is also delicious and distinctive. Typical Andhra foods include: spicy peppery Rasam; Chappala Pulusu (fish curry); and Erra Avakaya. So it isn’t surprising that Hyderabadi food blends Andhra and Mughlai styles. Andhra food itself can be broken down into several different types based on different regions of the State. There are also hints of Arab, Turkish, Parsi and other influences in Hyderabadi food. So you see, it is bastardized, pluralistic, and historically rich.

It is also amongst the most delicious cuisines on earth. I kid you not. It’s as spicy as South Indian Andhra food, its magnificence equals Mughlai food (like dal Makhani), and it’s as rich and flavourful as Italian food can be.

(And while I am not appointing myself final arbiter of the best food known to man, I think a woman who has a blog (mostly) about food, a woman who goes into raptures about food, a woman whose very mental stability depends on the availability of a delicious meal, in short a food-crazed woman, should be taken very seriously.)

Anyway, now that you’re sold on its deliciousness, here it is, a spicy palak dal- Hyderabadi style:

Ingredients:

1 cup of moong dal (a type of lentil, native to India)

1/2 teaspoon haldi/pasupu/turmeric powder

1/2 teaspoon grated ginger

1/2 teaspoon crushed garlic

About a medium sized bunch of spinach

1/2 tablespoon dried mango powder (Amchur)

5-6 green chilies cut in half lengthwise

2-3 sprigs of coriander/cilantro

Salt to taste

(The following are the ingredients for the tadka baghar or popu)

1 teaspoon cumin seeds

1/2 teaspoon mustard seeds

5 dried red chilies

5-6 fresh curry leaves or about 10 dried ones

4 peeled whole garlic cloves

2-3 tablespoons of ghee (you can get ghee at an Indian store; if you want to make south Indian ghee, you can read my recipe here)

Method:

The first thing to do is to prepare the dal (lentils). I use moong dal for this recipe. You should be able to get these lentils at an Indian store, if you don’t live in India. I normally soak lentils for about 20 minutes before I cook them. If you don’t have the time to do this, you can skip this step. This is how the lentils look soaked:

Moong dal (lentils native to the Indian subcontinent)The easiest way to cook dal is to cook it in a pressure cooker. If you don’t have one, just boil the dal in water until its cooked. Add half a teaspoon of turmeric and some salt to the dal before you cook it. Once it’s cooked it should look like this: Cooked moong dalNext, heat one tablespoon of oil in a saucepan. When it’s hot add the ginger and garlic. Fry the ginger and garlic until cooked (slightly browned, but not burnt). Add the spinach to the ginger-garlic and let it cook, stirring occasionally. Once the spinach is tender, add the lentils.

Hyderabadi Palak Dal (Spinach Lentils)

Let this cook for about 10 minutes. Then add half a tablespoon of dried Mango powder (Amchur), the green chillies and the coriander sprigs to the pot and again, let the dal cook. After about 5 minutes we’re ready to add the tadka or baghar (tempering of spices in oil).

The baghar:

Heat a tablespoon or two of ghee in a little saucepan like this:

Hot ghee

Let the ghee get hot. To test if it’s hot enough, throw a single cumin seed into the pan. If it begins to sizzle, add the rest of the cumin along with the mustard seeds and stir them about until they start to pop. When they start to pop, add the curry leaves, garlic cloves and red chilies.

BagharOnce the red chillies darken like this:

Baghar, tadka or popu

Add the baghar to the lentils.

Making Hyderabadi Palak Dal (Spinach Lentils)

and immediately cover the pot.

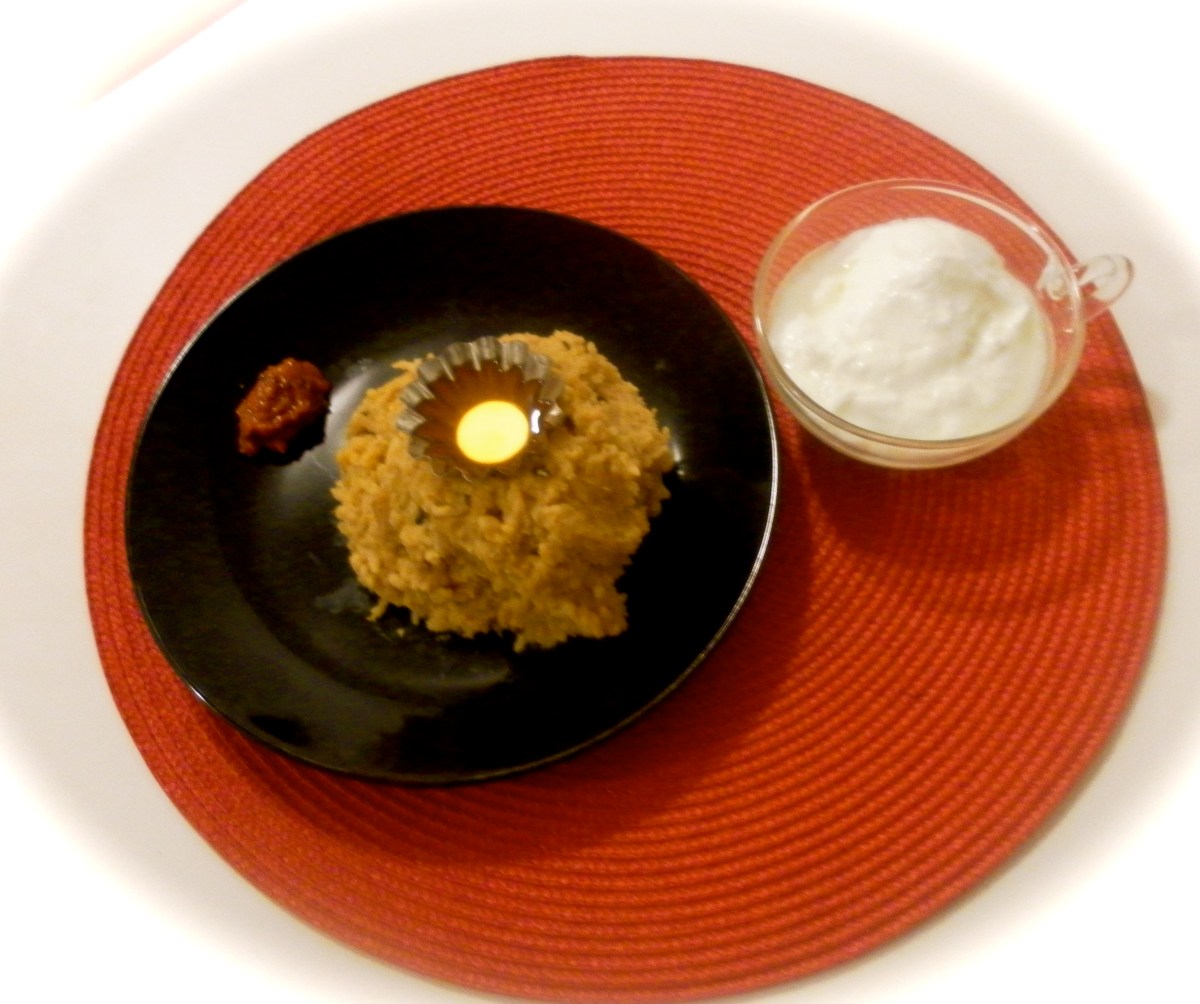
The dal is now ready! Serve it with some hot rice, yoghurt and a papad.

Categories
Chocolate Chocolate Truffles Cooking Food General Recipes

Rich Dark Chocolate Truffles with Soft Cream Cheese Centers

This afternoon I was out grocery shopping and I saw a box of truffles in the chocolate section that caught my eye- they were ‘cheesecake truffles’. “Hmm that sounds delicious” I thought to myself. The thing is, and you may not know this about me, as much as I am a chocolate-lover, even a chocolate-addict, I am so much more when it comes to cheesecake, I am in fact, a chocolate-cheesecake-fiend.

Don’t believe me? Well it’s true and the following tale will prove it to you. You see, there is a coffee shop quite literally below my apartment and they have delicious chocolate-almond cheesecake. This time last year, I was eating one slice of cheesecake per day. Soon, things got so bad that the owner of the coffee shop, his wife and two employees of theirs, independently of each other, expressed genuine surprise bordering on concern, when they noticed how often I was running downstairs for cake. When your cheesecake supplier stages an almost-intervention, well you know things have gone too far, so I quit cold turkey.

But of course, I still have a soft spot for the cheesecake-chocolate combination. So when I saw the box of cheesecake truffles, I rushed home like a woman possessed and researched recipes. It turns out one has to first bake a cheesecake, then let it firm up in the fridge for several hours and only then can one use this hardened cheesecake as a filling in truffles. This seemed like far too much waiting, so I decided to make chocolate cream cheese truffles, which are close enough.

Chocolate cream cheese trufflesThe process was fairly easy, and what I really liked about it was that one could add sugar and chocolate to taste. Traditional chocolate truffles are made from a ganache (you can read more about this in my previous posts about basic dark chocolate truffles and Cointreau truffles), and you can’t really add more or less chocolate, with intermittent tastings while making ganache (to be accurate, you probably could, but I think it would be a complicated process and you’d run the risk of breaking the ganache). So this really is something unique about this cream cheese truffle recipe. I’d recommend giving it a go, you might get hooked 😉

Ingredients:

100 g dark chocolate (at least 70% cocoa solids) (the better this chocolate is, the better your truffles will taste)

150 g cream cheese

5-6 tablespoons of icing sugar

1/2 tablespoon butter

1/2 teaspoon vanilla essence

Some cocoa powder or a handful of hazelnuts toasted and ground

Equipment:

4 Bowls and several spoons

1 large plate

A hand-held or stand-alone egg-beater/mixer

1 sheet of foil or butter paper

Method:

I began by placing the cream cheese (at room temperature) in a bowl

Chocolate Cream Cheese Truffles

Next, I melted the chocolate in the microwave. (When you do this, be sure to do this on a low setting as you don’t want to burn the chocolate. Ideally, you should melt the chocolate in a double boiler to avoid this, but I find that if I am careful, I can do it in the microwave.

While the chocolate was melting I began whipping the cream cheese up with the mixer (egg-beater). When it was creamy and softened, I added 2 tablespoons of icing sugar and whipped this into the cheese. I tasted the mixture and thought it needed a little more sugar, so I added another 2 tablespoons. (You should also taste the mixture intermittently and see if it needs more sugar; add as much as you think is appropriate.) Once it tasted just right, I scooped out about a third of the mixture into another bowl and place this bowl in the fridge.

To the rest of the cream cheese mixture (the 2/3rd remaining in the first bowl) I added the vanilla essence, butter and about three-quarters of the chocolate and mixed it all up with a spoon (don’t whip this). Then I took a little taste. It tasted like it needed more chocolate, so I added some more.

Cream cheese and chocolate mix I repeated this until I was satisfied that it tasted just right.

Now I was ready to start shaping the truffles. When you’re trying this, make sure you have enough works-space on your kitchen counter. I like sitting down while I do this, because it takes some time, so I usually move over to the floor because I feel more comfortable sitting cross-legged. You could move over to the dining table if you prefer. So I set the cream cheese mixture and the chocolate cream cheese mixture side by side on the floor.

Cream cheese and chocolate mix for trufflesI also placed a sheet of butter paper on a large plate next to these bowls.

Now I was ready for the fun part! I scooped out some of the chocolate mixture and shaped it into a sphere in my hand. Then I flattened it out on my hand like a mini chapathi or tortilla.

Shaping chocolate cream cheese trufflesThen, I scooped out a bit of the plain cream cheese mixture on to the centre of the ‘chocolate chapathi’:

Shaping chocolate cream cheese trufflesand carefully rolled the chocolate layer over the cream cheese centre, shaping the truffle into as perfect a sphere as possible. (I don’t have a photograph of the sphere-shaping bit because I needed both hands and by this time my other hand was covered in chocolate.)

Shaping chocolate cream cheese trufflesI repeated this until all the chocolate was used up:

Making chocolate cream cheese trufflesI was almost done…the last step was rolling the truffles in ground, toasted hazelnuts (you can also use cocoa). To do this, I placed the ground toasted hazelnuts in a bowl:

Then, I took each truffle and warmed the outside up by rolling it about in my hand. Next, I rolled the truffle about in the ground hazelnuts. Once its outside was coated, I placed the truffle in a little paper cup:

Chocolate Cream Cheese Truffle

I repeated this until all the truffles were coated, here they are:

Chocolate Cream Cheese TrufflesTa DA! They’re ready to be devoured! Rich dark chocolate truffles with soft cream cheese centres!

Chocolate Truffle with a Soft Cream Cheese Centre

Mmm..what a cheesy, chocolatey evening I had.

Categories
Cooking Food General Recipes

Delicious Re-fried Beans are Surprisingly Easy to Make!

Loads of people I’ve met and blogs I’ve read tell me to buy a can of re-fried beans at the store when I am making burritos or quesadillas or whatever else I might be making that call for re-fried beans. Not being Mexican myself, and never having researched the issue, I assumed it must be difficult to make good re-fried beans at home, that there must be some secret to it.

Then, I talked to one of my best friends who happens to be Mexican and she told me that I was most certainly misinformed. This friend of mine happens to live in a wooden hut, a-top some wooden stilts, in a little village in Panama, with an indigenous community called the Embera-Wounaan. I shall write more about this later, I promise.

Here is her house:

Embera-Wounaan village in Colon Province, Panama
A hut in an Embera-Wounaan village in Colon Province, Panama

While I was visiting her in Panama, we talked about re-fried beans and she even suggested making some right there in her little hut. And so we did!

Re-fried beans for breakfast!

We had the beans with eggs for breakfast, and they were delicious, even though we had no cheese (there is no electricity in the village and hence, no fridge). Oh and we also had fried sweet plantains, which in my opinion, are overrated.

This homemade re-fried beans adventure really encouraged me, so when I was back in North America, I did some general research on making re-fried beans, namely, the process, spices etc., and then proceeded to make some myself.

Spicy homemade refried beans
Spicy homemade re-fried beans

You should try it too! Here is my recipe!

(I based this recipe off my friends’ recipes, but I tweaked the quantities of the spices (you guessed right, I increased them) and incorporated some of the useful tips and information I got from my internet research.)

What you will need:

1 cup beans (you can use kidney beans, pinto beans or black beans)

Water

3-4 tablespoons ghee

1 medium sized red onion

2-3 cloves of garlic

2 small (or one large) jalapenos

1 teaspoon cayenne pepper

1 tablespoon red chill Powder

1 tablespoon cumin Powder

Two handfuls of  (I use either cheddar or Chihuahua (this is one aspect of the recipe I need to do more research on. I need to find out what cheese is best for this recipe!))

Cilantro/Coriander for garnish

Preparing the beans:

Soak the beans in plenty of water (at least tree times as much water as beans) overnight or at least 7 hours. This soaking is important; if you don’t soak the beans, they won’t be soft enough and the result won’t taste as good. There are allegedly short cuts to this, but I don’t believe they can produce the same results.

The next step is to cook the beans. Here’s a little tip, don’t use the water the beans were soaking in, to cook them. This water contains ‘oligosaccharides’ released from the beans, and they cause.. eerm..  flatulence! If you don’t follow my advice, there is always this yoga pose:

Pavanamukta Asana (Wind-relieving pose)

(Image by The Holistic Care Yoga Wiki. The above image is CC licensed, for more information go here.)

It’s a pretty easy pose, but it’s also easy to just throw the water out 😉 . So with fresh water, cook the beans in a pressure cooker until the cooker whistles about 4 times. If you don’t have a pressure cooker, you can simply boil them, it’ll just take longer. If you’re cooking them in a pot with water, the beans will be done when you can take one out and squish it between your fingers. I suppose you could use canned beans instead of going through all this trouble, but I am somehow not a big fan of things in cans. I feel, and obviously this is subjective, that beans from a can don’t taste as good as beans that have been soaked and cooked.

Method:

Finely dice the red onion, crush the cloves of garlic, and chop up the jalapenos.

Now we begin cooking! Start with some oil or ghee (Indian clarified butter) in a frying pan. (Apparently, what makes really great re-fried beans is cooking with lard. Since I am a vegetarian, that was not an option for me. But, it turned out quite well when I used oil, it also worked well with ghee.) Since I believe in Ayurveda (an ancient system of Indian medicine see here for more) I actually prefer cooking with ghee; it’s supposed to be healthier than oil. If you’d like to read my recipe, go here.

Of course a Mexican might be bemused or even annoyed by this bizarre substitution, but I think fusion and playfulness in cooking are good, as long as you are aware of what you’re doing, and acknowledge how the recipe or method has been changed. This ensures that you are more aware of how these changes affect the end product and this makes you a better cook. (I didn’t mean to sound preachy here, it’s just that I feel strongly about the difference between being playful and creative on the one hand, and being just, well, plain lazy, on the other.)

Anyway, I really ought to get back to writing about the beans eh?

When the oil is all heated up, add the diced onions and cook until slightly browned.

Now it’s time for the Jalapenos and garlic.

Once they’ve cooked for a few minutes, add 1 tablespoon each of cumin powder and chilli powder and 1 teaspoon of cayenne pepper. Mix it all up and fry until you smell the spices. Mmmm the fragrance will make you hungry!

It’s time for the beans! Add the cooked beans to the pan and let them cook for a while. Until they go from this:

To this:

Add salt to taste.

Now taste it and see how you like it. If the flavour is rich and intense, you can stop cooking the beans. If you think the beans taste like they could use a little more cooking, add a little of the water left over from cooking the beans to the pan, and let the beans cook some more. When you think the beans are done, turn the heat off and add a handful or two of grated cheese to the pan. Mix it all up until the cheese is melted and evenly mixed in.

Your beans are ready. Garnish with coriander/cilantro and enjoy!

Hot, homemade refried beans

I’ve use these re-fried beans in enchiladas, burritos and tacos, I’ve even made a re-fried bean-pizza. But most often, I like to just scoop some beans onto a plate and go at them with a spoon 🙂

Categories
Cooking Food General

Salmon Burgers with Goat Cheese and Basil

Yay! Spring is here and it’s warm enough to grill already! To celebrate, we grilled salmon burgers from Whole Foods (some day, i am going to make burger patties at home, I’ve decided!) for dinner this evening.

20120315-043053.jpg

Mine was served with whole wheat bread, fresh basil from the indoor potted basil plant (pictured in a previous post) and, goat cheese. I thought about the sort of cheese we should use, and decided I would give goat cheese a try. So I used soft, fresh goat cheese.

20120315-042944.jpg

Mmmm! Despite some opposition to goat cheese that my friend offered, the burger turned out well and went perfectly with a Belgian white beer. The beer had notes of coriander and a citrussy flavor as well, so it was very fresh and went with the ‘spring is here’ theme of the evening.

The truth is, the burger was so good that I ate two! I also drank 2 beers. It didn’t help that I’d had a pre-dinner snack that consisted of Denali Extreme Maximum Fudge Moose tracks ice cream with hot fudge on top. I felt bloated and ill for 2 whole hours after dinner. I am a disturbingly greedy person. Sigh.

Anyway, I can’t wait for the summer! More burgers, salmon steaks and, most importantly, I can make paneer tikka, achaari fish tikka and tandoori fish again! You can make these awesome Indian dishes indoors in an oven, but they just don’t taste right that way. They need to be grilled in a type of Indian oven- a tandoor, and I it turns out a BBQ grill is the next best thing! So, for the summer I can hardly wait!

Categories
Cooking Food General Recipes

How to Eat Delicious Homemade Pierogies Part II

Remember my earlier post about how to cheer yourself up on a cold gray winter afternoon by eating some delicious pierogies? In that post, I suggested heating up some classic pierogies on a pan and topping them off with some irish cheese and oregano. Well here is an alternate way to be lazy AND eat pierogies that proved to be equally delicious:

Homemade pierogiesIf you want to re-create this, here’s how you go about it. First get your polish Nana to make you some pierogies. If you don’t have a polish Nana, and your best friend or partner doesn’t either, go buy some from an eastern European store. Alternatively, figure out how to make some (or wait until I write about it) and then freeze them (by individually wrapping them in plastic/cling wrap and then throwing them all in a big freezer bag).

Next, melt some unsalted butter in a pan and heat the pierogies up. I recommend covering the pan at first and setting the flame on low so that the insides of the pierogies can cook. Then take off the lid and raise the heat slightly to toast the outsides of the pierogies a little. Place the pierogies on a plate and then caramelize some thin slices of white onions in the same pan.

The next step is garnishing the pierogies. Begin by sprinkling some freshly ground pepper on top followed by the caramelized onions. Then grate some Irish Dubliner cheese on top. I know, it sounds odd and inauthentic, but it works very well, better than parmesan, cheddar or pecorino (I tried all three). This cheese is sharp, so it complements the relative blandness of the pierogies. And anyway, anything Irish and anything with potatoes go together in my book 😛 The final touch was a sprig of basil freshly picked from our indoor herb garden:

Indoor herbsHere’s the end product:

PierogiesAgain, I feel I must clarify that I don’t generally take short cuts like this. This dish was something I resorted to on the day I returned from Panama. I’d been on a long flight and I was far too exhausted to cook up something; this was an extenuating circumstance. Normally, I tend to cook up fresh meals from scratch and have been known to make Paneer butter masala, brownies and even truffles in the wee hours of the morning. But we all have those days when we need to cut corners and this post is about how to embellish even a short cut meal so it tastes and looks delicious 🙂

Categories
Chocolate Food Reviews

The Best Ice Cream Money Can Buy: the Most Superlative-Filled Rant About Ice Cream Ever to be Written.

Normally, my posts are about things I make at home like chocolate, fish curry and body butter; I like using fresh ingredients and where possible homemade ones. So for instance, when I made chocolate brazil nut truffles, I made the brazil nut butter for the filling at home. Today, however, I am doing something entirely different. I am going to write about an unhealthy, commercially made, probably very-processed and nevertheless utterly delicious food, namely: Denali Extreme Maximum Fudge Moose Tracks.

This is not to be confused with ‘Denali Extreme Moose Tracks’. Oh no, these are two entirely different things- like apples and chocolate. If you like chocolate and are prone to excess, go that extra mile for the ‘extreme maximum fudge’ version, it IS worth the effort.

20120306-170553.jpg

This ice cream is FULL of chunks of chocolate and this chocolate has a slight salty taste to it that balances its sweetness oh so perfectly. Mmmm.

In the photo below, that chocolate chunk you see is actually a giant rock of chocolate. Apart from the little bit of ice cream you see stuck to its surface, the rest of what is in that bowl is solid chocolate! When I saw that chunk I squealed in delight, it was like finding pirate treasure, except better. If it had been treasure I would have had to convert that treasure into money and then traveled to an American grocery store to buy this ice cream and then dug in the tub with a spoon for chocolate, whereas now, I had a big chunk right here on my plate!

20120306-170746.jpg

And another example of this wondrous chocalatey stuff:

20120306-225405.jpg
Whoops, I just realized I ruined this photograph with my thumb. This is what happens when one takes photographs whilst simultaneously squealing.

And a shot of the inside of a half eaten tub of the stuff:

20120314-172331.jpg

It’s absolute incredible that this ice cream isn’t available everywhere. It’s even difficult to find in the US. The only places that I have found it in so far are Kroger and Meijer. If I haven’t said this before, here it is: this ice cream is unparalleled in its chocolateyness and really is my favourite kind of ice cream ( just a clarification, gelato is a whole different thing, I am talking about ice cream here). So if it’s available in your grocery store, I say go ahead and try it! But, be warned, that stuff is probably stronger than you are and isn’t for the faint of heart.

It came to a point where I was eating scoops and scoops of this stuff with Sanders dark chocolate fudge on top. I knew it was going to make me obscenely fat, but I felt like I couldn’t stop! In fact, recently, scientists at the Oregon Research Institute have claimed that in some ways one’s reaction to ice cream can be like that of an addict’s to her drug of choice. Reportedly, their studies show that people who eat a lot of junk food can be experiencing cravings similar to what dependent drug users experience. They used Haagen Dazs in their study as a sample of high-sugar junk food.

So kidding aside, I recommend moderation! If you eat it in small, controlled portions, at regulated times, you will enjoy it’s deliciousness in all it’s glory. Don’t go down the dark path that I have gone down multiple times, eating sickeningly large quantities of the stuff and then feeling sick- both metaphorically and literally.

Categories
Adventure General

Part I of my trip to Isla Grande and How to Make a Delicious, Impromptu Beach Cocktail

I’ve been missing in action for over a week now, and the reason for this is that I have been away in lovely, warm, sunny Panama. I enjoyed all of my trip, but I would have to say that my favourite bit was visiting the Caribbean coast and some islands around it. This is why my first post is going to be about the beach part of my vacation.

To get to the coast one has to travel by road from Panama city to the Panamanian province of Colon, up until a little port on the coast called La Guaira. From there we took a boat ride to Isla Grande, an island off the coast. We spent two days there; it was both a beautiful and puzzling little place. It was an extremely laid-back and sleepy town, and people seemed somewhat erratic in their niceness and willingness to serve customers. (I feel I must clarify here that we visited the island during the week, and apparently, it gets much busier during the weekends.)

There were for instance, little stores on the island that sold snacks, toilet paper, water, alcohol etc., Now these stores seemed to keep arbitrary timings and on top of this, the store-keepers also randomly, decided not to sell a customer things even though they were seemingly open. On second thought, their decision not to serve you wasn’t random, I think that if you asked too many questions they decided it wasn’t worth the trouble and refused to deal with you. Now, this didn’t happen to me, but it happened to my friends, and I have it on good authority (my friends who actually live in Panama) that this isn’t out of the ordinary at all. One morning for example, two of my friends went over to a store/café and asked if the Cafe was serving breakfast. The lady behind the counter asked what they would like for breakfast. My friends said they weren’t sure, “how about eggs?”, they casually asked. She then promptly told them that both the café and store were closed and wouldn’t even sell them bottled water.

Despite the island’s eccentric (but also friendly) inhabitants, all in all, I enjoyed myself and really liked the place. I would even recommend it to anyone who wants a relaxed Caribbean vacation. It isn’t crowded, it’s fairly inexpensive and there aren’t a lot of resorts, relatively speaking. This is a good thing in my opinion because the place was empty and peaceful. There are also very few foreign tourists here, and most visitors were Panamanians. I would recommend however, that you go during the week, rather than the weekend.

When we arrived, I was disappointed because much of the shore was either rocky or had restaurants and hotels built on it. The town seemed somewhat disorganized and it seemed as though the bars, restaurants and hotels were not making the best of the wonderful natural beauty around them. Most importantly, there didn’t seem to be a nice, sandy beach about, except for little sandy bits between hotels and houses. But after lunch we went out wandering and found a lovely, deserted beach on the other side of the island.

Beautiful beach, Isla Grande, Panama
Isla Grande, Panama (Photo: Matthew Snyder).

There was a part of the beach that looked like a Peninsula; waves broke on either side of it. You can see it more clearly in the picture below:

Beautiful virgin beach, Isla Grande, Panama
Isla Grande Beach, Panama (Photo: Matthew Snyder)

It was empty and beautiful, as you can see:

Secluded beach, Isla Grande Panama
Deserted beach stretch, Isla Grande, Panama (Photo: Matthew Snyder)

There was a café right on the beach, but oddly it had only one type of beer and only served fried plantains. It didn’t even open until about 4 p.m. This was another example of the inexplicable moodiness of the service industry on the island.

So the next afternoon, we went back to this beach with supplies of our own. We had snacks, pineapple juice and this insanely cheap Panamanian rum called Seco. As we were walking to the beach, we ran into a sole and very out-of-place looking vendor who was trying to sell fresh coconuts on an almost-empty beach. We bought some and while we were sitting on the beach sipping fresh coconut water, my friend Andrea pondered aloud if it would be weird for her to put some rum in the coconut. No it wouldn’t Matt and I exclaimed! The next thing we knew, we were making impromptu pina-colada inspired beach cocktails. Here’s how YOU can do this too, the next time you’re on the beach. (That’s my friend Andrea in the photos.)

First, take a fresh coconut and drink up some of the coconut water in it, to make space for the other ingredients:

Then, add a few generous ‘glugs’ of rum:

Next, add some Pineapple juice to taste:

Impromptu beach cocktail recipe
The best beach cocktail ever!

Swirl everything in the coconut about. Lastly, drink up!

It was a truly delicious cocktail!

Categories
Cooking Food General Recipes

How to Eat Delicious Homemade Pierogies

An alternate but equally fitting title for this post would be: How to Cheer Yourself up on a Cold, Wet, Gray Winter Afternoon. You’ll see why if you read on.

I was at home, sitting on the couch, trying to bring myself to work, do some yoga, or just be productive in some way. And I just couldn’t. It was dreary outside; we’d had snow early in the morning, but by now all the snow had melted into sludge. The sun was nowhere to be seen and I was generally feeling bloody awful, pardon the cussing. I hadn’t even the energy to cook! Can you imagine that? “I ALWAYS have the energy to cook, bake etc” I muttered to myself, half heartedly. I was, you see, even too tired and bored to be dramatically panicked by this laziness; I was also too tired to be dramatically panicked by my lack of dramatic panic. This, when I am the sort of person who uses exclamation points more than any other form of punctuation! See what I mean!

Anyway, I found the answer! Delicious homemade pierogies! You see, pierogies freeze well and I happened to find a couple in the freezer. They were basic or classic pierogies, stuffed with potatoes and cheese, made by a friend’s super sweet and part-polish Nana. So I promptly melted some unsalted butter in a pan and heated the pierogies up. I covered the pan at first and set the flame on low so that the insides of the pierogies could cook. Then I took off the lid and raised the heat slightly and toasted the outside a little.

Finally the garnish: I sprinkled some freshly ground pepper on top and then grated on some Irish cheese, Dubliner to be precise. I know, it sounds odd and inauthentic, but it works very well. This cheese is sharp, so it complements the relative blandness of the pierogies. And anyway, anything Irish and anything with potatoes go together in my book 😛 The final touch was a sprig of fresh oregano.

Here’s the end product:

I shall make pierogies myself one of these days, mushroom and cheese ones, and then I shall write all about it.

Categories
Cooking Food General Indian Cooking Recipes

How to Make Khichdi: A Low-fat, Fast, and Simple Indian Recipe

I spent much of this past week writing a long note on copyright theory. I had a deadline to meet (as I mentioned, in my previous post about sunbathing kitties) and I found myself working pretty much around the clock. So I ended up eating out quite a bit.  4 days out of the past 7, I walked out in the snow, slush, gorgeous winter sun, or whatever else this bizarre winter threw at me, and got takeout. Finally, yesterday, sick of all this, I decided to make myself some good, comfort food. I needed something that was simple, fast and healthy; especially something ‘fast’ because I wanted to send off the note to my supervisor before the end of the day. “What should I make?” I pondered, and then it struck me! I was going to make Khichdi!

I’ve forgotten all about khichdi these past few years, choosing to explore more complex and indulgent dishes like dal makhani instead. But today was a khichdi kind of day. Khichdi is the perfect food for when you’re sick, or too busy to make something more complicated. It’s just lentils and rice with some mild spices. You can however, add some vegetables (bleugh! (I am not a huge fan of vegetables, you see)) to it to if you want to.

Here’s how to make some khichdi for yourself:

Ingredients:

1 cup moong dal (you could also use other lentils like Tur dal for instance)

A little less than 1 cup rice

1 tsp red chilli powder

1 tsp cumin powder (dry roast cumin seeds and then grind them, or you can buy the powder at the store)

1 tsp coriander powder (dry roast coriander seeds and then grind them, or you can buy the powder at the store)

1/2 tsp haldi (turmeric powder)

3 cloves of garlic, peeled

1-2 green chilli sliced horizontally into two. (You can also use half a Jalapeño).

For the tadka (tempering):

1-2 tbsp of ghee (Indian clarified butter, you can make this at home, or buy some at an Indian store)

1/2 to 3/4 cumin seeds

3 dried red chillies

A few kernels of black pepper

2 pinches of heengh (asafoetida)

3 cloves 

Optional Serving Accompaniments:

Yoghurt

Ghee (you can find it in an Indian store; if you’d like to make it at home, here is my recipe)

Indian Pickle (you can make some at home, but this isn’t so easy. You can also buy some at any Indian store. I chose a Andhra-style tomato pickle for today).

Method:

Start by soaking the moong dal in water for about 30 minutes. You don’t generally have to soak moong dal, but it cooks faster if you do. Also, I like the dal to be well-cooked, even squishy in khichdi, which is why I wouldn’t skip this step in this recipe.

Moong Dal
Pre-soaked moong dal used in making khichdi

Place a pressure cooker or pot (that comes with a lid) on the stove.  Add the lentils, rice, garlic, green chillies and red chilli, turmeric, coriander and cumin powders and stir. Finally, add 2 cups of water, place the lid on the cooker/pot, lower the heat to medium and let the lentil-rice mixture cook. If you’re using a pressure cooker, let the mixture cook until the cooker lets off 4 whistles. If you’re using a pot, just let the mixture cook slowly, stirring occasionally. The mixture is done when it’s squishy enough for you, but make sure not to overdo it or you will end up with a goopy mess.

Now, add one or two tablespoons of ghee (I added two but one will do the trick) to the smallest pot you own, and turn on the heat to high. When the ghee is hot, add the cumin seeds and wait for them to splutter. Then, add the red chillies (torn in half), black pepper, cloves and heengh to the ghee and toss them about. When the chillies darken add this spiced ghee (called the tadka or popu) to the lentil-rice mixture. Your khichdi is done!

Serve with yoghurt and some pickle.

Khichdi
Khichdi- a rice and lentil dish that is great as comfort food, for when you’re sick, busy or lazy 🙂

I like eating south Indian ghee with khichdi, so I served some ghee along with it in a little tart mold. That’s what I placed right on top of the khichdi.

Khichdi with Ghee
Khichdi tastes best with a generous helping of Ghee- Indian Clarified butter.

If you want to know more about making south Indian ghee, you can read about it on this website. I am sure I will post something about it soon enough though. I LOVE ghee in general and South Indian ghee in particular.

Categories
Baking Chocolate Food Indian Cooking Recipes

How to Break AND Fix a Chocolate Ganache

I am taking chocolate fudge cupcakes to a friend’s birthday party tonight! I baked them late last night and took a break from work this afternoon to frost them. I decided to fill them with dark chocolate ganache and top them off with either Gianduja chocolate frosting or Peanut butter-cream frosting. I will write about how the cakes turned out soon enough, this post however is all about the ganache. More specifically, it is about how to break a chocolate ganache and then, fix it. Why, you ask, would you want to know how to break a ganache? Well, because then you’ll know what not to do when YOU make your next ganache, of course. And if you manage to break your ganache in a unique and entirely different manner than the one chronicled below, why then read on, and you will find how to fix it!

A dark chocolate ganache should taste smooth and rich. This is how it should look:

Chocolate ganache
This is how a chocolate ganache ought to look; a broken ganache will look oily and goopy not smooth and even like this.
Unfortunately for me, things went horribly wrong. I ended up with an awful, goopy, oily mess. I didn’t take a picture of it, but here is a link to someone else’s photograph of a ruined ganache that looks very much like mine did.

I think this might be because I added cold vanilla extract from the fridge, when in fact, I should have ensured that it was at room temperature.

I panicked and tried various ways of fixing it. First, I heated it on low in the microwave. When that didn’t work, I tried heating it in a double boiler. Finally, I tried to fix it by adding a few tablespoons of warm milk one at a time. After each table-spoon, I gently stirred the mixture with a whisk. And Voila! It worked! Here is what I ended up with:

Fixed chocolate ganache
Fixed, but slightly thin, ganache
It is smooth and even, the way it out to be. However, the mixture is a bit thinner than my previous ganaches have been. It’ll firm up in a bit I am sure, and since I am using it as a filling for cupcakes this might even be a happy accident, as it might be nice to have a softer filling inside the cakes. On the other hand, if I was going to be making truffles with this ganache, I might have a problem on my hands.

Ps. I washed my hands before I dipped my finger in that ganache!