Categories
Baking Chocolate Food General Recipes

Whole-Wheat Double Chocolate Cookies

As I wrote in a previous post about my chocolate chip cookie recipe, cookies haven’t always been my favourite dessert or snack. I don’t mean that I don’t like them, I DO like them, and I certainly would never say no to a chocolate cookie. But, they aren’t usually the first thing I think of when I walk into my kitchen wanting to bake something. This has changed gradually, since my last cookie post, and I’ve been thinking and fantasizing about cookies more. I’ve been thinking, nay, dreaming especially about gooey, rich, chocolate chocolate chip cookies that are crisp on the outside, and gooey on the inside. (Really, over the past few weeks, I’ve actually taken a break from working without realizing it because my mind has wandered off from copyright law, meandered through various foods, lingered on fish tacos, and finally settled on visualizing chocolate cookies.)

So today, I finally decided to give it a shot and bake some double chocolate cookies! But, because I wanted an adventure and a challenge, I decided to try and bake the gooey-est, yummy-est cookies that I possibly could, using whole-wheat flour. It’s healthier than all-purpose flour you see. Also, I ended up buying 10 kilos of the stuff when my mother visited (she makes delicious Indian rotis for which we needed the flour), and haven’t used much of it since she left.

I was nervous at first; it seemed ill-advised. I wanted something decadent and delicious, and whole-wheat based baked goodies don’t usually taste very decadent or delicious. In my experience, they taste kind of, well, healthy. And by that I mean, rough, dry, and most importantly, the opposite of rich. But, I decided to give it a shot.

I was going to use chocolate and butter in the recipe, that was a given. But, using whole-wheat flour and brown sugar seemed like a good way to make the recipe a wee bit healthier than usual.

“Did they turn our well?”, you ask. Oh yes, indeed they did.

Healthy Whole Wheat Chocolate Chip Cookies

They turned our so well that I was forced to resort to expletives to describe how good they tasted, when I first bit into one.

Healthy dark chocolate cookies

If you’d like to try baking them too, here’s what you’ll need:

1 cup whole-wheat flour (I used chapathi flour) (if you’re not a stickler about making the cookies completely whole-wheat, you could mix in 2 tablespoons of all-purpose flour, just so the cookies are a little smoother)

1 teaspoon baking powder

1/4 cup dutch processed cocoa

1 teaspoon salt

8 ounces semi-sweet chocolate (be warned that using unsweetened chocolate instead results in a sour, bitter, dry and brittle cookie)

5 tablespoons unsalted butter

3/4 cup dark brown sugar

1/4 cup granulated white sugar

2 eggs

1 teaspoon vanilla extract

1 teaspoon instant coffee

3 handfuls of dark chocolate chips (substitute some of the chips with toasted hazelnuts or macadamia nuts if you like)

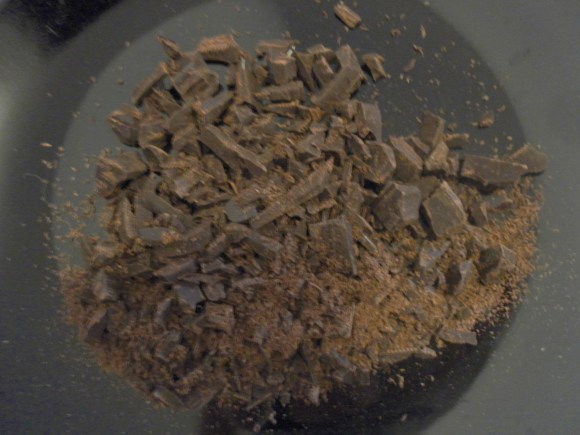
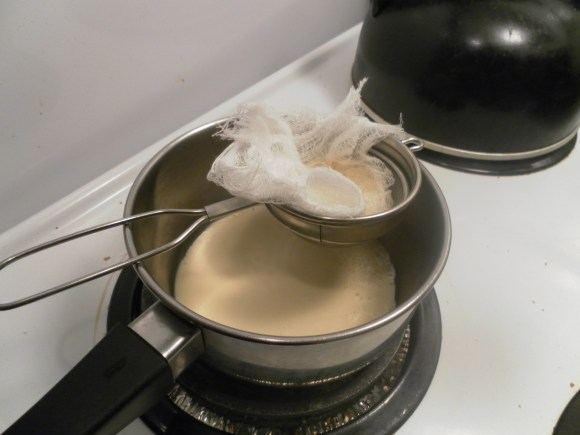
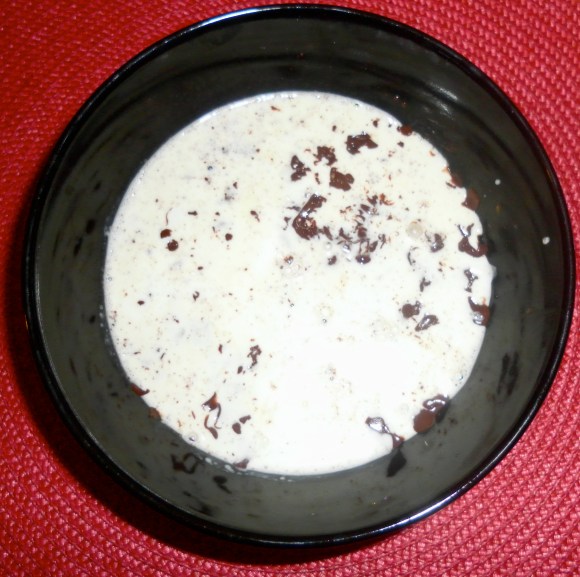
Method: Melt the chocolate in a double boiler (you can also do this in a microwave, in which case, make sure to use a lot heat setting so as not to burn the chocolate). While the chocolate is melting, in a medium bowl, whisk the dry ingredients together. In a small bowl lightly whisk the eggs, sprinkle the coffee on top of the eggs, and set the bowl aside.

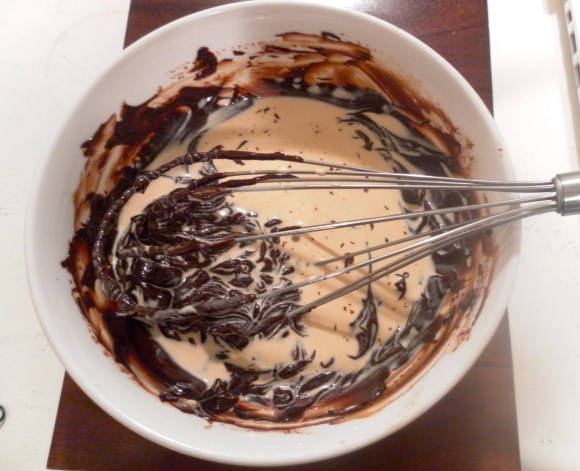
In a separate bowl beat the butter until smooth and creamy. Then, add the two types of sugar, and beat until smooth. Now, add the eggs, followed by vanilla extract, and finally the melted chocolate, all the while beating the mixture. Continue beating at medium to low-speed until the mixture is smooth.

Next, at a low-speed, beat in the dry ingredients. Once they’re mixed in, fold in the chocolate chips with a spatula, or your hand, until they are somewhat evenly distributed.

Your dough is now ready! (If you used your hands to mix the chips in, this is a great time to give the dough a taste.)

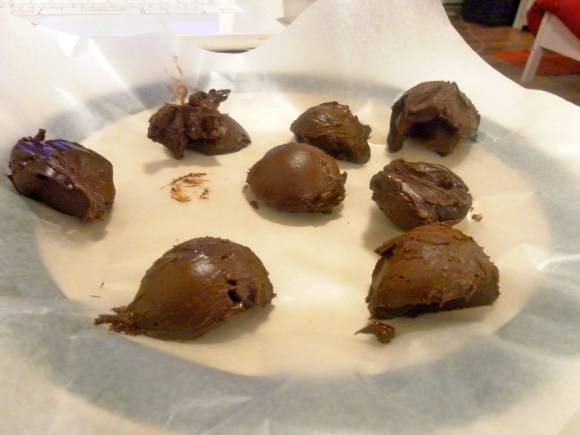
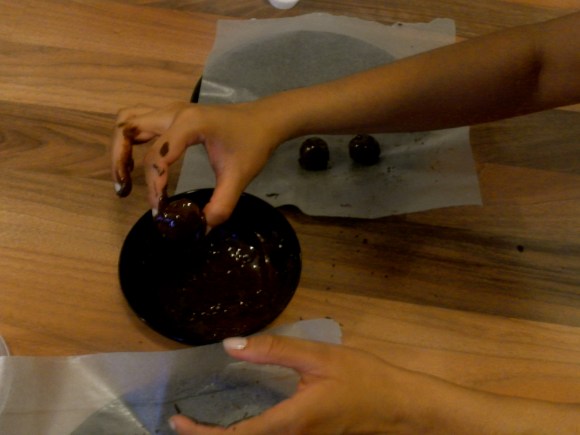
The final step involves dividing up the dough. It’s best to move to the dining table for this last step as it takes about 5-10 minutes, and you don’t really need access to things in the kitchen or the sink for this. Place a sheet of parchment-paper or wax-paper on a baking sheet. Using an ice cream scoop, scoop out a little portion of the cookie dough on your palm and roll it into a ball. The size of this portion can very, depending on how large you want your cookies to be; I scooped out about a ping-pong ball sized amount. Roll the dough up into a ball, then flatten it a bit, into a little disc. Place the disc on the sheet. Continue doing this until all the dough is used up.

How to freeze cookie dough

You’re almost done! You can bake the cookie dough at this point. But, if you want to eat warm, fresh cookies everyday, whenever you want, just freeze the dough instead. If you’re having a party, and want to serve warm cookies at it, but can’t be bothered with baking them on the day of the party, then this freezing method works perfectly for that too. When the party starts, you can just pop the frozen dough-discs into the oven and then chat with friends over wine/martinis/etc., until they are ready.

To freeze the dough, place the baking sheet in the freezer for about 2 hours, until the dough is frozen. Then take the sheet out, place the balls in a freezer bag and pop them back into the freezer. Whenever you’re ready to eat a cookie (or three), pre-heat the oven to 350 degrees farenheit, place a dough-disc on a baking sheet covered with baking-paper and bake for 12 minutes, until the edges, and top seem firm. You might want to turn the tray around mid-way through, to ensure even baking.

It’s best to let the cookie cool a bit on the tray and then on a cooling rack. But if you’re impatient, that’s probably not going to happen.

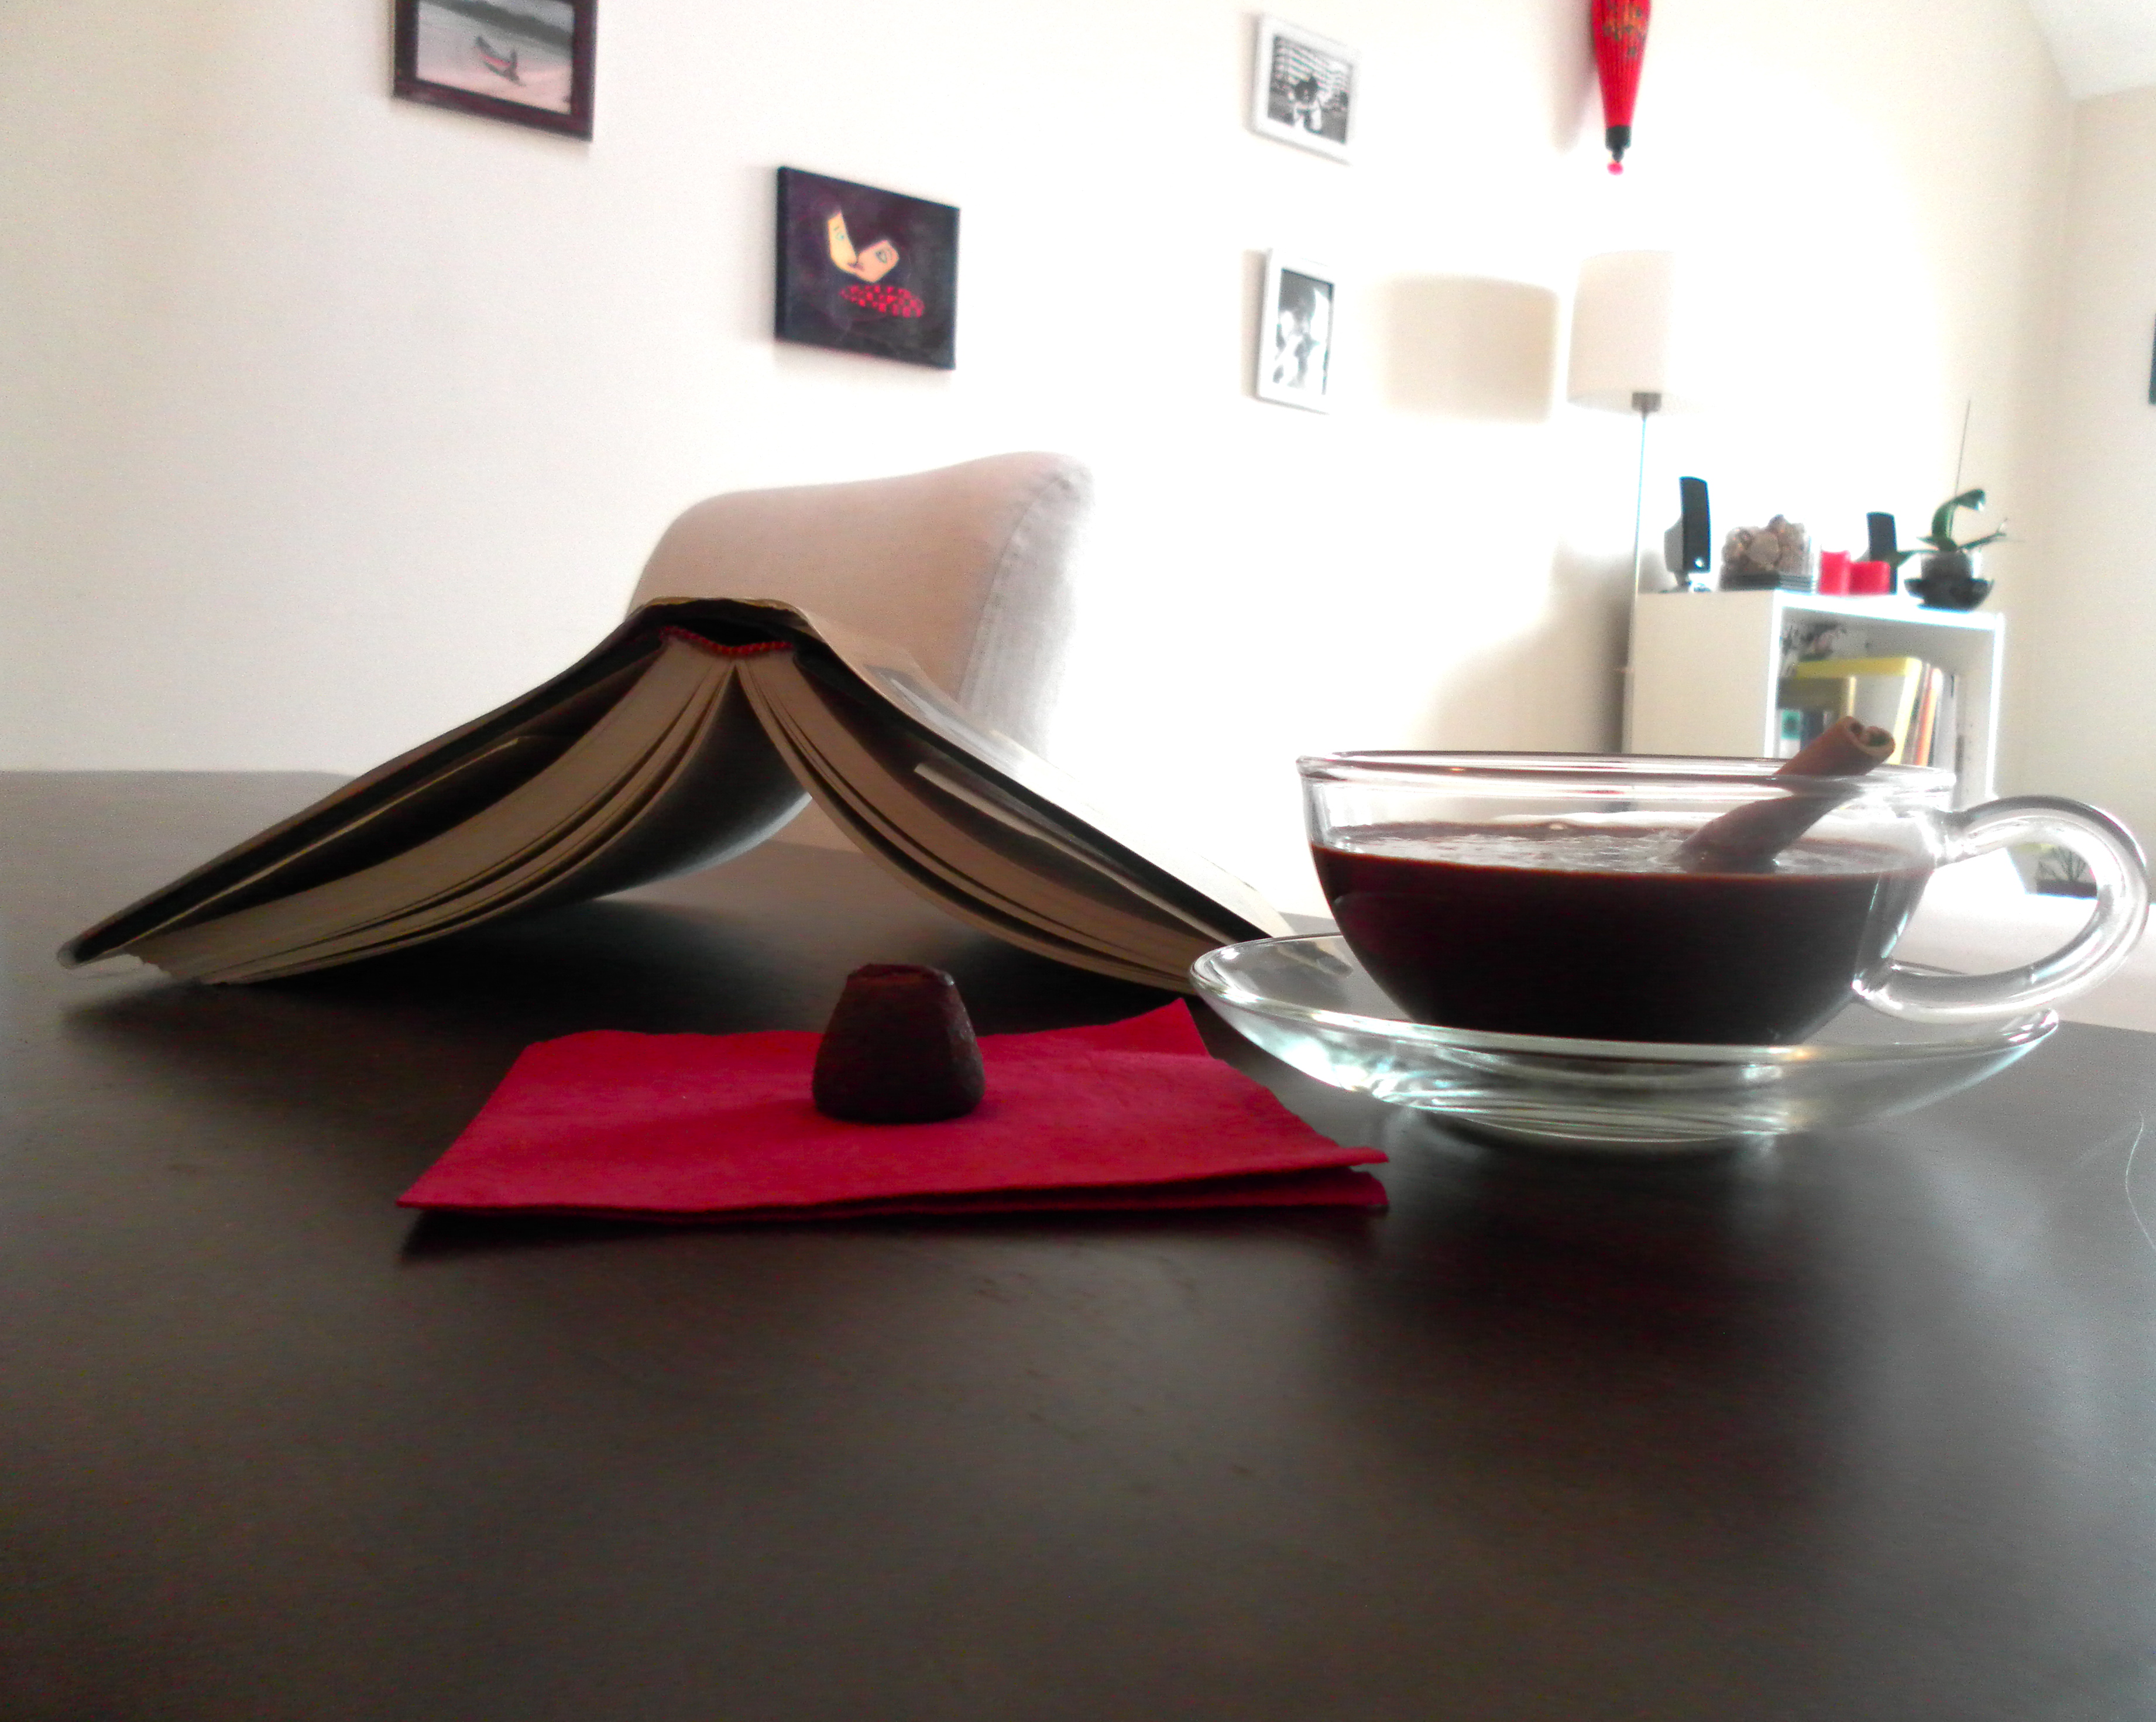
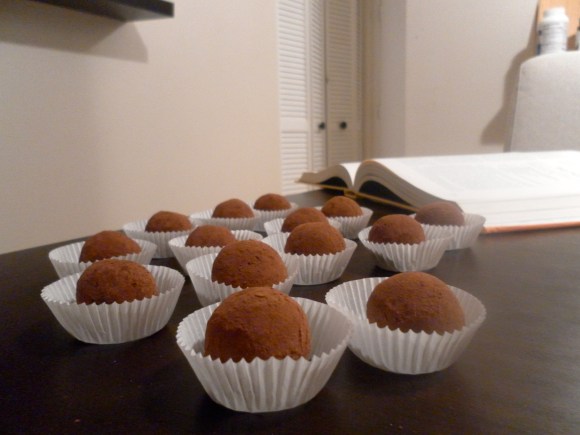
Mmmm… these cookies were pure deliciousness!

Healthy, whole-wheat chocolate chip cookies

You could also enjoy it, all warm and gooey, with a glass of cold milk!

Categories
Chocolate Food General

How to Really Enjoy a Winter Afternoon

SAMSUNG DIGITAL CAMERA

When I closed my eyes and took a sip out of this cup, I sighed, actually sighed, aloud.  You know how cakes and chocolates are advertised as ‘decadent’? Well THIS was more than that; worse than that even; and better than that; it was positively depraved. The rich, thick, smooth, creamy, soft, chocolatey concoction was pure wickedness; it was indulgence, irresponsibility, a sense of loosing oneself and a wanton disregard for common sense and moderation, all swirled together into one little cup.

And as if all that wasn’t enough, I paired it with a little chocolate truffle!

Rich, creamy hot chocolate recipe

And yet, I was somehow not satisfied (this proves my argument that the hot chocolate really was evil and powerful (I mean we all know that I am a goddess of self-control and moderation (reflected as much in my eating habits as my use of language and parentheses), generally speaking, so it had to be some sort of dark magic that the chocolate wielded))! And so I sneaked over to my freezer, pulled out one of my frozen chocolate chip cookie dough portions and popped it into the oven. Eight minutes later, I added this to my little afternoon snack:

Delicious Chocolate Chunk Cookie

Yes, yes, there is a pie-sliced bit of cookie missing; but it is a long and arduous journey from my kitchen to my dining table, filled with many perils.

The long and short of it was that I spent the next 10 minutes ooohing and aahing and moaning, and being general inappropriate, while I sipped the chocolate and ate the cookie. But then again, wouldn’t you do the same before a spectacle such as this?

Best Hot Chocolate Recipe

At the end of it however, I was happy, relaxed and more energetic all at once, and ready to go back to work on my thesis here i am gleefully typing away about it.

If you’d like to try this at home, here’s what you need:

60-75 g of dark chocolate (ideally 60% cocoa content)

1/2 cup whole milk

1 teaspoon brown sugar

A pinch of ground nutmeg

A pinch of salt

1/4 teaspoon instant coffee (optional)

A stick of cinnamon

A chocolate truffle (go here for a collection of my chocolate truffle recipes)

A cookie (go here for my recipe)

Method:

Start off by throwing the chocolate into a little saucepan. Add the milk and turn on the heat to low. Using a whisk keep whipping the chocolate into the milk as it melts. Be carefully not to burn the chocolate.

How to make delicious, rich hot chocolate

Once it’s all melted and the mixture becomes thick and chocolatey, add the salt, sugar, nutmeg powder and coffee and whip it all up some more. When everything is blended, pour the mixture into a little cup. Top off with whipped cream if you like. Place the cinnamon stick in the chocolate to use as a stirrer, and serve with a truffle and/or cookie, and a good book 🙂

Oh and make sure to leave your computer somewhere where it won’t bother you, so you can focus on all the delightfulness before you.

SAMSUNG DIGITAL CAMERA

Categories
Chocolate Chocolate Truffles Food Recipes

Spiced Black Tea (Masala Chai) Chocolate Truffles

Masala Chai Truffles

My latest chocolate-related invention: Masala Chai Chocolate Truffles!

How did I come up with this curious combination of chocolate and masala chai (Indian-style black tea)? I was planning my birthday party earlier this month, and I was trying to think of snacks and desserts that I could serve at the party. I wanted to be able to do most of the work in advance, preparing at least some of the foods days in advance, but I also didn’t want to compromise on their taste. Truffles, are of course a great choice given these criteria. So I decided to make some of my usual favourites: Cointreau truffles, mint butter-cream truffles and almond butter-cream truffles. But, I also wanted to be a bit adventurous and try something new and quirky. I’d made myself a cup of tea, and was sipping it, while I thought about what new flavours I could throw together, when the obvious occurred to me: tea-truffles. And then I thought, “Why not masala chai truffles, just to spice things up?”. They turned out surprisingly well, and were quite a hit.

If you’d like to give them a go, here’s how.

Equipment you will need:

A cutting board and knife OR a food processor

2 medium-sized bowls

2 plates

Parchment sheet, baking sheet or foil

Little paper cups to put the truffles in.

Ingredients:

8 Oz (approx 225 g) good dark chocolate (at least 70-80 % cocoa solids)

1/2 cup cream (whipping cream in Canada or heavy cream or double cream elsewhere)

2 pinches of salt

1 tea bag masala chai (available in most grocery stores)

A few tablespoons of cocoa powder

Method:

Chop up the chocolate on a cutting board into fine pieces with a large knife. This is the tiresome part of the recipe. I have a food processor, so I just break the chocolate up into individual squares and then throw it into the processor. The reason you want the chocolate broken up into fine bits is because you want it all to melt evenly when you pour in the hot cream. Throw the chocolate bits into a bowl.

How to make chocolate truffles/chocolate ganache

Next, get the half cup of cream to a gentle simmer and immediately turn off the heat. Add the tea bag to the cream, and let it steep for about 5 minutes.

Heat the cream again to a gentle simmer, and pour the hot cream through a strainer lined with a cheese cloth (as shown below), into the bowl with the chocolate.

How to make masala chai truffles

Using a ladle, make sure all the chocolate is covered by the cream. Let it sit for 2-3 minutes. Then add the salt, and delicately mix everything with a whisk.

Making Masala Chai Truffles

It’s important not to be rough because then you will get air bubbles into the chocolate. That wouldn’t be good as you want the chocolate to taste smooth and rich.

Chocolate ganache

Once you have a smooth mixture (this is called chocolate ganache), place the bowl in the fridge for about half an hour, until it firms up. The length of time you will need to leave it in the fridge will depend on the temperature inside your fridge, so keep checking on it. You want the ganache to be just firmed up, but not hard.

In the meantime, take out the plates and place a sheet of parchment or foil on each of them. Once the chocolate mixture is ready, take it out of the fridge and spoon out the chocolate in small portions on the parchment or foil (use an ice cream scoop if you have one). The portions should be approximately the size you want the truffles to be.

Making assorted chocolate truffles

Now, roll each scoop/portion of chocolate about in your hand until it is more or less spherical, then place it back on the parchment. I would recommend washing your hands periodically, while you do this, as you will get chocolate all over them, and it will be more difficult to shape the truffles if you’ve got melted chocolate on your hands. Also, the washing will help to cool your hands. The truth is, I have to wash my hands periodically anyway because I can’t resist licking some of the chocolate off every once in a while 😉

Masala chai/black-tea flavoured truffles

Masala Chai truffles

Once you’ve shaped all the truffles, take another bowl and put about 2 tbsp of cocoa powder in it. Take each truffle in your hand, roll it about for a second or two in your hands, just enough to warm the surface and then roll the truffle in the cocoa powder, until it is covered. Finally, place it in a paper cup. Repeat until all the truffles are done.

Masala Chai Truffles

I’ve heard it being said that this process can be messy and/or arduous; I didn’t think it was either; I did however end up smelling like chocolate all day 🙂

You can put the truffles in the fridge for two to three weeks, but take them out a few hours before you serve them, so that they’re at room temperature. They also make for a great present, just put them in a nice box and voilà! you have a handmade, personalized present!

Masala Chai Truffles
Categories
Baking Chocolate Food General Recipes

Delicious Chocolate Chunk Cookies, Fresh and Warm, Whenever You Want!

Warm cookies, fresh out of the oven, crisp on the outside, gooey on the inside, full of chocolate chunks- doesn’t that sound simply heavenly? So often, I think about baking cookies, and then decide that it’s not worth the trouble, considering how short-lived the joy is of eating them warm out of the oven. I’ve only ever liked fresh, warm cookies, you see. Once they’ve cooled, I lose interest in them. In fact, the only way I really enjoy cold cookies is by breaking them into chunks and dropping them into chocolate ice cream 🙂

But now, I have found a way to eat warm, fresh cookies everyday, whenever I want, and you can too! Just follow this recipe for cookie dough, then shape the dough into little balls, and freeze them raw. When you’re ready to eat a cookie, simply pop a dough-ball into the oven and 10 minutes later, enjoy!

Fresh, crisp, goey chocolate chunk cookies

If you’re having a party, and want to serve warm cookies at it, but can’t be bothered with baking them on the day of the party, then this freezing method works perfectly for that too. I did this for my birthday party, and everything went smoothly! I just popped the frozen dough-balls into the oven and then chatted with friends until 10 minutes later, they were ready 🙂

If you’d like to try the recipe I use, here it is! It’s from ‘Baking Illustrated’ published by the famous ‘Cook’s Illustrated’ magazine editors.

Here’s what you will need:

1¾ cups unbleached all-purpose flour

½ teaspoon baking soda

1 teaspoon salt

12 tablespoons unsalted butter, divided

¾ cup (5¼ ounces) dark brown sugar

½ cup (3½ ounces) granulated sugar

2 teaspoons vanilla extract

1 egg

1 egg yolk

2 handfuls of dark chocolate chunks

In a medium bowl, whisk the dry ingredients together. Next, in a microwave-safe bowl, melt the butter and let it cool until it is luke-warm. Add the two types of sugar to the butter and beat until smooth. Then, add the egg, egg yolk, and vanilla extract and continue beating at medium to low-speed until the mixture is smooth. Next, at a low-speed, beat in the dry ingredients. Once they’re mixed in, add the chocolate chunks, and try to mix them in with a spatula or your hand, until they are somewhat evenly distributed. Your dough is now ready!

The final step involves shaping the dough into balls. It’s best to move to the dining table for this last step as it takes about 5-10 minutes, and you don’t really need access to things in the kitchen or the sink for this. Place a sheet of parchment-paper or wax-paper on a baking sheet. Using an ice cream scoop, scoop out a little portion of the cookie dough on your palm and roll it into a ball. The size of this portion can very, depending on how large you want your cookies to be; I scooped out about a ping-pong ball sized amount. Roll the dough up into a ball, then tear it apart at the centre. Rotate the two halves so that the uneven, torn surface faces upwards, and re-attach the two bits together into a make-shift, but clearly imperfect sphere. (Apparently, this uneven surface makes the cookie look better once baked. (I am not entirely certain of this, to tell you the truth. One day, I shall be brave enough not to follow this instruction, and then I will let you know what happened.))

You’re almost done! Place the baking sheet in the freezer for about 2 hours, until the dough is frozen. Then take the sheet out, place the balls in a freezer bag and pop them back into the freezer. Whenever you’re ready to eat a cookie (or three), pre-heat the oven to 325 degrees farenheit, place a dough-ball on a baking sheet covered with baking-paper and bake for 10-12 minutes, until golden brown on top.

It’s best to let the cookie cool a bit on the tray and then on a cooling rack. But if you’re impatient, like I am, these cookies taste good minutes after they’re out the oven too, as you can see from the picture below, I could hardly wait to bite into my cookie 😛

Delicious chocolate chunk cookies in minutes

Mmmm…deliciousness!

You could also enjoy it, all warm and gooey, with a glass of cold milk!

Chocolate chunk cookies in minutes

Categories
Chocolate Chocolate Truffles Cooking Food General Recipes

Dark Chocolate Truffles with Mint-Buttercream Centers

Last week I decided to invite some friends over to mine for drinks, desserts, cheese, and some cheese related hors d’ oeuvres. It was my birthday you see, and what better way is there to celebrate one’s birthday than by feeding one’s friends and drinking with them? 🙂

I tried several new recipes out for this party, including three new types of chocolate truffles! Here’s one of my favourite ones: truffles with mint centers!

Mint Chocolate Truffles

This was a modification of a basic truffle recipe that I came up with while fooling around with new flavours and textures; If you’d like to try it, read on!

Ingredients:

100 g dark chocolate (at least 70% cocoa solids) (the better this chocolate is, the better your truffles will taste)

1/2 cup heavy whipping cream

2 pinches of salt

5-6 tablespoons of icing sugar

5 tablespoons butter

1/4 to 1/2 teaspoon mint essence

3-4 drops green artificial food colouring

5-6 squares of dark chocolate for coating the truffles

Equipment:

4 Bowls and several spoons

1 large plate

A hand-held or stand-alone egg-beater/mixer

1 sheet of foil or butter paper

Method:

I began by heating the cream in a little pan to a gentle simmer. In the meantime, I chopped the chocolate into bits (you can also use a food processor), and placed the chocolate bits in a bowl.

How to make chocolate truffles/chocolate ganache

Once the cream began to simmer, I poured it over the chocolate and let it sit until the chocolate melted.

Making a chocolate ganache for chocolate truffles

Once the chocolate was melted, I took a whisk and gently mixed the chocolate and cream into a smooth mixture adding a pinch of salt as I did this. This delicious ganache needed to cool and firm up, so I covered it up and placed it on the dining table. Once it reached room temperature, I transferred the bowl to the fridge.

Chocolate ganache

While the ganache cooled, I placed the butter in a bowl and began whipping it up with a hand-held mixer (egg-beater). When it was creamy and softened, I added a pinch of salt, 2 tablespoons of icing sugar, 1/4 tsp of mint essence, and a few drops of green food colouring. I whipped all this up into a  creamy smooth mix and then tasted it. I thought the mixture needed a little more sugar, so I added another 2 tablespoons. (You should also taste the mixture intermittently and see if it needs more sugar or mint essence; add as much as you think is appropriate.) Once it tasted just right, I covered up the bowl and placed it in the fridge.

Once both the ganache and mint-filling were firmed up in the fridge, I took them out and began working with them. I covered two baking trays with wax paper (you can also use baking paper or aluminum foil) and then began scooping large blobs of chocolate on one of the trays.

Making assorted chocolate truffles

Once all the chocolate was divided into ‘large blobs’ on the first tray, I began scooping smaller portions of the mint-buttercream into my hand, shaping them into rough spheres and then placing them on the other tray.

Making mint Chocolate Truffles

As soon as all the mint mixture was used up, I placed both trays in the freezer for about 15 minutes. Once the scoops and mint-spheres had hardened from the cold, I was ready to start shaping the truffles!

(When you’re trying this, make sure you have enough works-space on your kitchen counter. I like sitting down while I do this, because it takes some time, so I usually move over to the floor because I feel more comfortable sitting cross-legged. You could move over to the dining table if you prefer.)

Now I was ready for the fun part! I picked up one of the chocolate scoops and shaped it into a sphere in my hand. Then I flattened it out on my hand like a mini chapathi or tortilla.

Shaping chocolate cream cheese truffles Step 1 in shaping chocolate cream cheese truffles

Then, I took one of the mint flavoured balls and placed it at the centre of the ‘chocolate chapathi’:

Shaping chocolate cream cheese truffles Step 2 in shaping chocolate cream cheese truffles

and carefully rolled the chocolate layer over the mint centre, shaping the truffle into as perfect a sphere as possible. (I don’t have a photograph of the sphere-shaping bit because I needed both hands and by this time my other hand was covered in chocolate.)

Shaping chocolate cream cheese truffles Step 3 in shaping chocolate cream cheese truffles

I repeated this until all the chocolate was used up:

Shaping chocolate truffles

Next, I melted 5-6 dark chocolate squares in the microwave. (When you do this, be sure to do this on a low setting as you don’t want to burn the chocolate. Ideally, you should melt the chocolate in a double boiler to avoid this, but I find that if I am careful, I can do it in the microwave. After, I let the chocolate cool a bit (it’s important not to let it harden), I picked up one of the truffles, and dipped it into the chocolate, coating it completely, as shown in the photograph below:

Dipping truffles in chocolate

Then, I placed the truffle back on the wax paper to cool. I repeated this until all the truffles were coated. Finally, I let them all cool and then placed them in little green-coloured paper cups.

And Ta DA! They were ready to be devoured! Rich dark chocolate truffles with soft mint-flavoured butter-cream centers. 

And then, all that was left was one lonely half-truffle. If it looks half-eaten, that’s because it is 😛 I did it for you all, so you can see what the centers look like 😉

Mint Chocolate Truffle

Categories
Chocolate Food General Recipes

A Cure for Dark Winter Afternoon Blues

I’ve been remiss again, and for this I apologize. The life of a grad student is often erratic, and various deadlines have kept me from writing about my food-related adventures. Happily, they haven’t entirely prevented me from having said adventures. So, now that I have some time again, I shall return to chronicling my chocolate and spice related capers.

Despite my happiness at having a bit more free time though, there is a cloud in my otherwise blue sky. A literal cloud, in fact, because winter has arrived, bringing with it cold, dark afternoons :(. Finally, I understand why people who live in Canada, the northern U.S and northern Europe are so obsessed with the weather. It’s actually depressing to not see or feel fuzzy, yellow sunshine for months on end. (I mentioned these places in particular, because these are the cold parts of the world that I’ve lived in. I realize of course that there are other cold places, I’ve just never lived there and so, have no idea if people there are obsessed with ‘The Weather’.)

And then suddenly, a few weeks ago, I stumbled upon a cure, a magical, instantaneous cure for winter blues, namely: hot chocolate. All you need is a few minutes in the kitchen to stir up a nice cup of hot, chocaltey richness, and you’re all set. You can curl up on your couch with a blanket and a good book, and a soft pair of socks on your feet (ideally a cat is also included in this scenario) and winter will actually seem bearable.

Don’t believe me? Just look at this:

photo-22

I’ve taken to making myself a cup every once in a while 🙂 I use homemade chocolate fudge ice-cream topping to make the hot chocolate, rather than cocoa or chocolate flakes. If you’d like to recreate this deliciousness, it’s fairly simply. Just warm up 2/3rds of a cup of milk. Then dissolve 2-3 tablespoons of homemade dark chocolate fudge into it. Here is a recipe for a velvety, homemade dark chocolate fudge that I strongly recommend; it’s super yummy and super-easy to make. (It is also delicious on ice-cream, which is what I originally made it for.)

Once you’ve dissolved the fudge, top off the hot chocolate with some whipped cream and stick a cinnamon stick into the cup:

photo-23

Finally, sprinkle some cocoa powder on the cream, and sip away! If you’ve got a cookie to go with it, more power to you. I think my next post will be about the dark-chocolate-chunk cookies that I am now about to go and bake 😛 Mmmm.

photo-24

Categories
Chocolate General

The Perfect Pick-Me-Upper on a Cold, Wet, Awful Fall Evening

I am not much of a coffee drinker. I barely ever drink coffee actually, although I do like a tisane or a flavoured green tea every once in a while. However, because I find myself having to spend long hours at my desk in front of this computer, painstakingly writing, footnoting and editing my thesis, over the past week, I’ve resorted to coffee. The problem though, is that it tastes awful. Coffee smells absolutely heavenly, which is why I use it in baking (my espresso buttercream icing is a case in point) and chocolate-making, I even just sniff coffee-bean jars sometimes, but I am not a fan of its taste. I know, I know, all you coffee lovers out there might object on the ground that I might not be buying the right beans, or grinding them fresh etc., But, dear readers, I’ve never, absolutely never, liked the taste of coffee. No matter how it was made and no matter what beans were used, the taste of coffee never appealed to me.

Therefore, today, I decided to try complimenting my cup of coffee with flavours that I do like. I brewed myself a cup (I used a milk frother and steamed milk by the how, so my coffee would turn out more foamy) and then added 3 dollops of my velvety hot chocolate fudge (go here for the recipe) and one and half teaspoons of Frangelico liqueur.

I have to say, it turned out pretty darned good, for a homemade cup of coffee made by a complete amateur! It was a perfect hazelnutty, chocolatey accompaniment to copyright law on this cold, wet, depressing evening.

Chocolatey hazelnut coffee on a grey day.

I did of course top the coffee off with a generous helping of whipped cream and a sprinkling of cocoa powder.

 Hazelnut and chocolate coffee whipped cream and a sprinkling of cocoa powder.

Now I am all perked up and energetic. Also, I feel strangely warm and fuzzy, it must be the booze 😛

Categories
Baking Chocolate Food General Recipes

In Praise of Spontaneity and Vanilla and Espresso Buttercream Frosting

One of the things that often irks me about living in North America is how much people seem to plan and organize their social lives. Speaking broadly of course, based on anecdotal evidence from my life, I find that people in India are far more spontaneous. I think there is something nice about being able to phone a friend and make an impromptu plan for the same day once in a while. But, here, more often than not, people plan dinner parties and drinks weeks in advance.

Unfortunately, having to pencil appointments with my friends into my calendar really doesn’t work for my personality. I often find myself feeling tired, or un-social, and want nothing more than to sit on the couch with a book, but end up having to go out because I accepted an invitation weeks ago. People may have gone to considerable trouble to cook for me, or a the very least they’ve set aside time to see me, so I feel compelled to go. At other times, I have a spontaneous urge to go out and see people, but end up staying in, because I haven’t made any plans with anyone.

I realize that part of life is having to do things one doesn’t feel like doing, but when it comes to how we interact with one another, I don’t think it has to be this way, and it isn’t this way in India. Of course, the ‘impromptu system’ I am advocating has its own drawbacks. In spite of its flaws however, I prefer this system to what I see as an overly organized North American model.

Luckily, that’s all it is, a model; which means not everyone follows it and I’ve managed to find a few people here who like spontaneity once in a while too 🙂 All of this has meant that last evening, I was able to indulge in one of the small, simple joys of life, namely throwing an impromptu soiree. The plan was made frantically, over multiple text messages, sometime last afternoon. After which, I could be seen running about trying to throw some snacks together. Since spontaneity was the theme, I even decided to bake a cake! It turned out pretty well, but what I really liked about it was the icing, so I thought I would share the recipe here with you 🙂

Ingredients:

1 Chocolate Cake

4 Eggs

1 Cup Sugar

2 Pinches of Salt

3 Sticks of Butter

1 tsp Vanilla Essence

1 tbsp Instant Espresso

Method:

Place the sugar, salt and eggs in a double boiler (just place them in a heat proof bowl and then place the bowl over another bowl of simmer water, make sure not to let the bottom of the first bowl touch the water). Gently and continuously, whisk the mixture while it heats up. Using a thermometer check the temperature of the mixture periodically. When the temperature reaches 160 F, take the mixture of the heat. Now beat the mixture at high-speed until it becomes fluffy and airy and reaches room temperature. Then add the butter in, half a stick at a time, beating continuously at medium speed. Once the butter is whipped in, separate the mixture into two equal parts in two bowls.

In the first bowl beat in the espresso at high-speed until you have a really light fluffy frosting.

Next, cut the cake in half. (Ideally, when you bake the cake, bake it in two separate bowls so that you have two layers without having to slice the cake in half later). Using a spatula spread a thick layer of espresso frosting over the top of the bottom layer. You don’t have to worry about doing this neatly. Make sure to leave aside about 3-4 tablespoons of frosting to decorate the top of the cake with. Then place the top layer of the cake on top of the frosting.

In the second bowl, beat in the vanilla essence, until you have a smooth, fluffy texture.

Using a separate spatula, spread this over the top and sides of the cake. Once you have a somewhat smooth (it does not have to be flawless) surface, use a basting brush to draw fine decorative lines along the sides and top of the cake. Finally, fill some of the left over frosting into a frosting bag and squeeze little bits of it on the top the cake in whatever pattern you like.

And there you have it, a white vanilla butter-cream frosted cake with a creamy espresso layer in the middle. Mmmm.

Mine turned out a little lopsided 😦 clearly I have to work some more on my decorative skills. However, it tasted pretty darned good and got rave reviews at my party 🙂

Categories
Chocolate Food General Recipes

Velvety Hot Chocolate Fudge

Of all the lovely chocolatey treats in the world, chocolate-themed ice cream is one of my favourites. If you’ve seen my post on the best ice cream in the world you know I am not kidding or exaggerating when I say that I am hooked to chocolate filled, chocolate topped and chocolate sprinkled chocolate ice cream.

Now ordinarily, I eat my ice cream with Sanders Dark Chocolate Fudge, which is an absolutely delicious ice cream-topping that you can get in grocery stores all over Michigan. I haven’t found a decent substitute here in Canada though, and believe me, I’ve looked. So I stock up on Sanders every time I am in Michigan. When I run out, which is always fairly soon after I return to Canada, I settle for whatever generic fudge is available at my local grocery store. This makes me immensely discontent. Really, it gets in the way of me being truly happy here. Also, store-bought fudge is often filled with high fructose corn syrup and tonnes of sugar and preservatives. Given this unfortunate state of affairs, I’ve tried on 3 separate occasions to make a homemade fudge topping, following recipes from different sources each time. Alas, the result was sub-par each time.

But today, as I sat down on my couch to a new episode of “Luther”, I was struck by an idea. You see, the biggest problem with the homemade sauces I made was that none of them were gooey and fudgy enough. Also, there is a warm, velvety feeling that the Sanders fudge fills my mouth with, and I haven’t been able to re-create this texture and taste in all my fudge-making attemptsI’ve been telling myself that my refusal to use high fructose corn syrup lies at the root of my failure. “Or perhaps, it is some other, secret ingredient that I am missing”, I would think to myself morosely, in my dark moments. But the thought that came to me this evening, the question rather, was this: could it be, that the secret ingredient was caramel sauce? (Side note: I have now discovered that this inspiring epiphany was the result not of divine intervention, but a happy co-incidence. You see, I was eating caramel chocolate ice cream on the couch, while watching the tv show).

I was intrigued, I was inspired, I was impatient! I pranced over to the kitchen, and began concocting. What I ended up with wasn’t as good as Sanders chocolate fudge, but it was pretty darned delicious nevertheless. Also, I think that this recipe is slightly healthier, because I used no corn syrup or preservatives, just good wholesome, somewhat fattening ingredients 🙂 If you want to try it, here’s how:

Homemade Dark Chocolate Sauce for Icecream

Ingredients:

1/2 cup brown sugar

2 tbsp water

1 tbsp organic unpasteurized honey

1 tbsp organic grade B maple syrup

1/2 cup heavy cream

4 tbsp good quality, unsalted butter

A few pinches of salt to taste

1 tsp vanilla essence

150 g 80% good quality dark chocolate

Method:

Place the sugar, water, honey and maple syrup in a little saucepan and heat on medium heat. Don’t stir the mixture at all; instead swirl the liquid about in the saucepan once in a while. Use a basting brush dipped in water to brush down the sides of the pan if needed. Wait until the sugar dissolves and then turns a deep amber (the maple syrup will make the mixture a little brown right from the start, so wait until the mixture turns even darker), about 8 minutes.

Next, take the pan off the heat and add cream and butter to the mixture. Whisk the mixture until it is smooth.

Homemade hot chocolate fudge

Then add the chocolate, salt and vanilla essence. Mix it all up until you have a nice smooth texture.

Homemadel hot chocolate sauce

You can serve it warm, as most people like it, or you can wait until it cools and thickens. I like my sauce thicker and more fudgy, so I wait until it has cooled down before I drown my ice cream in it. Either way, whenever you’re ready, pour this delicious goeeyness on your ice cream and eat away to your heart’s content.

Homemade Dark Chocolate Topping

Pour the left-over fudge into a jar and store it in the fridge.

Homemade Dark Chocolate Sauce Recipe

Categories
Baking Chocolate Food General Recipes

The Hazelnuttiest Cake in the World

My very first post on this blog was about a Nutella cake. While baking that cake, I used a recipe from Nigella Lawson’s book, ‘How to Be a Domestic Goddess’, as a guide. I really liked that cake, as is evident from my post about it, but there was one thing about it that bothered me. I didn’t like the fact that the cake called for Nutella, which is after all a processed food from the supermarket. I’d rather make a cake from scratch, or as close to from scratch as is possible for someone who lives in a little apartment in a big city. That way, I have a little more control over what goes into it. Last week, I tried making a more ‘wholesome’ and ‘homemade’ option as it were, based off a recipe from ‘Baking Illustrated’.

How did it turn out you ask? Well see for yourself:

Recipe for Dark Chocolate Hazelnut Cake

Truly, I liked the taste of this cake even better than my earlier attempt; the big bonus of this new recipe is that the cake turns out even more hazelnutty, which is GOOD, because hazelnuts are heavenly 🙂

If you want to make this cake too, here’s what you will need:

Equipment:

A 23 cm or 9 inch spring-form pan, two large bowls, two smaller bowls, a hand-held or stand-alone mixer or a whisk, a food-processor or mortar and pestle, and a tea towel.

Ingredients:

For the Cake:

6 free range eggs (I insist on free-range after seeing some horrific videos of how chicks and hens are treated in “egg factories”.

A pinch of salt

1 stick of unsalted butter 

200 g hazelnuts

1 cup granulated sugar

2 tablespoons all-purpose flour

175 g dark chocolate (at least 70% cocoa solids)

For the Icing:

150 ml heavy cream or whipping cream

150 g good quality dark chocolate (at least 70% cocoa solids), chopped

2-3 Tablespoons fo Frangelico

A pinch of Salt

2 handfuls of hazelnuts 

A half cup or so of dark chocolate flakes (you can make these by using a paring knife or a vegetable peeler on some dark chocolate).

Preparing the Ingredients:

To begin with, I made sure to lay all the ingredients out on my dining table. When you’re baking, unless the recipe otherwise specifies, it is best to use all ingredients at room temperature. Next, I turned on the oven and preheated it to 350 degrees Fahrenheit.

Preparing the hazelnuts: I toasted the nuts (both those you need for the cake and those you need for decorating the top of the cake) in the oven at 350 Fahrenheit for about 10 minutes, tossing them once or twice in-between. Once they were lightly browned and I could smell the delicious hazelnutty aroma, I took them out of the oven and let them cool for a bit. Then, I placed them in a tea-towel and rubbed the nuts against each other until their skins peeled off.

Next, I put 200 g of the toasted and skinned nuts in a food processor, along with 2 tablespoons of flour and 1/4 cup of sugar and processed them till fine (you could also use a coffee grinder or mortar and pestle).

Preparing the chocolate: I melted the chocolate in a microwave, taking care to use a low heat setting, so as not to burn the chocolate.

Preparing the eggs: I separated the egg yolks from the whites, placing 5 egg whites in a large bowl and 6 egg yolks in a smaller bowl. (You can throw away the extra egg white or use it in a face or hair mask.)

Some people think separating the egg white and yolk and beating them separately is a waste of time, but it isn’t if your recipe does not call for baking powder/soda. This is because all the air in your cake will have to come from the egg whites, since there is no chemical raising agent added to the cake.

I was now ready to begin! What follows are step-by-step instructions to re-create the rich nutty cake I made today! Enjoy!

Method:

1. Place the butter in a large bowl and beat until fluffy. Next, add the remaining three-quarters of sugar, one-quarter at a time, until creamy and almost white. Now add the egg yolks two tablespoons at a time, beating well throughout. Next, add the melted chocolate (which would have cooled a bit by now) and beat the mixture until the chocolate is blended in. Then, gently stir in the hazelnut meal that you have already prepared in the food processor.

2. Now we beat the egg whites; this is the slightly tricky part of the recipe. Add a pinch of salt to the whites and then beat them until they are ‘stiff but not dry”. What this means is that you want to be able to make the foamy whites rise to a peak with your finger.

How to properly beat egg whites
Stiff egg-whites
Another way to test this is to take a clean dry egg and try to float it on top of the egg-white foam. If it sinks you’re not done. If it floats completely you’ve overdone it. If it sinks just a quarter of an inch, well you’re egg-whites are perfect then! Make sure the bowl and the whisk you use are perfectly clean, i.e. they are free from oil and water.

3. Once the egg whites are ready, add a dollop of the egg-white-foam to the mixture from step 1 and mix it in. Next, very gently and with a light hand, fold in the rest of the foam. This is important; don’t be rough at this stage; because we want to preserve the airy-ness and lightness of the foam. Here is a video that shows you how to do it:

4. When you’re done folding the foam in, pour the batter in a greased and floured 9 inch or 23 cm springform pan.

Delicious Hazelnut Cake

5. Slide the pan into the oven and set the timer for 50 minutes. I would go and check on the cake toward the tail-end of this period, say around 45 minutes in. The cake is done when you can insert a tooth-pick gently into the cake, about halfway between the centre and the edge of the cake, and it comes out clean when you pull it out.

6. When it’s done, take the cake out and cool it on a cooling rack. Once it has cooled remove the sides of the pan.

(At this stage of the process, I already noticed one thing that was better about this cake when compared to my earlier Gianduja cake. The surface of this cake was smoother; there were no cracks on this cake at all. Also, it was more evenly baked. (The small nick visible in the picture was made by me with a knife, it wasn’t a crack on the surface.)

Hazelnut cake

7. Now the cake is ready and it’s time to make the icing! Heat 150 ml of cream and 150 g of chopped chocolate in a saucepan over low heat. Once it’s melted, add a pinch of salt and the Frangelico. Mix and let the ganache sit on the counter and cool for a bit. In the meantime, take the 2 handfuls of hazelnuts you toasted earlier, and crush them in a mortar or pestle or processor. I like to crush them into small chunks, you can choose to crush them more finely, or coarsely, whatever works for you.

8. Once cooled a bit, pour the ganache over the cake and spread it evenly over it, using an icing spatula or a large, broad knife.

Icing a Hazelnut cake with Dark Chocolate Ganache
I couldn’t glaze the cake until the day after I baked it because I had errands to run. Mysteriously, more than a quarter of the cake just disappeared overnight, so I ended up glazing the left-over part of the cake 😛
Next, garnish the cake with crushed hazelnuts and dark chocolate flakes and serve with a shot of Frangelico 🙂

Rich, hazelnut cake served with Frangelico
This rich hazelnut cake tastes best when served with Frangelico
Also, a little tip, if you’re going to store the cake for a while, make sure to heat it up quickly in the microwave when you take it out of the fridge. Just heat for 20-30 seconds on a low setting; both the cake and the icing taste waaay nicer that way.

Mmm this cake was utterly delicious, it’s totally worth the effort of baking it, I promise!

Chocolatey Hazelnut Cake
Eating my Delicious Hazelnut Cake 🙂