I woke up this morning with a hankering for delicious pancakes 🙂 but I didn’t want just plain old pancakes, I wanted to make something interesting. Of course, I could have made nutella pancakes, or ice-cream pancakes, but I wanted to try to make something a little, well healthier.
You see, over the past few days, I’ve been trying to eat more fruit and vegetables. It is however, not an easy thing to do, given that I dislike most veggies and nearly all fruit. Yesterday, I even tried making myself a carrot smoothie, because I hate eating carrots. I chopped up a few skinned carrots and threw them in the food processor with some water. This experiment did not go too well, and I do not recommend trying it at home. I ended up with what can be best described as orange glop, of which I unfortunately took a large gulp. This was, in equal measure, both brave and stupid.
So this morning, I woke up with renewed determination; I was going to eat fruit, and I was going to enjoy it! I decided on pumpkin and apple pancakes topped with maple syrup and a flavoured butter that I call ‘Sugar and Spice Butter’. This I washed down with hazelnut and chocolate tea.
This was a delicious and fairly easy to set-up, sunday brunch. And yes, while it wasn’t really that healthy, it was most definitely a change from my usual chocolate-themed food 🙂
And this did go into the making of this breakfast 🙂
I admit that I did take a shortcut, just this once. I started off with pancake mix. Calm down dear readers, there is a reason, a justification for this otherwise unpardonable sin! First and foremost, I am NOT a morning person! Second, this Trader’s Joe’s mix is absolutely delicious. You really should go and stock up on a whole lot of boxes of this in the fall- it’s a seasonal product you see.
So I followed the instructions on the box, except that I added chopped up apple bits to the batter. For the flavoured butter all you need is:
1/4 cup good quality unsalted butter
2 teaspoons brown sugar
1/2 teaspoon freshly ground cinnamon
1/2 teaspoon freshly ground nutmeg
A few drops vanilla essence
Whip all this up in a bowl and then heat the mixture for about 45 seconds on low heat in the microwave, just enough to melt the sugar. Then whip it all up again and place it in the fridge to cool and harden. And there you have it: flavoured butter for pancakes, crepes or bread!
Oh and I have to fess up, I did finish up my brunch with a little dessert. I moved over to the coffee table, with this:
Another cup of tea and a little cup of home-made hazelnut chocolate butter 😉
Mmmm…I can’t help it, I am a chocolate nut-butter fiend.
When I moved to a new apartment last month, I bought this Ikea arm-chair. It served its main purpose as comfortable extra seating well, and the colour went with my decor, but I found it just a tad-bit plain.
I thought and thought about how I could jazz it up a little, and even contemplated trying to dye the chair or reupholster it. Then, I had a simple idea that I think worked out well: why not use upholstery tacks to decorate the chair? A lot of the antique furniture I’ve seen has brass-head tacks that both hold down the fabric and serve a decorative purpose.
So, I went to various stores including home-depot and a craft store and finally found upholstery nails/tacks at Rona. This is what I did with them:
First, I stripped off the arm-chiar cover because I liked the shape of the chair and its cute legs, and both were being hidden by the cover. I kept the cushion covers on though, as that way I can take them off and wash them every once-in-a- while. Next, I used small and large tacks in an alternating pattern.
I really like the design because I think it brings out the curviness of the chair 🙂
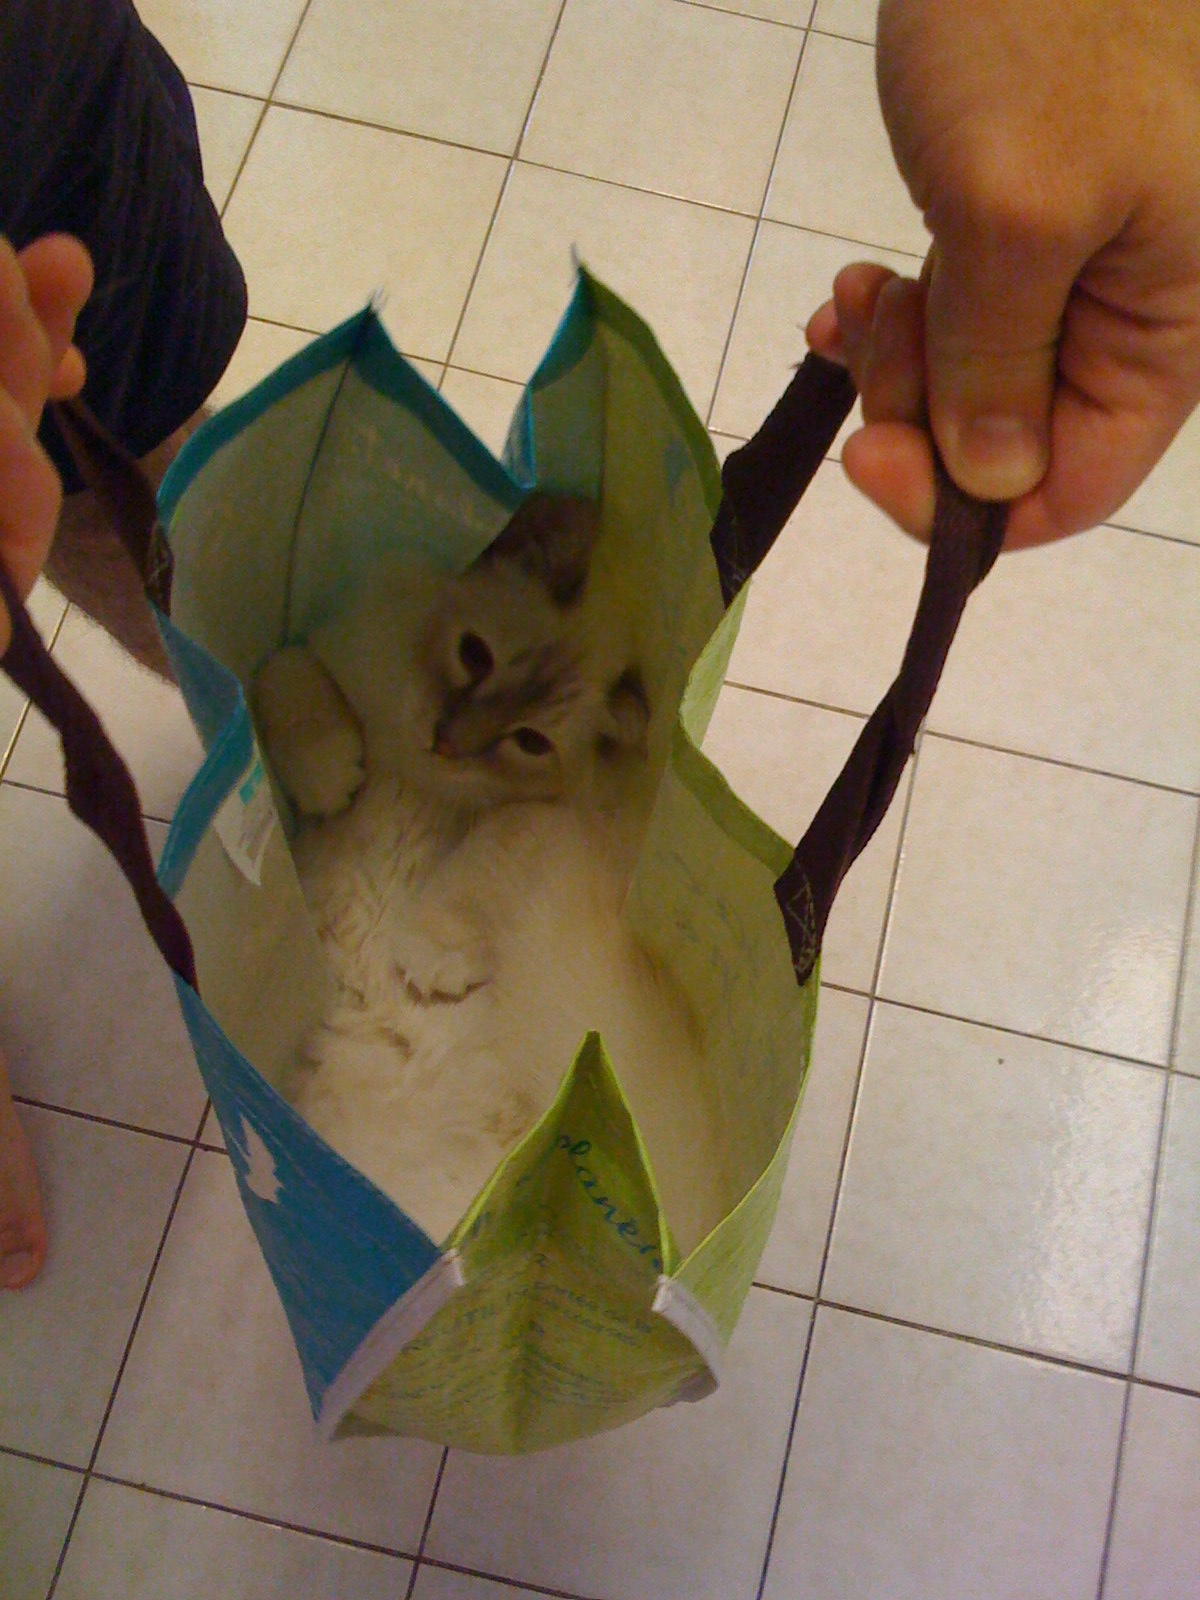
What better way to start writing again after a long sabbatical than by posting about one of the cutest, most beautiful cats I know?
So here are a few photos of him in some mighty odd places!
See him? Here’s a closer shot:
I did move him right after this shot as I wasn’t sure if he’d fall off! I know, I know, he is a cat and all that, but he isn’t my cat and those who know him best said they didn’t trust his balance 😉
Oh and doesn’t he look adorable here?
And where do you think this is? He’s all curled up in…
If you’ve already read a few of my blog posts, or you’re a friend of mine, you probably know that I am not thrilled by the prospect of eating fruits and vegetables. Usually, I only use fruit and vegetables (with the exception of spinach, tomatoes and butternut squash) on my skin and hair! In fact, if a serial-killer were to abduct me with the express intention of torturing me, his/her best bet would be to force me to eat some fruit, or worse veggies.
But, I am getting old and well, wrinkles and the prospect of some debilitating illness (in that order) are also beginning to cause me some concern. This has prompted me to consider eating some fruit.
I tried at first to eat berries, specifically, strawberries, blueberries and such, but found them to be too sour. So then I began coupling them with slices of cake, specifically, cheesecake, Nutella cake and such. This worked, except, I also got horrendously fat ( not quite horrendously, but I did put on some weight). I found I was eating more cake and less fruit; not only did this make me fat, it sort of defied the purpose of eating fruit, namely to try and be more healthy, if I ended up eating more sugars and fats along with the fruit, in order to be able to consume the fruit.
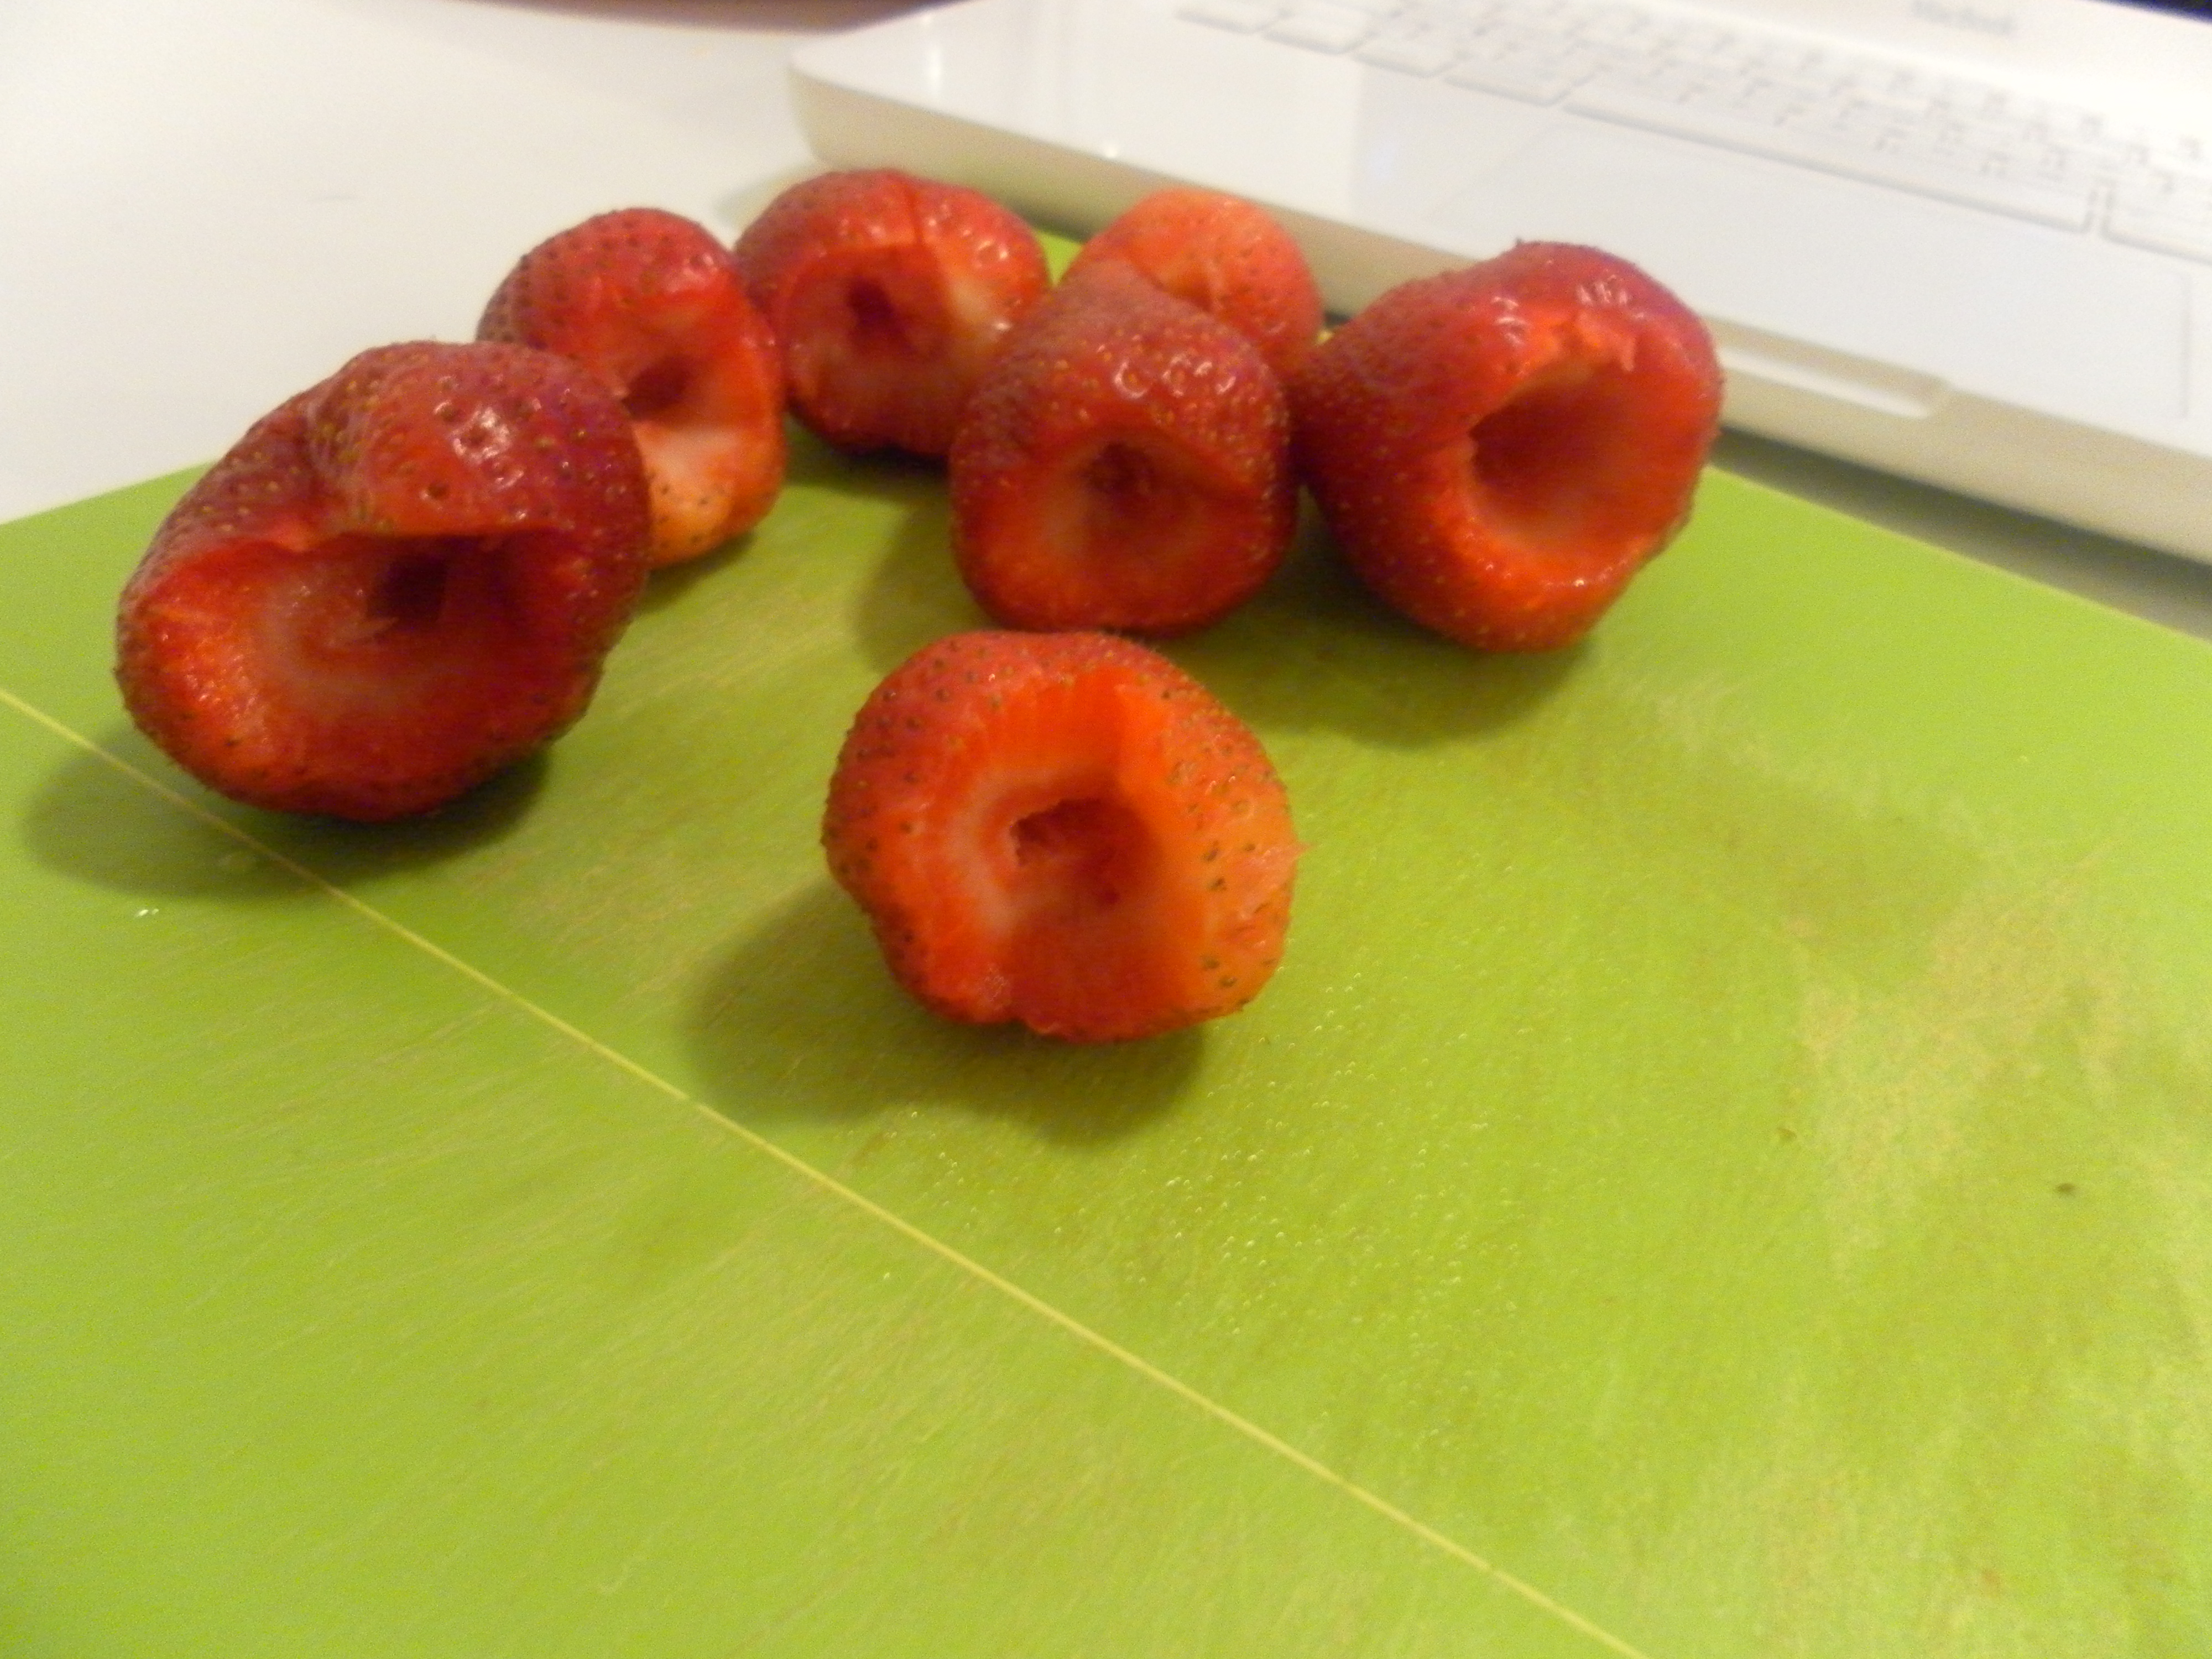
But finally, I might have a solution! I’ve begun making fruit smoothies every morning and they’re quite refreshing! I’ve been told they’re pretty good by some of my friends who’ve tried them. For me, as you know, all good food has to be spicy and buttery or in the alternative, chocolatey, so while it’s really difficult to even think about raw fruit as yummy, I will say this, this smoothie is quite a bit better than edible, which makes it one of the best fruit smoothies in the world, I assure you.
If you want to try making one, all you need are 6 medium strawberries, a banana, yoghurt, milk, and a food processor or blender. Start by culling the strawberries:
If you don’t know how to do this, watch this video about how to cull strawberries fast:
Next, throw the berries and the banana (cut in half) into a processor or blender and process until smooth. Then add 2-4 tablespoons of yoghurt (depending on how tart you like your smoothie to be) and about 3 tablespoons of milk. Process some more until everything is blended and pour into a tall glass.
Drink immediately, and give yourself a pat on the pat for doing something healthy 🙂
My very first post on this blog was about a Nutella cake. While baking that cake, I used a recipe from Nigella Lawson’s book, ‘How to Be a Domestic Goddess’, as a guide. I really liked that cake, as is evident from my post about it, but there was one thing about it that bothered me. I didn’t like the fact that the cake called for Nutella, which is after all a processed food from the supermarket. I’d rather make a cake from scratch, or as close to from scratch as is possible for someone who lives in a little apartment in a big city. That way, I have a little more control over what goes into it. Last week, I tried making a more ‘wholesome’ and ‘homemade’ option as it were, based off a recipe from ‘Baking Illustrated’.
How did it turn out you ask? Well see for yourself:
Truly, I liked the taste of this cake even better than my earlier attempt; the big bonus of this new recipe is that the cake turns out even more hazelnutty, which is GOOD, because hazelnuts are heavenly 🙂
If you want to make this cake too, here’s what you will need:
Equipment:
A 23 cm or 9 inch spring-form pan, two large bowls, two smaller bowls, a hand-held or stand-alone mixer or a whisk, a food-processor or mortar and pestle, and a tea towel.
Ingredients:
For the Cake:
6 free range eggs (I insist on free-range after seeing some horrific videos of how chicks and hens are treated in “egg factories”.
A pinch of salt
1 stick of unsalted butter
200 g hazelnuts
1 cup granulated sugar
2 tablespoons all-purpose flour
175 g dark chocolate (at least 70% cocoa solids)
For the Icing:
150 ml heavy cream or whipping cream
150 g good quality dark chocolate (at least 70% cocoa solids), chopped
2-3 Tablespoons fo Frangelico
A pinch of Salt
2 handfuls of hazelnuts
A half cup or so of dark chocolate flakes (you can make these by using a paring knife or a vegetable peeler on some dark chocolate).
Preparing the Ingredients:
To begin with, I made sure to lay all the ingredients out on my dining table. When you’re baking, unless the recipe otherwise specifies, it is best to use all ingredients at room temperature. Next, I turned on the oven and preheated it to 350 degrees Fahrenheit.
Preparing the hazelnuts: I toasted the nuts (both those you need for the cake and those you need for decorating the top of the cake) in the oven at 350 Fahrenheit for about 10 minutes, tossing them once or twice in-between. Once they were lightly browned and I could smell the delicious hazelnutty aroma, I took them out of the oven and let them cool for a bit. Then, I placed them in a tea-towel and rubbed the nuts against each other until their skins peeled off.
Next, I put 200 g of the toasted and skinned nuts in a food processor, along with 2 tablespoons of flour and 1/4 cup of sugar and processed them till fine (you could also use a coffee grinder or mortar and pestle).
Preparing the chocolate: I melted the chocolate in a microwave, taking care to use a low heat setting, so as not to burn the chocolate.
Preparing the eggs: I separated the egg yolks from the whites, placing 5 egg whites in a large bowl and 6 egg yolks in a smaller bowl. (You can throw away the extra egg white or use it in a face or hair mask.)
Some people think separating the egg white and yolk and beating them separately is a waste of time, but it isn’t if your recipe does not call for baking powder/soda. This is because all the air in your cake will have to come from the egg whites, since there is no chemical raising agent added to the cake.
I was now ready to begin! What follows are step-by-step instructions to re-create the rich nutty cake I made today! Enjoy!
Method:
1. Place the butter in a large bowl and beat until fluffy. Next, add the remaining three-quarters of sugar, one-quarter at a time, until creamy and almost white. Now add the egg yolks two tablespoons at a time, beating well throughout. Next, add the melted chocolate (which would have cooled a bit by now) and beat the mixture until the chocolate is blended in. Then, gently stir in the hazelnut meal that you have already prepared in the food processor.
2. Now we beat the egg whites; this is the slightly tricky part of the recipe. Add a pinch of salt to the whites and then beat them until they are ‘stiff but not dry”. What this means is that you want to be able to make the foamy whites rise to a peak with your finger.
Stiff egg-whitesAnother way to test this is to take a clean dry egg and try to float it on top of the egg-white foam. If it sinks you’re not done. If it floats completely you’ve overdone it. If it sinks just a quarter of an inch, well you’re egg-whites are perfect then! Make sure the bowl and the whisk you use are perfectly clean, i.e. they are free from oil and water.
3. Once the egg whites are ready, add a dollop of the egg-white-foam to the mixture from step 1 and mix it in. Next, very gently and with a light hand, fold in the rest of the foam. This is important; don’t be rough at this stage; because we want to preserve the airy-ness and lightness of the foam. Here is a video that shows you how to do it:
4. When you’re done folding the foam in, pour the batter in a greased and floured 9 inch or 23 cm springform pan.
5. Slide the pan into the oven and set the timer for 50 minutes. I would go and check on the cake toward the tail-end of this period, say around 45 minutes in. The cake is done when you can insert a tooth-pick gently into the cake, about halfway between the centre and the edge of the cake, and it comes out clean when you pull it out.
6. When it’s done, take the cake out and cool it on a cooling rack. Once it has cooled remove the sides of the pan.
(At this stage of the process, I already noticed one thing that was better about this cake when compared to my earlier Gianduja cake. The surface of this cake was smoother; there were no cracks on this cake at all. Also, it was more evenly baked. (The small nick visible in the picture was made by me with a knife, it wasn’t a crack on the surface.)
7. Now the cake is ready and it’s time to make the icing! Heat 150 ml of cream and 150 g of chopped chocolate in a saucepan over low heat. Once it’s melted, add a pinch of salt and the Frangelico. Mix and let the ganache sit on the counter and cool for a bit. In the meantime, take the 2 handfuls of hazelnuts you toasted earlier, and crush them in a mortar or pestle or processor. I like to crush them into small chunks, you can choose to crush them more finely, or coarsely, whatever works for you.
8. Once cooled a bit, pour the ganache over the cake and spread it evenly over it, using an icing spatula or a large, broad knife.
I couldn’t glaze the cake until the day after I baked it because I had errands to run. Mysteriously, more than a quarter of the cake just disappeared overnight, so I ended up glazing the left-over part of the cake 😛Next, garnish the cake with crushed hazelnuts and dark chocolate flakes and serve with a shot of Frangelico 🙂
This rich hazelnut cake tastes best when served with FrangelicoAlso, a little tip, if you’re going to store the cake for a while, make sure to heat it up quickly in the microwave when you take it out of the fridge. Just heat for 20-30 seconds on a low setting; both the cake and the icing taste waaay nicer that way.
Mmm this cake was utterly delicious, it’s totally worth the effort of baking it, I promise!
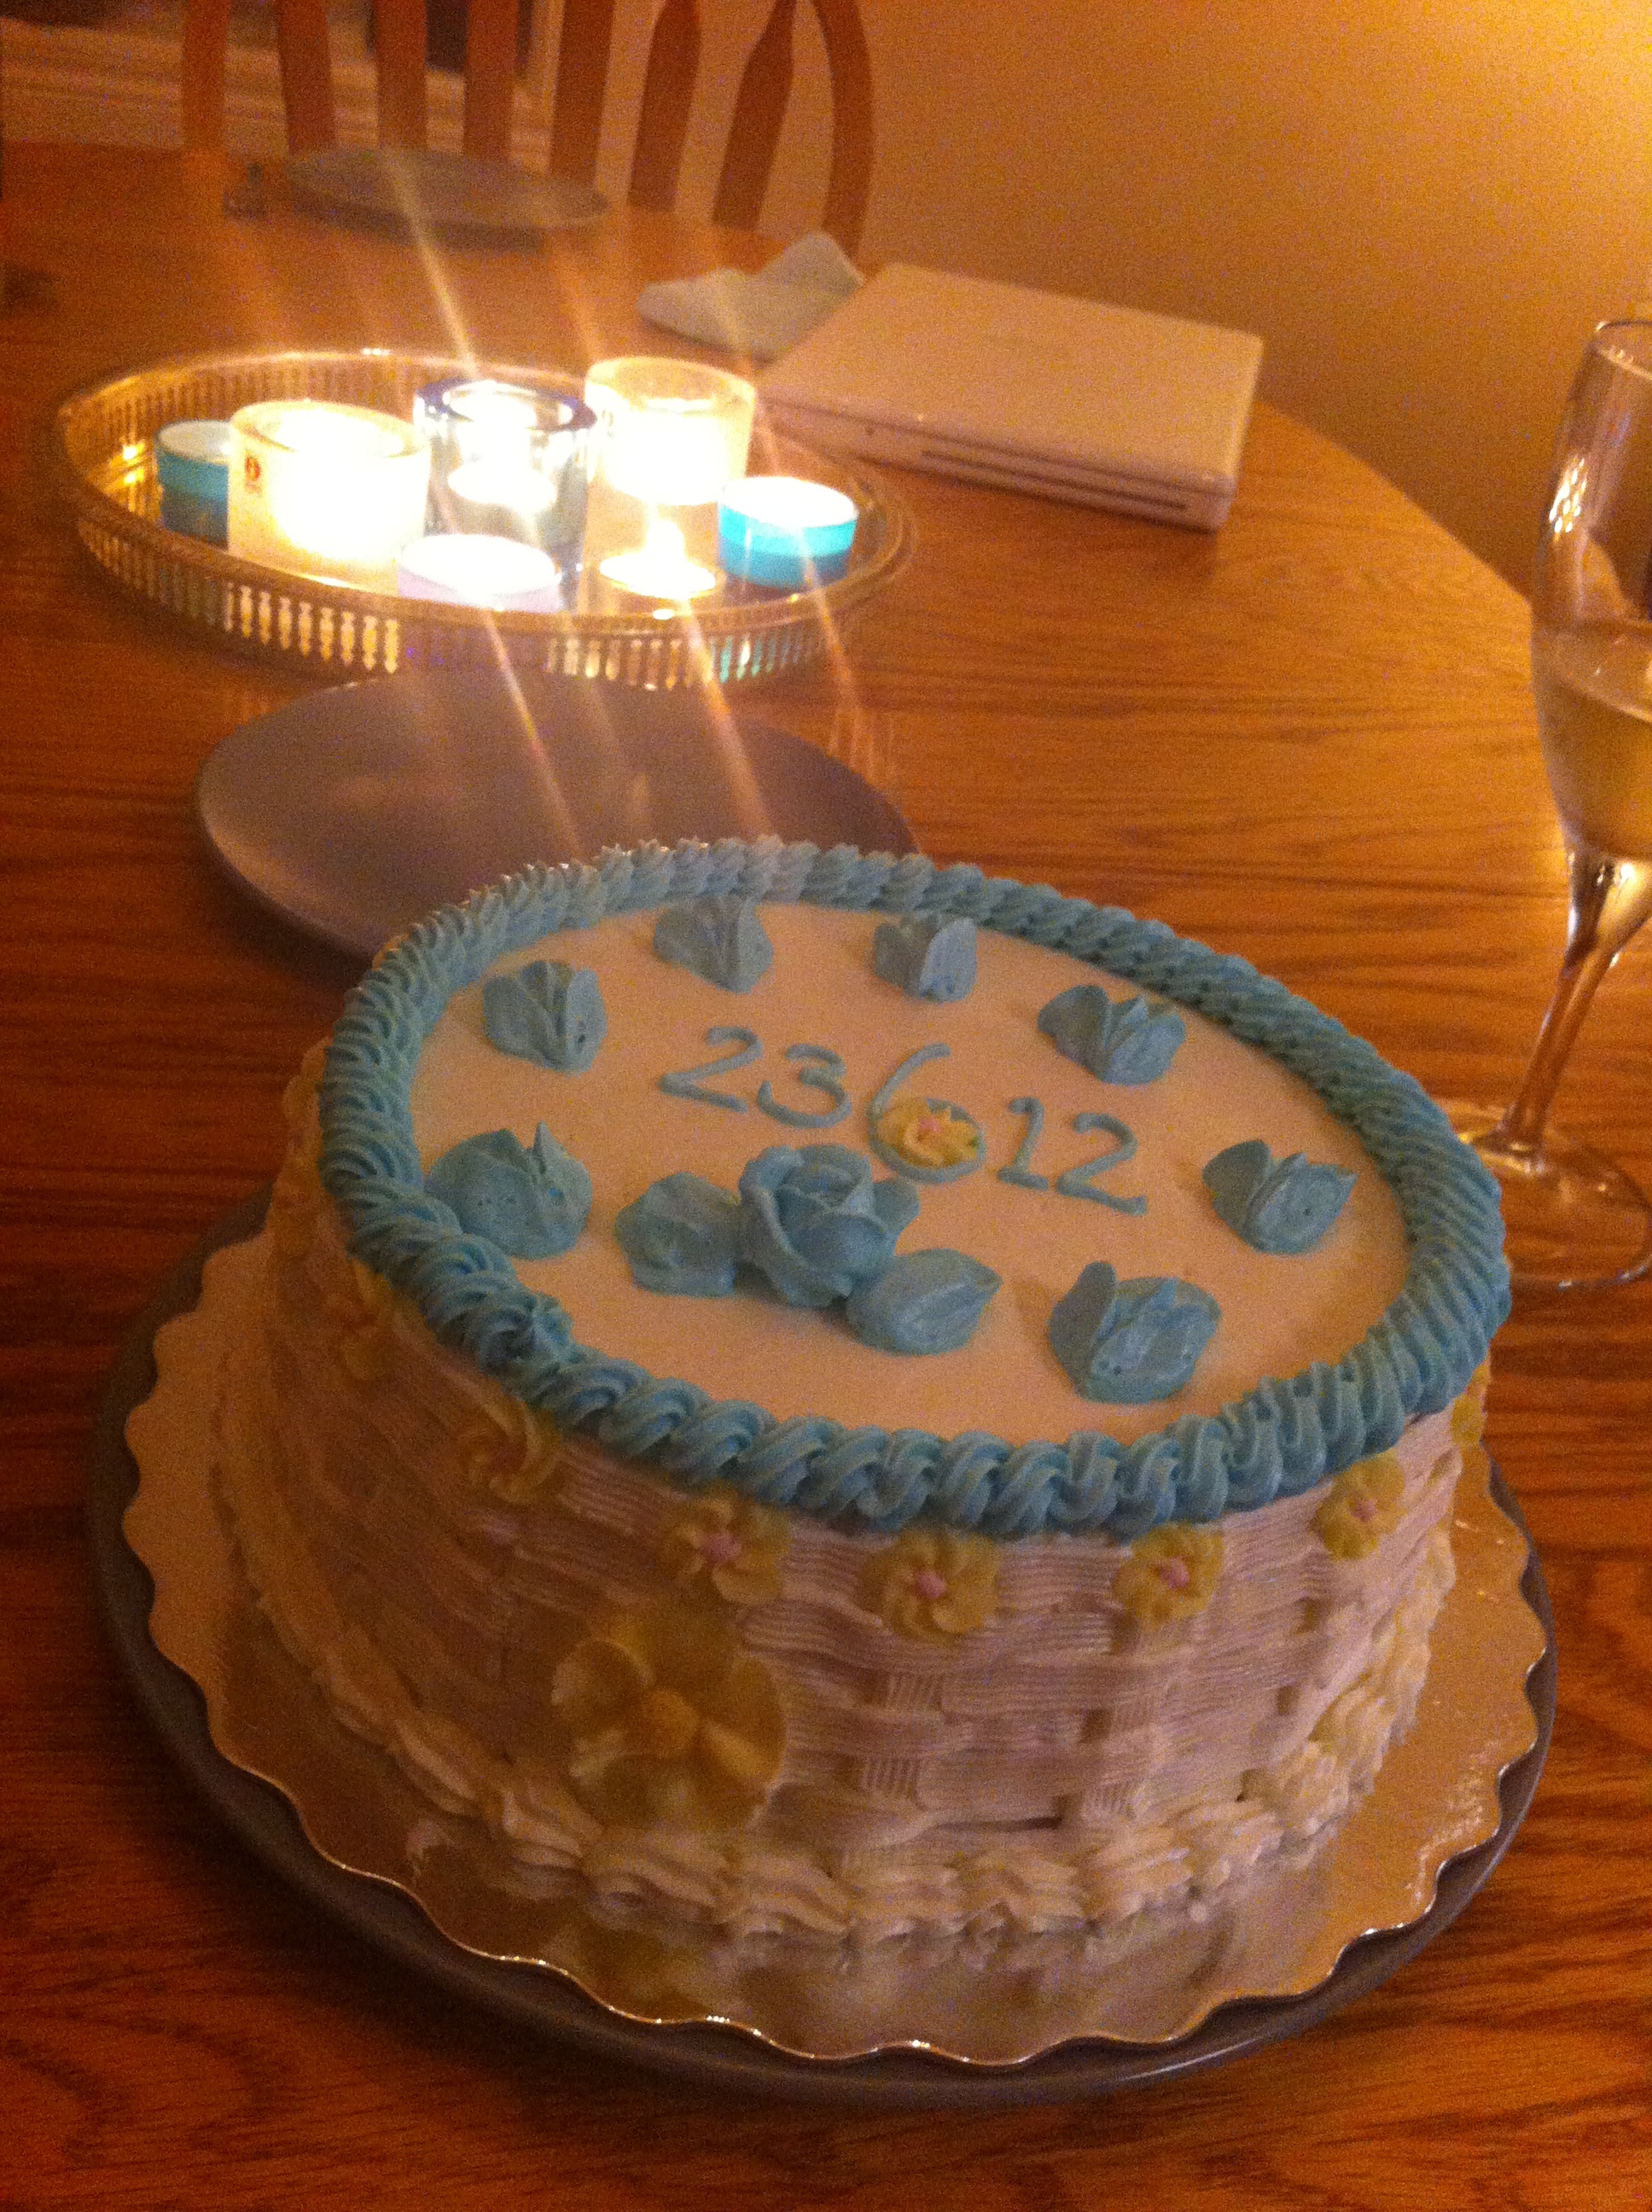
Last week, two old friends invited me over to their home for dinner. It was a lovely evening which ended with them bringing out this super pretty cake. On a side-note, the friend who baked this cake is so serious about baking that she is actually taking a cake-decoration class! Don’t you think it’s very intricately decorated?
It looked so ornate and perfect that I almost couldn’t eat it. Almost. Needless to say, I ate more than I should, and brought a whole lot more home with me 😛
I think ALL evenings should end like this, with a beautiful, and perhaps as importantly, large cake, being shared amongst a few good friends 🙂
Last week I was to meet an old friend for dinner. He said I could pick the restaurant and because I really wanted to try some place new, I spent hours researching restaurants in Toronto. I wanted to find a great place that served something unusual, something that was relatively new to me.
You see, I’ve been feeling more than a little restless lately; these past few months, I haven’t been traveling as much as I usually. One great way I’ve found to satisfy my wanderlust when I cannot afford to spend time traveling, is to try out a restaurant that serves food from some interesting part of the world. This ‘coping mechanism’ is particularly effective if the restaurant serves cuisine from a part of the world that I haven’t visited yet.
So I googled and yelped away and finally decided on a Persian restaurant called The Pomegranate. It is, oddly enough, situated in Little Italy. I rang the restaurant the next day and managed to get a dinner reservation for the same night.
The restaurant itself was cozy and the decor was somewhat cute. I have to be honest though, it wasn’t anywhere as nice as the review on blogto.com led me to believe. Some of the furnishings and fixtures were bordering on shabby and it wasn’t half as gorgeous or interesting as I expected it to be, given its Persian association. It reminded me a little bit of the scores of Indian restaurants I’ve seen, with kitschy Indian decor; in short it looked like it was trying far too hard to be what it thought westerners wanted it to be.
When the food arrived though, I forgot all about the decor. It was delicious! I should point out in no uncertain terms here, that I have never been to Iran, nor have I ever had ‘persian’ or Iranian food anywhere except in India. Also, I use the term ‘Persian’ to describe the food and the restaurant because this is how the restaurant owners have chosen to describe the place and the food. The term is fraught with political, cultural and historical connotations and tensions, but this post isn’t the place to go into all of this, and I am certainly not informed enough on the issues involved to wax eloquent on it, so I have decided to simply stick with the term that the restaurant owners have chosen.
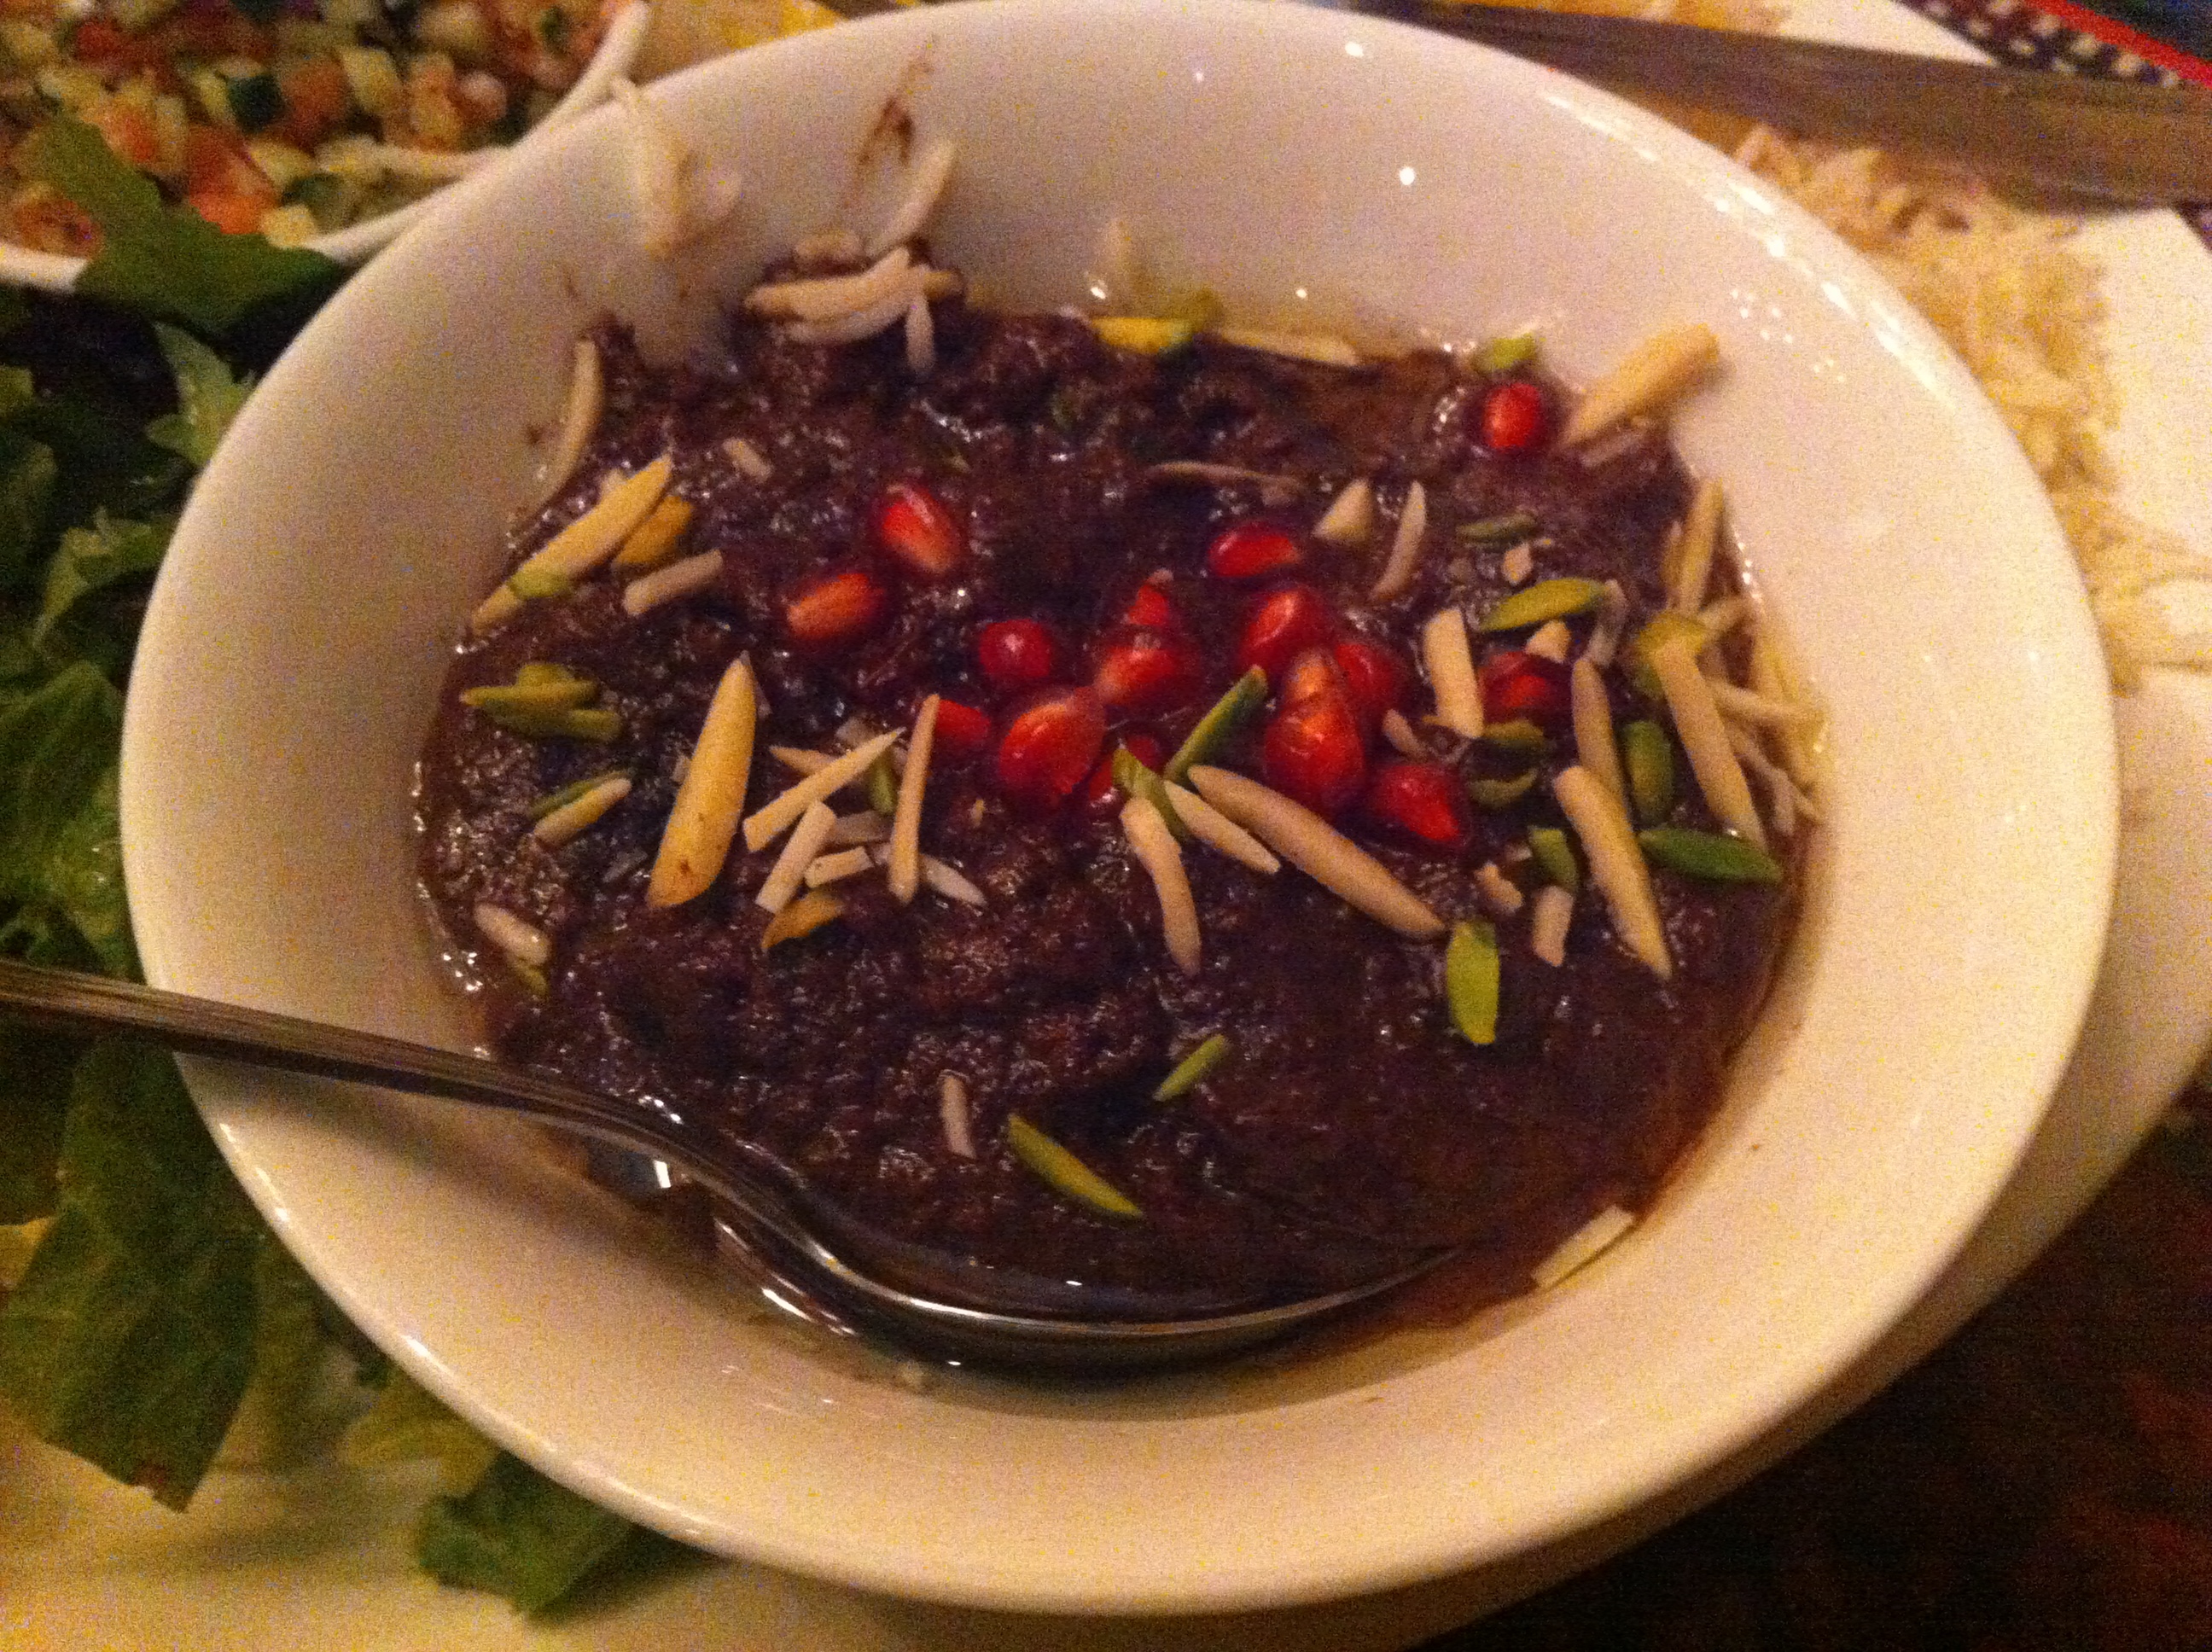
Getting back to the food, I had the fesenjaan (they had a vegetarian version with mushrooms). It came with a generous serving of rice and salad (of course I didn’t touch the salad 😉 )
Described as a stew of walnuts and pomegranate syrup, the fesenjaan was flavouful and creamy with a detectable but subdued nutty flavour. One of the reviews of the restaurant I came across described this dish as syrupy (and the menu hinted at this by describing it as a stew of pomegranate syrup) and I must admit I almost didn’t order it because of this, but in fact it wasn’t syrupy. It was delicately sweet and in terms of texture and consistency resembled a typical mughlai sauce/gravy (which of course entirely makes sense as mughlai food was deeply influenced by Persian cuisine). So it was more like a sweetened shahi paneer or butter chicken than it was like a syrup.
In conclusion, I recommend the place. It’s cute, the servers are friendly, the food is good and the decor is pleasant and cosy enough- it’s just not breathtaking or as unique as it could be.
This post is also about truffles. I thought I should just make that clear right at the start. If you’re tired of all my truffle-y posts, skip this one; my next one won’t be about truffles, or even chocolate. It’ll probably be about this delicious, spicy Hyderabadi-style fish I made yesterday; or it might be about a nice little Persian restaurant that I visited last week. Either way, it probably won’t be about chocolate.
Although, it just occurred to me that if you’re bored by chocolatey posts, you’re not really my key demographic, are you? (Really, what are you doing here if chocolate doesn’t make you ever-so-slightly unhinged?)
Anyway, this is a post about a great gift-idea: assorted chocolate truffles. This is usually an ideal little present because truffles are delicious (to most people), make people happy (quite literally (read my previous post for more on this)) and they’re very personal (you can custom-make flavours to suit your friends’ tastes). They’re also pretty easy to make, once you’ve gotten the hang of it.
The first step involves choosing flavours. You could choose from so many different kinds! Here are a few:
1. Dark Chocolate truffles (go here for my recipe)
2. Cointreau Dark Chocolate truffles (go here for my recipe)
3. Dark Chocolate Cream Cheese Truffles with Cream Cheese Centers (go here for my recipe)
4. Dark Chocolate Truffles with Orange-Cream Cheese Centers (go here for my recipe)
5. Dark Chocolate Truffles with Strawberry Cream Cheese Centers (go here for my recipe)
6. Dark Chocolate Hazelnut Truffles (recipe in this post)
7. Mint Chocolate Truffles (recipe in this post)
8. Dark Chocolate Truffles with Brazil-nut butter centers (recipe forthcoming)
I could go on and on, but I’ve got my whole life to invent truffle recipes. For now, I am going to stop thinking about truffle flavours and get on with this post.
Here’s what I chose for my first truffle-gift-experiment: Cointreau chocolate, mint chocolate and hazelnut. I chose these flavours because they’re really easy to make, easier than truffles with flavoured centers.
What you will need:
200g dark chocolate (At least 70% cocoa solids)
1 cup heavy/whipping cream
Two pinches of salt
About a teaspoon of mint essence
2 teaspoons Frangelico (or some other hazelnut liqueur)
1 teaspoon Cointreau or Grand Marnier
A handful of hazelnuts
2 tablespoons of cocoa powder
50g chocolate to dip the mint truffles in
3 sheets of parchment paper or foil
3 post-its
Coloured paper cups to place the truffles in
Method:
Chop up the chocolate with a knife and place it in a bowl:
You could also use a food processor. Next, warm up the cream until it just begins to boil and pour it over the chocolate:
Try and make sure that all the chocolate is covered. Let the bowl stand for a few minutes. Add the salt, take a whisk and gently mix the cream and chocolate. Now your ganache is ready.
Bring out two more bowls. Spoon about one-third of the ganache into one of these bowls and another third of the ganache into the other bowl. Now you have three portions of ganache in three separate bowls.
Mix in the mint essence in the first bowl, Frangelico in the second bowl and Cointreau (or Grand Marnier) in the third bowl. I would start by adding a little of each flavour and then adding more to taste. It is especially important to use the mint essence sparingly. For one thing, different brands of mint essence have varying levels of strength. Also, mint as a flavour very easily overpowers chocolate.
Let the ganache(s) cool to room temperature and then, place the bowls in the fridge.
In about an hour, check if the ganache has firmed up. If it has, take all three bowls out of the fridge. Place three sheets of foil or parchment paper on three separate plates. Take three post-its and write the names of the flavours of the truffles down, one flavour for each post-it. Now, stick a post-it underneath each plate. Next, scoop out tablespoon-sized portions of the mint flavoured ganache on the correspondingly labelled plate. Use an ice-cream scoop if you have one.
Repeat this with the other two flavoured ganaches. Place the plates in the fridge.
After about 20 minutes, take the plates out and begin to roll each scoop of ganache into as perfect a sphere as possible. Make sure not to confuse the different flavoured truffles; place all mint truffles on the plate labelled ‘mint’ and the Cointreau ones on the plate labelled ‘Cointreau’ and so on.
Once you’ve rolled all the ganache into balls, place all three plates back in the fridge for about 20 minutes.
Now comes the last step, coating the truffles.
For the hazelnuts truffles, I decided that the most appropriate coating was toasted and crushed hazelnuts. This is a simple enough coating to make. Just pop a handful of hazelnuts in the oven (preheated to 375 farenheit (that’s 180 celsius)) for about 10 minutes, tossing the nuts once during this time. Let them cool and then place them in a tea-towel and rub them against each other until they lose their skins. Then place them in a mortar and pestle and coarsely grind them. I suggested a mortar and pestle rather than a grinder because this way you can make sure you break up all the nuts without reducing most of the nuts to a powder.
Coarsely ground toasted hazelnutsAnd now for the final touch, just roll each hazelnut truffle about in your hand for a bit to make the outside of the truffle sticky and then roll it in the crushed hazelnuts. Lightly press the nuts in to make sure they stick to the truffle.
For the Cointreau truffles, I decided on a simple coating: cocoa powder. Just take a few tablespoons of cocoa powder in a bowl, warm the outside of each Cointreau truffle by rolling it about in your hand, and then lightly roll it in the bowl of cocoa until it is completely covered.
Lastly, I decided to dip the mint truffles in dark chocolate. This looks and sounds more difficult than it is, and it’s actually a lot of fun 🙂 It is also undoubtedly messy.
Carefully melt 50g dark chocolate (using either a double boiler or a microwave on a very low heat setting). Let the chocolate cool a bit (we don’t want to wait for it to harden, but we don’t want it to be too warm either).
Once the chocolate has cooled somewhat, take a truffle and dip it into the chocolate. Roll it about in the chocolate until it’s completely coated and then fish it out.
Place the truffle back on the foil/butter paper. Repeat this process with all the truffles. Once you’ve dipped all the truffles, take a toothpick and trace a circle around the bottom of each truffle. This is so that we don’t have a lot of excess chocolate stuck awkwardly to the bottom of the truffle once the outside chocolate has hardened.
Place each truffle in a paper cup. Preferably, use paper cups of different colours that compliment the truffle flavours. For instance, I used green for mint, orange for Cointreau and light brown for hazelnut. Let the truffles sit somewhere cool to cool. They should be ready in 20-30 minutes.
Since the idea was to make assorted truffles as a gift, I wanted to pack them in a nice box. I hunted all over my neighborhood for a cute gift box, but couldn’t find anything appropriate. I finally stumbled upon an arts and crafts store, and they were nice enough to cut some beautiful coloured paper for me so that I could make little bags out fo it:
I placed the truffles in these bags once they were ready and sowed on little message cards on the front that not only gave my friend my regards, but also described the different flavours of truffles included in the bag on the back.
Needless to say, my friend won’t mind taking care of my plants again 😉
Chocolate, actual chocolate, is good for you! It turns out that it’s all the other stuff that can be found in an average bar of milk chocolate that is bad for you, like added fats and of course sugar. On the other hand, eating some dark chocolate (like the chocolate in the photograph above) everyday can put you well on your way to immortal happiness.
Okay, I realize that it doesn’t really say that chocolate makes you immortal. But chocolate does seem to help you live longer. Apparently, studies show that dark chocolate is rich in anti-oxidants and that it helps prevent heart disease and high blood pressure. According to one medical researcher quoted in the article, “the chronic consumption of cocoa may be associated with improved cardiovascular health”. This has to be one of best sentences I have ever read!
The article also talks about chocolate’s mood-enhancing impacts. Apparently, and this is probably something that most of you have heard about at some point, chocolate also contains phenethylamine, which “triggers the release of pleasurable endorphins and potentates the action of dopamine, a neuro-chemical associated with sexual arousal and pleasure.”
A lesser known chemical in chocolate is ‘anandamide’ which binds to the same receptor site in the brain as the psychoactive constituent of marijuana. Anandamide produces feelings of elation and exhilaration. The article asks: “If this becomes more widely known, will they make chocolate illegal?”. This is inarguably the WORST most frightening sentence/question ever to be published in the history of human publication.
Also, chocolate increases the levels of serotonin in your brain.
I found this article through a friend (thanks Minni, if you’re reading this) and got so excited that I wanted to scream out loud in my office, or run around hugging people in the library (my office is in the library). You see, I have always maintained that chocolate is the Answer. “To what?” you ask?. “To Everything” I answer. For instance, handing out delicious chocolate bars to angry dictators will bring about world peace. This is a Fact. While mad dictators will probably need a truckload of chocolate instead of a bar or two, I don’t see why this wouldn’t work, in principle.
My point is, I always knew chocolate was thepanacea, but now I have scientific backing 🙂
In other news, “anandamide’, derived from the Sanskrit word ‘ananda’, is my new favourite chemical. I mean isn’t that the cutest name ever?
I wouldn’t say that I am tremendously fond of macaroons. I mean I like them, sure, but I’ve never woken up in the middle of the night and wanted one. I have woken up in the middle of the night craving all sorts of other foods. Some of the things I have had midnight cravings for include:
1. Chocolate
2. Chocolate Ice Cream with Fudge on Top
3. Chocolate Fudge
4. Fish Tacos
5. Re-fried Beans
6. Yummy Thin Crust Pizza
7. Fish Curry (and this is an umbrella term I am using to refer to about 6 kinds of fish curry)
I could literally go on for hours, and this is just what I craved over the last week or ten days.
But, I’ve never ever craved a macaroon. My point is, I was never into macaroons, that is until recently. The other day, a friend brought me some assorted macaroons as a gift and since then, I’ve developed a taste for them. It isn’t that I’ve never had them before, it’s that these were particularly delicious macaroons. Unlike chocolate, which I enjoy eating even when it’s of average quality, I only like macaroons if they’re particularly well made, and these were yummy! They were from MoRoCo, a little chocolate-themed store and restaurant in the Yorkville area of Toronto. Go here for their website.
The macaroons were light and airy and I loved all the different flavours they had.
They made the most delightful little snack last evening along with a ginger-white chocolate cookie. You see, I set them on my bedside table late in the afternoon, and my plan was to take a break from working to eat them, when I was done reading this important chapter of an important book for my even more important dissertation.
It turned out to be a rather engaging chapter, and I kept on reading. Evening had turned to dusk before I realized I hadn’t eaten them yet. (This, by the way, is proof of the fact that I am only reasonably fond of macaroons, whereas I am unreasonably obsessed with chocolate. I’ve never left uneaten chocolate by my bedside and forgotten about it. That’s unheard of! If I did that and it became known to my family and/or friends, everyone who loved me would be very worried about me indeed.)
I needed a drink at this point, so I made myself a colourful drink (fresh, pulpy watermelon juice) to go with the snack:
Needless to say, I had a nice, rewarding study break. I did of course also dig into some of those truffles I made yesterday as well 🙂