Categories
Cooking Food General Indian Cooking Recipes

Buttery, Fiery Fish Kebabs, Inspired by Hyderabad

The wonderful weather we had over the Easter weekend had me excited about summer being around the corner. Then, as some of you know, the weather took a turn for the worse; it’s been rainy, grey and relatively unpleasant, on and off, since that weekend, and summer seems like a far away dream. This combined with the fact that I miss India, my parent’s home, the sun, my family and most importantly (:P) the ease with which I could get my hands on some delicious food, and the whole thing made me depressed.

But, instead of giving in to the grey, I decided that I was going to protest the gloom and the fact that I was not in India any more, by making some spicy, nay, fiery Indian food! And what combines Indian spices with the suggestion of summer in North America better than kababs (kebabs in this part of the world)?

Since I eat neither meat nor chicken, I decided that I was going to use fish instead. Also, since it was Hyderabad in particular, that I was missing, I wanted to make something with a Hyderabadi base (for more on Hyderabadi food, read this post). So I did some reading and thinking, and revisited memories of some of the more delicious kababs I’d eaten in my good old meat-eating days, and then went to work.

It took some experimenting, but I finally ended up with a literal and figurative mash-up: fish kababs that pay homage to Hyderabad. I won’t of course stake any claim to either originality or authenticity; all I will say is that these turned out to be spicy, soft, buttery and delicious fish kababs.

Spicy, buttery fish kebabs!

If you’d like to re-create this magic, read on for my instructions.

Ingredients:

1 pound white fish fillets

1 pound salmon fillets

1 tablespoon yoghurt

4 tablespoons butter

Salt to taste

2 tablespoons coriander leaves

2 tablespoons mint leaves

4 spring onions

4 Indian green chillies or two jalapeño peppers, coarsely chopped

Zest of 1 lime, finely grated

3 cloves of garlic, with their skins removed

1 teaspoon ginger, grated

2 egg whites

1 tablespoon red chili powder

Oil or ghee (indian clarified butter, go here for more information on this and a recipe for making it at home) for frying or grilling the kababs

Spices to be Dry Roasted:

1.5 teaspoons fennel seeds

1.5 teaspoons black peppercorns

1 tablespoons coriander seeds

2 tablespoons Chana dal

3 whole dried red chilies

2 cloves

Seeds from 1 black cardamom pod

Method:

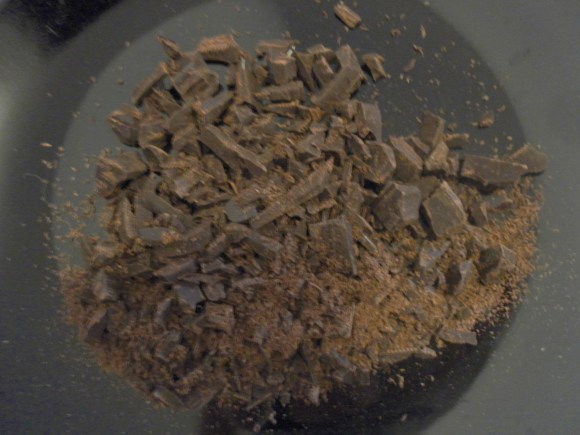
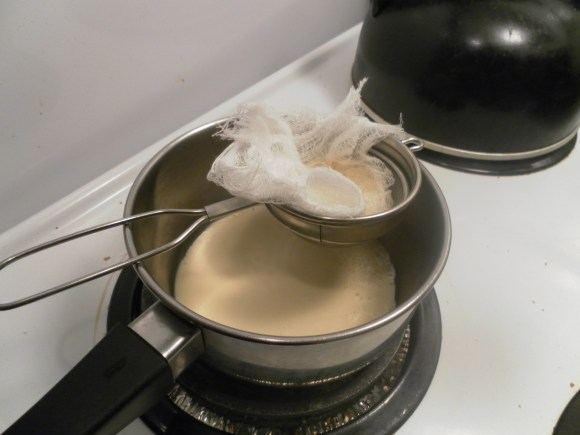
Place the spices to be dry roasted in a pan, and roast them on low heat until fragrant. Take them off the heat and let them cool.

image

In the meantime, place the coriander, mint, spring onions, chilis, lime zest, garlic and ginger in a food processor.

image

Whizz the ingredients around until they are finely chopped up, like this:

image

Remove (what I am going to elegantly refer to from now on as) the ‘green mixture’ into a bowl.

In the same food processor, process the fish fillets until they become an even paste, like this:

image

While the fish is being processed, grind the dry roasted spices (with a mortar and pestle or in a dry grinder) to a powder.

Once the fish is processed  mix in the ‘green mixture’, chili powder, dry roasted and ground spices, and salt.

image

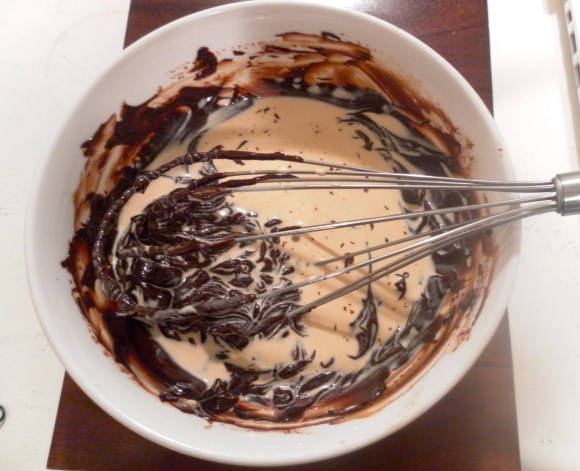
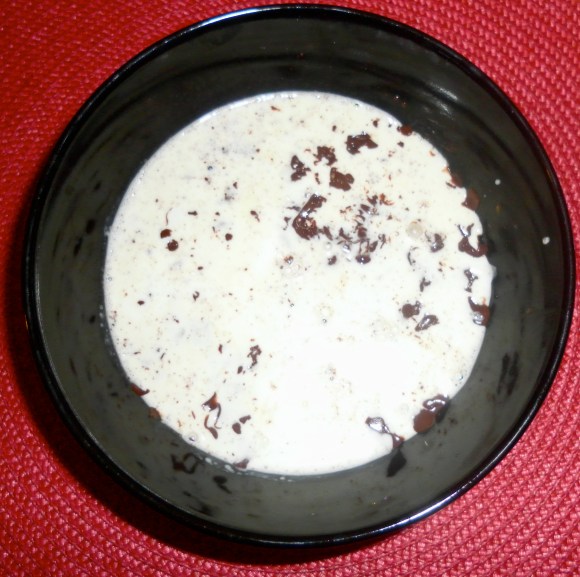
Add the yoghurt, egg whites and butter, and process until smooth, like this:

image

Your ‘kabab batter’, if you will, is now ready. You can refrigerate this. Whenever you’re ready to eat, take it out, and cook up your kababs.

I tried pan searing the kababs, and that worked out fine. However, the best way to cook them, in my opinion, is to grill them in the oven on a baking sheet, at a fairly high temperature. I went with 450 fahrenheit. Also, instead of oil, I used ghee to grease the tray, and halfway through the grilling (about 7 minutes in) I flipped the kababs and brushed some ghee on them with a basting brush.

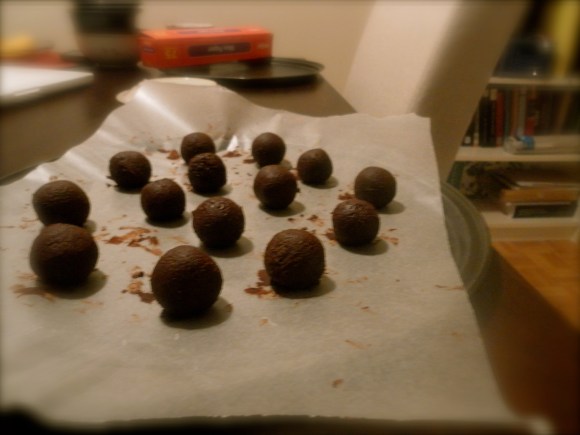
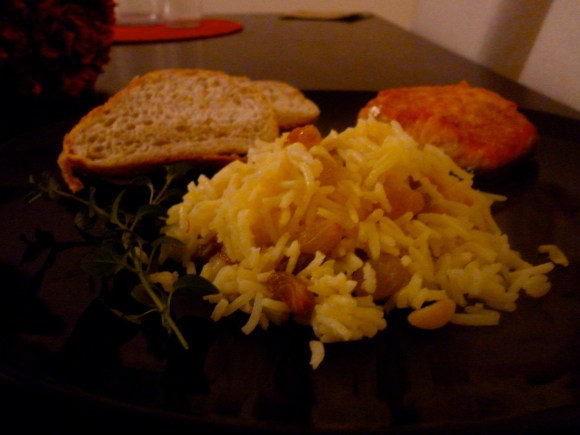
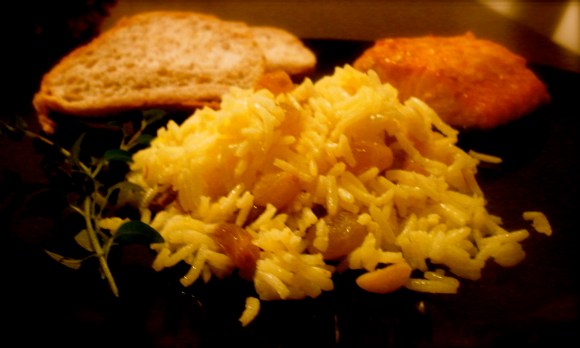
And voilà, you have some delicious, buttery, spicy as hell kababs, right in the comfort of your home! I felt a wee bit less home sick after a few of these!

Spicy, buttery fish kebobs!

A great way to serve these kababs is with some green chutney. This is the recipe I used to make it. 

Spicy Indian fish kebab recipe!

Categories
Chocolate Food General Recipes

Dark Chocolate Strawberries Sprinkled with Toasted Brazil Nuts (a Quick and Healthy Dessert!)

Strawberries dipped in dark chocolate and coated in toasted nuts

I decided to stay in town for the long weekend because I wanted (had) to work on my thesis (it’s taking over my life!). So while it seemed like the whole world was outside enjoying the lovely spring weather, I was indoors all day, sitting at my desk, staring at this computer screen.

Earlier this afternoon, I felt particularly overwhelmed, and needed a little something to cheer myself up and keep me going on the chapter I was working on. So I went over to my pantry and picked out some snacks. I set out some dark chocolate covered biscuits and chocolate cream filled wafers on a plate and was about to walk away, when it occurred to me that I needed to add something more healthy to the mix. So I decided to make some chocolate covered strawberries!

Strawberries dipped in chocolate and sprinkled with toasted brazil nuts

The process is so simple that I don’t think it even makes sense to post a recipe. But, if you’ve never made chocolate covered strawberries, here are some simple tips.

Start off by melting some dark chocolate; you can use a microwave, just make sure to use a low heat setting, so as not to burn the chocolate.

If you’d like to sprinkle some nuts on the strawberries, pre-heat the oven to 350 degrees Fahrenheit and toast some brazil nuts or hazelnuts on a baking tray for about 5-7 minutes, until they are fragrant. Once cooled, place the nuts in a tea towel and rub them against each other through the towel, in order to remove their skins. Then, crush the nuts with a mortar and pestle and set the crushed nuts aside.

In the meantime, wash the berries and dry them with a paper towel. Then, dip the berries in chocolate. I decided to leave the leaves on the strawberries as it’s easier to work with them that way, and I also think it’s easier to pick them up by the leaves when you want to eat them 🙂

You can use your hands to coat the strawberries in chocolate, like this:Dipping strawberries in chocolate

wpid-2013-03-31-19.58.58.png

If you don’t want to use your hands, or you’d like to take the leaves off, you can also use a fondue fork.

image

After you’ve dipped each berry in the chocolate, place it on a plate covered in wax paper or parchment paper.

image

If you’ve decided to add nuts to the mix, coat the chocolate covered strawberries in the crushed nuts. Let the berries be for a while, until the chocolate hardens, and then serve them. And there you have it, a simple and quick snack or dessert that’s very healthy!

image

Categories
Baking Chocolate Food General Recipes

Whole-Wheat Double Chocolate Cookies

As I wrote in a previous post about my chocolate chip cookie recipe, cookies haven’t always been my favourite dessert or snack. I don’t mean that I don’t like them, I DO like them, and I certainly would never say no to a chocolate cookie. But, they aren’t usually the first thing I think of when I walk into my kitchen wanting to bake something. This has changed gradually, since my last cookie post, and I’ve been thinking and fantasizing about cookies more. I’ve been thinking, nay, dreaming especially about gooey, rich, chocolate chocolate chip cookies that are crisp on the outside, and gooey on the inside. (Really, over the past few weeks, I’ve actually taken a break from working without realizing it because my mind has wandered off from copyright law, meandered through various foods, lingered on fish tacos, and finally settled on visualizing chocolate cookies.)

So today, I finally decided to give it a shot and bake some double chocolate cookies! But, because I wanted an adventure and a challenge, I decided to try and bake the gooey-est, yummy-est cookies that I possibly could, using whole-wheat flour. It’s healthier than all-purpose flour you see. Also, I ended up buying 10 kilos of the stuff when my mother visited (she makes delicious Indian rotis for which we needed the flour), and haven’t used much of it since she left.

I was nervous at first; it seemed ill-advised. I wanted something decadent and delicious, and whole-wheat based baked goodies don’t usually taste very decadent or delicious. In my experience, they taste kind of, well, healthy. And by that I mean, rough, dry, and most importantly, the opposite of rich. But, I decided to give it a shot.

I was going to use chocolate and butter in the recipe, that was a given. But, using whole-wheat flour and brown sugar seemed like a good way to make the recipe a wee bit healthier than usual.

“Did they turn our well?”, you ask. Oh yes, indeed they did.

Healthy Whole Wheat Chocolate Chip Cookies

They turned our so well that I was forced to resort to expletives to describe how good they tasted, when I first bit into one.

Healthy dark chocolate cookies

If you’d like to try baking them too, here’s what you’ll need:

1 cup whole-wheat flour (I used chapathi flour) (if you’re not a stickler about making the cookies completely whole-wheat, you could mix in 2 tablespoons of all-purpose flour, just so the cookies are a little smoother)

1 teaspoon baking powder

1/4 cup dutch processed cocoa

1 teaspoon salt

8 ounces semi-sweet chocolate (be warned that using unsweetened chocolate instead results in a sour, bitter, dry and brittle cookie)

5 tablespoons unsalted butter

3/4 cup dark brown sugar

1/4 cup granulated white sugar

2 eggs

1 teaspoon vanilla extract

1 teaspoon instant coffee

3 handfuls of dark chocolate chips (substitute some of the chips with toasted hazelnuts or macadamia nuts if you like)

Method: Melt the chocolate in a double boiler (you can also do this in a microwave, in which case, make sure to use a lot heat setting so as not to burn the chocolate). While the chocolate is melting, in a medium bowl, whisk the dry ingredients together. In a small bowl lightly whisk the eggs, sprinkle the coffee on top of the eggs, and set the bowl aside.

In a separate bowl beat the butter until smooth and creamy. Then, add the two types of sugar, and beat until smooth. Now, add the eggs, followed by vanilla extract, and finally the melted chocolate, all the while beating the mixture. Continue beating at medium to low-speed until the mixture is smooth.

Next, at a low-speed, beat in the dry ingredients. Once they’re mixed in, fold in the chocolate chips with a spatula, or your hand, until they are somewhat evenly distributed.

Your dough is now ready! (If you used your hands to mix the chips in, this is a great time to give the dough a taste.)

The final step involves dividing up the dough. It’s best to move to the dining table for this last step as it takes about 5-10 minutes, and you don’t really need access to things in the kitchen or the sink for this. Place a sheet of parchment-paper or wax-paper on a baking sheet. Using an ice cream scoop, scoop out a little portion of the cookie dough on your palm and roll it into a ball. The size of this portion can very, depending on how large you want your cookies to be; I scooped out about a ping-pong ball sized amount. Roll the dough up into a ball, then flatten it a bit, into a little disc. Place the disc on the sheet. Continue doing this until all the dough is used up.

How to freeze cookie dough

You’re almost done! You can bake the cookie dough at this point. But, if you want to eat warm, fresh cookies everyday, whenever you want, just freeze the dough instead. If you’re having a party, and want to serve warm cookies at it, but can’t be bothered with baking them on the day of the party, then this freezing method works perfectly for that too. When the party starts, you can just pop the frozen dough-discs into the oven and then chat with friends over wine/martinis/etc., until they are ready.

To freeze the dough, place the baking sheet in the freezer for about 2 hours, until the dough is frozen. Then take the sheet out, place the balls in a freezer bag and pop them back into the freezer. Whenever you’re ready to eat a cookie (or three), pre-heat the oven to 350 degrees farenheit, place a dough-disc on a baking sheet covered with baking-paper and bake for 12 minutes, until the edges, and top seem firm. You might want to turn the tray around mid-way through, to ensure even baking.

It’s best to let the cookie cool a bit on the tray and then on a cooling rack. But if you’re impatient, that’s probably not going to happen.

Mmmm… these cookies were pure deliciousness!

Healthy, whole-wheat chocolate chip cookies

You could also enjoy it, all warm and gooey, with a glass of cold milk!

Categories
Food Recipes

Crabcake Burger

image

I was swamped with work and feeling a bit out of sorts tonight, so I did the unthinkable, and decided to eat frozen crabcakes for dinner. The store downstairs sells them, which meant I could go down in my track pants and slippers and grab some.

I wanted to spruce the crabcakes up a bit though, with some fresh ingredients.  So I also grabbed some lettuce and a fresh ciabatta bun, and ended up throwing together a crabcake burger. It made for a pretty good, quick dinner tonight.

Here’s a close-up:

image

The white stuff is sour cream, yoghurt,  rock salt, pepper, fresh chopped onions and a pinch of garlic salt- all whipped together.

Categories
Cooking Food General Recipes

Tuna and Olive Crostini

I had a lot of crostini left over from a big party I threw, as well as plenty of olives. So here’s a little snack I came up with using these left-overs. Tuna and Olive Crostini Recipe

This tuna and olive crostini makes for a delicious snack or even a light dinner; and it’s pretty easy to make. What’s more, the recipe doesn’t involve too many ingredients and it isn’t labour intensive at all.

Here’s what you will need:

2 baguette slices

A teaspoon of olive oil

A can of tuna or half a cup of fresh tuna

A handful of good quality pitted olives, ideally, use a combination of green and black olives.

A wedge of lime

Extra sharp cheddar to taste

Chili flakes to taste

Method:

To begin with, cut two slender slices off a baguette. Brush both sides of the baguette with some olive oil and grill the slices in a panini-maker or the oven. If you’re using an oven, pre-heat it to 350 degree Fahrenheit and then bake the slices for about 15 minutes, until golden brown. Next, top off the bread with some tuna, squeeze some lime juice on top. Slice the olives in half and then arrange them on top of the tuna, as shown in the photograph below. Place the slices in the oven and let them bake for 5 minutes.

How to Make Tuna and Olive Crostini Recipe as an appetizer

In the meantime, cut 3-4 slices of cheddar. Once the slices have baked for 5 minutes, place the cheese on top of the olives and top off with chili flakes.

Tuna and Olive Crostini Recipe

Place the slices back in the oven and let them bake for about 10 minutes, until the cheese is all melted.

Tune and Olive Crostini

And there, you’re snack’s ready!

Categories
Chocolate Chocolate Truffles Food Recipes

Spiced Black Tea (Masala Chai) Chocolate Truffles

Masala Chai Truffles

My latest chocolate-related invention: Masala Chai Chocolate Truffles!

How did I come up with this curious combination of chocolate and masala chai (Indian-style black tea)? I was planning my birthday party earlier this month, and I was trying to think of snacks and desserts that I could serve at the party. I wanted to be able to do most of the work in advance, preparing at least some of the foods days in advance, but I also didn’t want to compromise on their taste. Truffles, are of course a great choice given these criteria. So I decided to make some of my usual favourites: Cointreau truffles, mint butter-cream truffles and almond butter-cream truffles. But, I also wanted to be a bit adventurous and try something new and quirky. I’d made myself a cup of tea, and was sipping it, while I thought about what new flavours I could throw together, when the obvious occurred to me: tea-truffles. And then I thought, “Why not masala chai truffles, just to spice things up?”. They turned out surprisingly well, and were quite a hit.

If you’d like to give them a go, here’s how.

Equipment you will need:

A cutting board and knife OR a food processor

2 medium-sized bowls

2 plates

Parchment sheet, baking sheet or foil

Little paper cups to put the truffles in.

Ingredients:

8 Oz (approx 225 g) good dark chocolate (at least 70-80 % cocoa solids)

1/2 cup cream (whipping cream in Canada or heavy cream or double cream elsewhere)

2 pinches of salt

1 tea bag masala chai (available in most grocery stores)

A few tablespoons of cocoa powder

Method:

Chop up the chocolate on a cutting board into fine pieces with a large knife. This is the tiresome part of the recipe. I have a food processor, so I just break the chocolate up into individual squares and then throw it into the processor. The reason you want the chocolate broken up into fine bits is because you want it all to melt evenly when you pour in the hot cream. Throw the chocolate bits into a bowl.

How to make chocolate truffles/chocolate ganache

Next, get the half cup of cream to a gentle simmer and immediately turn off the heat. Add the tea bag to the cream, and let it steep for about 5 minutes.

Heat the cream again to a gentle simmer, and pour the hot cream through a strainer lined with a cheese cloth (as shown below), into the bowl with the chocolate.

How to make masala chai truffles

Using a ladle, make sure all the chocolate is covered by the cream. Let it sit for 2-3 minutes. Then add the salt, and delicately mix everything with a whisk.

Making Masala Chai Truffles

It’s important not to be rough because then you will get air bubbles into the chocolate. That wouldn’t be good as you want the chocolate to taste smooth and rich.

Chocolate ganache

Once you have a smooth mixture (this is called chocolate ganache), place the bowl in the fridge for about half an hour, until it firms up. The length of time you will need to leave it in the fridge will depend on the temperature inside your fridge, so keep checking on it. You want the ganache to be just firmed up, but not hard.

In the meantime, take out the plates and place a sheet of parchment or foil on each of them. Once the chocolate mixture is ready, take it out of the fridge and spoon out the chocolate in small portions on the parchment or foil (use an ice cream scoop if you have one). The portions should be approximately the size you want the truffles to be.

Making assorted chocolate truffles

Now, roll each scoop/portion of chocolate about in your hand until it is more or less spherical, then place it back on the parchment. I would recommend washing your hands periodically, while you do this, as you will get chocolate all over them, and it will be more difficult to shape the truffles if you’ve got melted chocolate on your hands. Also, the washing will help to cool your hands. The truth is, I have to wash my hands periodically anyway because I can’t resist licking some of the chocolate off every once in a while 😉

Masala chai/black-tea flavoured truffles

Masala Chai truffles

Once you’ve shaped all the truffles, take another bowl and put about 2 tbsp of cocoa powder in it. Take each truffle in your hand, roll it about for a second or two in your hands, just enough to warm the surface and then roll the truffle in the cocoa powder, until it is covered. Finally, place it in a paper cup. Repeat until all the truffles are done.

Masala Chai Truffles

I’ve heard it being said that this process can be messy and/or arduous; I didn’t think it was either; I did however end up smelling like chocolate all day 🙂

You can put the truffles in the fridge for two to three weeks, but take them out a few hours before you serve them, so that they’re at room temperature. They also make for a great present, just put them in a nice box and voilà! you have a handmade, personalized present!

Masala Chai Truffles
Categories
Baking Chocolate Food General Recipes

Delicious Chocolate Chunk Cookies, Fresh and Warm, Whenever You Want!

Warm cookies, fresh out of the oven, crisp on the outside, gooey on the inside, full of chocolate chunks- doesn’t that sound simply heavenly? So often, I think about baking cookies, and then decide that it’s not worth the trouble, considering how short-lived the joy is of eating them warm out of the oven. I’ve only ever liked fresh, warm cookies, you see. Once they’ve cooled, I lose interest in them. In fact, the only way I really enjoy cold cookies is by breaking them into chunks and dropping them into chocolate ice cream 🙂

But now, I have found a way to eat warm, fresh cookies everyday, whenever I want, and you can too! Just follow this recipe for cookie dough, then shape the dough into little balls, and freeze them raw. When you’re ready to eat a cookie, simply pop a dough-ball into the oven and 10 minutes later, enjoy!

Fresh, crisp, goey chocolate chunk cookies

If you’re having a party, and want to serve warm cookies at it, but can’t be bothered with baking them on the day of the party, then this freezing method works perfectly for that too. I did this for my birthday party, and everything went smoothly! I just popped the frozen dough-balls into the oven and then chatted with friends until 10 minutes later, they were ready 🙂

If you’d like to try the recipe I use, here it is! It’s from ‘Baking Illustrated’ published by the famous ‘Cook’s Illustrated’ magazine editors.

Here’s what you will need:

1¾ cups unbleached all-purpose flour

½ teaspoon baking soda

1 teaspoon salt

12 tablespoons unsalted butter, divided

¾ cup (5¼ ounces) dark brown sugar

½ cup (3½ ounces) granulated sugar

2 teaspoons vanilla extract

1 egg

1 egg yolk

2 handfuls of dark chocolate chunks

In a medium bowl, whisk the dry ingredients together. Next, in a microwave-safe bowl, melt the butter and let it cool until it is luke-warm. Add the two types of sugar to the butter and beat until smooth. Then, add the egg, egg yolk, and vanilla extract and continue beating at medium to low-speed until the mixture is smooth. Next, at a low-speed, beat in the dry ingredients. Once they’re mixed in, add the chocolate chunks, and try to mix them in with a spatula or your hand, until they are somewhat evenly distributed. Your dough is now ready!

The final step involves shaping the dough into balls. It’s best to move to the dining table for this last step as it takes about 5-10 minutes, and you don’t really need access to things in the kitchen or the sink for this. Place a sheet of parchment-paper or wax-paper on a baking sheet. Using an ice cream scoop, scoop out a little portion of the cookie dough on your palm and roll it into a ball. The size of this portion can very, depending on how large you want your cookies to be; I scooped out about a ping-pong ball sized amount. Roll the dough up into a ball, then tear it apart at the centre. Rotate the two halves so that the uneven, torn surface faces upwards, and re-attach the two bits together into a make-shift, but clearly imperfect sphere. (Apparently, this uneven surface makes the cookie look better once baked. (I am not entirely certain of this, to tell you the truth. One day, I shall be brave enough not to follow this instruction, and then I will let you know what happened.))

You’re almost done! Place the baking sheet in the freezer for about 2 hours, until the dough is frozen. Then take the sheet out, place the balls in a freezer bag and pop them back into the freezer. Whenever you’re ready to eat a cookie (or three), pre-heat the oven to 325 degrees farenheit, place a dough-ball on a baking sheet covered with baking-paper and bake for 10-12 minutes, until golden brown on top.

It’s best to let the cookie cool a bit on the tray and then on a cooling rack. But if you’re impatient, like I am, these cookies taste good minutes after they’re out the oven too, as you can see from the picture below, I could hardly wait to bite into my cookie 😛

Delicious chocolate chunk cookies in minutes

Mmmm…deliciousness!

You could also enjoy it, all warm and gooey, with a glass of cold milk!

Chocolate chunk cookies in minutes

Categories
Chocolate Chocolate Truffles Cooking Food General Recipes

Dark Chocolate Truffles with Mint-Buttercream Centers

Last week I decided to invite some friends over to mine for drinks, desserts, cheese, and some cheese related hors d’ oeuvres. It was my birthday you see, and what better way is there to celebrate one’s birthday than by feeding one’s friends and drinking with them? 🙂

I tried several new recipes out for this party, including three new types of chocolate truffles! Here’s one of my favourite ones: truffles with mint centers!

Mint Chocolate Truffles

This was a modification of a basic truffle recipe that I came up with while fooling around with new flavours and textures; If you’d like to try it, read on!

Ingredients:

100 g dark chocolate (at least 70% cocoa solids) (the better this chocolate is, the better your truffles will taste)

1/2 cup heavy whipping cream

2 pinches of salt

5-6 tablespoons of icing sugar

5 tablespoons butter

1/4 to 1/2 teaspoon mint essence

3-4 drops green artificial food colouring

5-6 squares of dark chocolate for coating the truffles

Equipment:

4 Bowls and several spoons

1 large plate

A hand-held or stand-alone egg-beater/mixer

1 sheet of foil or butter paper

Method:

I began by heating the cream in a little pan to a gentle simmer. In the meantime, I chopped the chocolate into bits (you can also use a food processor), and placed the chocolate bits in a bowl.

How to make chocolate truffles/chocolate ganache

Once the cream began to simmer, I poured it over the chocolate and let it sit until the chocolate melted.

Making a chocolate ganache for chocolate truffles

Once the chocolate was melted, I took a whisk and gently mixed the chocolate and cream into a smooth mixture adding a pinch of salt as I did this. This delicious ganache needed to cool and firm up, so I covered it up and placed it on the dining table. Once it reached room temperature, I transferred the bowl to the fridge.

Chocolate ganache

While the ganache cooled, I placed the butter in a bowl and began whipping it up with a hand-held mixer (egg-beater). When it was creamy and softened, I added a pinch of salt, 2 tablespoons of icing sugar, 1/4 tsp of mint essence, and a few drops of green food colouring. I whipped all this up into a  creamy smooth mix and then tasted it. I thought the mixture needed a little more sugar, so I added another 2 tablespoons. (You should also taste the mixture intermittently and see if it needs more sugar or mint essence; add as much as you think is appropriate.) Once it tasted just right, I covered up the bowl and placed it in the fridge.

Once both the ganache and mint-filling were firmed up in the fridge, I took them out and began working with them. I covered two baking trays with wax paper (you can also use baking paper or aluminum foil) and then began scooping large blobs of chocolate on one of the trays.

Making assorted chocolate truffles

Once all the chocolate was divided into ‘large blobs’ on the first tray, I began scooping smaller portions of the mint-buttercream into my hand, shaping them into rough spheres and then placing them on the other tray.

Making mint Chocolate Truffles

As soon as all the mint mixture was used up, I placed both trays in the freezer for about 15 minutes. Once the scoops and mint-spheres had hardened from the cold, I was ready to start shaping the truffles!

(When you’re trying this, make sure you have enough works-space on your kitchen counter. I like sitting down while I do this, because it takes some time, so I usually move over to the floor because I feel more comfortable sitting cross-legged. You could move over to the dining table if you prefer.)

Now I was ready for the fun part! I picked up one of the chocolate scoops and shaped it into a sphere in my hand. Then I flattened it out on my hand like a mini chapathi or tortilla.

Shaping chocolate cream cheese truffles Step 1 in shaping chocolate cream cheese truffles

Then, I took one of the mint flavoured balls and placed it at the centre of the ‘chocolate chapathi’:

Shaping chocolate cream cheese truffles Step 2 in shaping chocolate cream cheese truffles

and carefully rolled the chocolate layer over the mint centre, shaping the truffle into as perfect a sphere as possible. (I don’t have a photograph of the sphere-shaping bit because I needed both hands and by this time my other hand was covered in chocolate.)

Shaping chocolate cream cheese truffles Step 3 in shaping chocolate cream cheese truffles

I repeated this until all the chocolate was used up:

Shaping chocolate truffles

Next, I melted 5-6 dark chocolate squares in the microwave. (When you do this, be sure to do this on a low setting as you don’t want to burn the chocolate. Ideally, you should melt the chocolate in a double boiler to avoid this, but I find that if I am careful, I can do it in the microwave. After, I let the chocolate cool a bit (it’s important not to let it harden), I picked up one of the truffles, and dipped it into the chocolate, coating it completely, as shown in the photograph below:

Dipping truffles in chocolate

Then, I placed the truffle back on the wax paper to cool. I repeated this until all the truffles were coated. Finally, I let them all cool and then placed them in little green-coloured paper cups.

And Ta DA! They were ready to be devoured! Rich dark chocolate truffles with soft mint-flavoured butter-cream centers. 

And then, all that was left was one lonely half-truffle. If it looks half-eaten, that’s because it is 😛 I did it for you all, so you can see what the centers look like 😉

Mint Chocolate Truffle

Categories
Cooking Food General Recipes

A Deliciously Sweet Dinner

Normally, when I have a dinner party, I cook Indian food. The main reason for this is that most of my friends love Indian food, and they tell me it’s nice for them to get a chance to eat home-made Indian food. Second, I think I cook it better than I do any other kind of cuisine. After Indian food, Italian food is probably my favourite type of food, and most of my Italian recipes are heavy on the cheese :), like risotto, or gnocchi in a gorgonzola and walnut sauce.

Earlier this week however, I found myself in a bit of a quandary. One of my friends was coming over for dinner, and she’s not a fan of either spicy food or heavy, creamy, fatty food. The thing is, every Indian recipe I know, is one or the other, often both. And every Italian dish I’ve ever made was either smothered with cheese or drowning in butter, sometimes it was both. So I decided to make her something different, something, non-Indian.

“What could I cook?” I wondered frantically on my way home from school. It was a tough question; after all, what is delicious and neither spicy or fatty/buttery/cheesy? It seemed like a truly insurmountable, unsolvable problem.

And then it hit me, I should cook something sweet! So I settled on a sweet themed dinner: grilled salmon marinated in a brown-sugar and lemon sauce served with roz bi zaffaran (saffron rice). (I made the saffron rice based on a recipe from ‘The Book of Jewish Food’ by Claudia Roden.)

The meal turned out rather well; the rice and fish complimented each other well. Another surprising upside was: the whole meal was really easy and quick to make, and the kitchen-clean-up involved was minimal.

SAMSUNG DIGITAL CAMERA

If you’d like to try it, here’s what you will need:

For the Grilled Salmon:

1 pound salmon fillets

1.5 tbsp soy sauce

1 tbsp lemon juice

1/4th cup of brown sugar

1 tbsp dry white wine or water

1/8 th cup olive oil

Saffron Rice:

1 cup basmati rice

2 cups water

1 tbsp butter

Salt to taste

2-3 pinches saffron threads

A handful of toasted flaked almonds

3 handfuls of golden raisins soaked in a cup of hot water

Method:

Mix all the ingredients for the salmon (except the salmon itself), stirring until the sugar is dissolved. Place the salmon fillets in a small baking dish and then pour the marinade over the fish. Cover with the dish with a lid or foil and let the fish marinate for a bit. Turn the oven on and pre-heat it to 400 degrees Fahrenheit.

In the meantime, grind the saffron threads with a mortar and pestle into a fine powder. Next, boil the water, oil and salt in a deep pot. When the water begins to boil, add the rice and saffron powder. Stir, lower the heat, cover the pot with a lid and let the rice cook. Check on it periodically, stirring.

While the rice is cooking, place the fish in the preheated oven and set the timer for 20 minutes. Every 5 minutes, bast the fish with the extra marinade in the baking dish.

The fish ought to be ready around the same time that the rice is cooked. Take the fish out of the oven when it’s slightly browned on top and flakey. Once the rice is cooked, fluff it, and mix in the raisins and almonds.

Serve the fish and rice up on a plate, with a few springs of fresh oregano and maybe a slice or two of bread. If you’re feeling like eating a healthier, more balanced meal, toss some spinach with some chopped strawberries and blackberries, and a lemon-honey vinaigrette (3 tbsp lemon juice, 1 tbsp honey, 1/4 cup olive oil, 1 tbsp poppy seeds and salt and pepper to taste). Throw in some toasted almonds and walnuts for some extra deliciousness. The salad goes perfectly with the sweet-theme of this meal. You won’t even want dessert 🙂

SAMSUNG DIGITAL CAMERA

SAMSUNG DIGITAL CAMERA

Categories
Chocolate Food General Recipes

A Cure for Dark Winter Afternoon Blues

I’ve been remiss again, and for this I apologize. The life of a grad student is often erratic, and various deadlines have kept me from writing about my food-related adventures. Happily, they haven’t entirely prevented me from having said adventures. So, now that I have some time again, I shall return to chronicling my chocolate and spice related capers.

Despite my happiness at having a bit more free time though, there is a cloud in my otherwise blue sky. A literal cloud, in fact, because winter has arrived, bringing with it cold, dark afternoons :(. Finally, I understand why people who live in Canada, the northern U.S and northern Europe are so obsessed with the weather. It’s actually depressing to not see or feel fuzzy, yellow sunshine for months on end. (I mentioned these places in particular, because these are the cold parts of the world that I’ve lived in. I realize of course that there are other cold places, I’ve just never lived there and so, have no idea if people there are obsessed with ‘The Weather’.)

And then suddenly, a few weeks ago, I stumbled upon a cure, a magical, instantaneous cure for winter blues, namely: hot chocolate. All you need is a few minutes in the kitchen to stir up a nice cup of hot, chocaltey richness, and you’re all set. You can curl up on your couch with a blanket and a good book, and a soft pair of socks on your feet (ideally a cat is also included in this scenario) and winter will actually seem bearable.

Don’t believe me? Just look at this:

photo-22

I’ve taken to making myself a cup every once in a while 🙂 I use homemade chocolate fudge ice-cream topping to make the hot chocolate, rather than cocoa or chocolate flakes. If you’d like to recreate this deliciousness, it’s fairly simply. Just warm up 2/3rds of a cup of milk. Then dissolve 2-3 tablespoons of homemade dark chocolate fudge into it. Here is a recipe for a velvety, homemade dark chocolate fudge that I strongly recommend; it’s super yummy and super-easy to make. (It is also delicious on ice-cream, which is what I originally made it for.)

Once you’ve dissolved the fudge, top off the hot chocolate with some whipped cream and stick a cinnamon stick into the cup:

photo-23

Finally, sprinkle some cocoa powder on the cream, and sip away! If you’ve got a cookie to go with it, more power to you. I think my next post will be about the dark-chocolate-chunk cookies that I am now about to go and bake 😛 Mmmm.

photo-24